How to Use CN3065 Solar Charge Controller: Examples, Pinouts, and Specs

Introduction
The CN3065 is a highly efficient solar charge controller designed to manage the charging of lithium-ion batteries from solar panels. It features an integrated MPPT (Maximum Power Point Tracking) algorithm, which ensures optimal energy harvesting from solar panels under varying light conditions. This component is compact, cost-effective, and ideal for applications requiring efficient solar energy utilization.
Explore Projects Built with CN3065 Solar Charge Controller
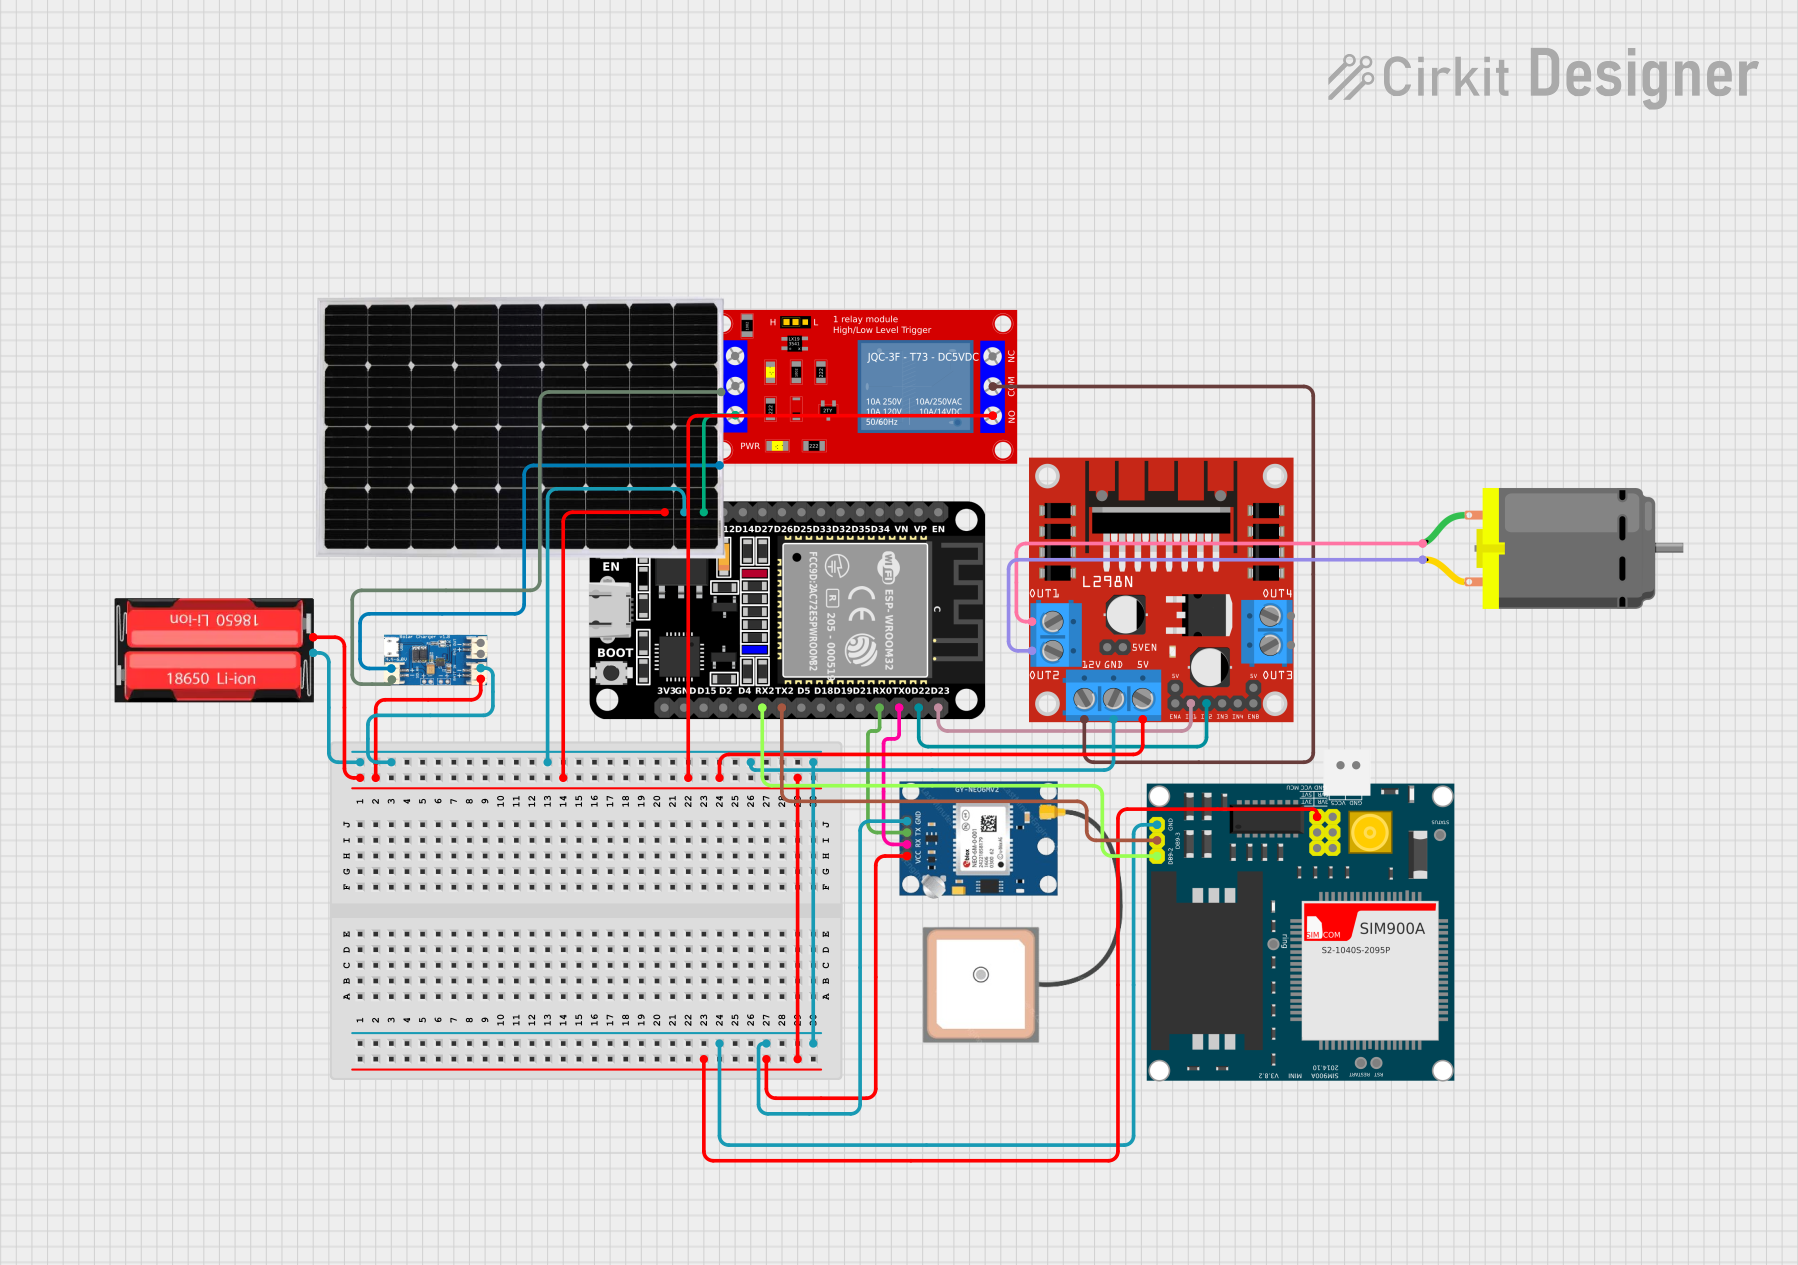
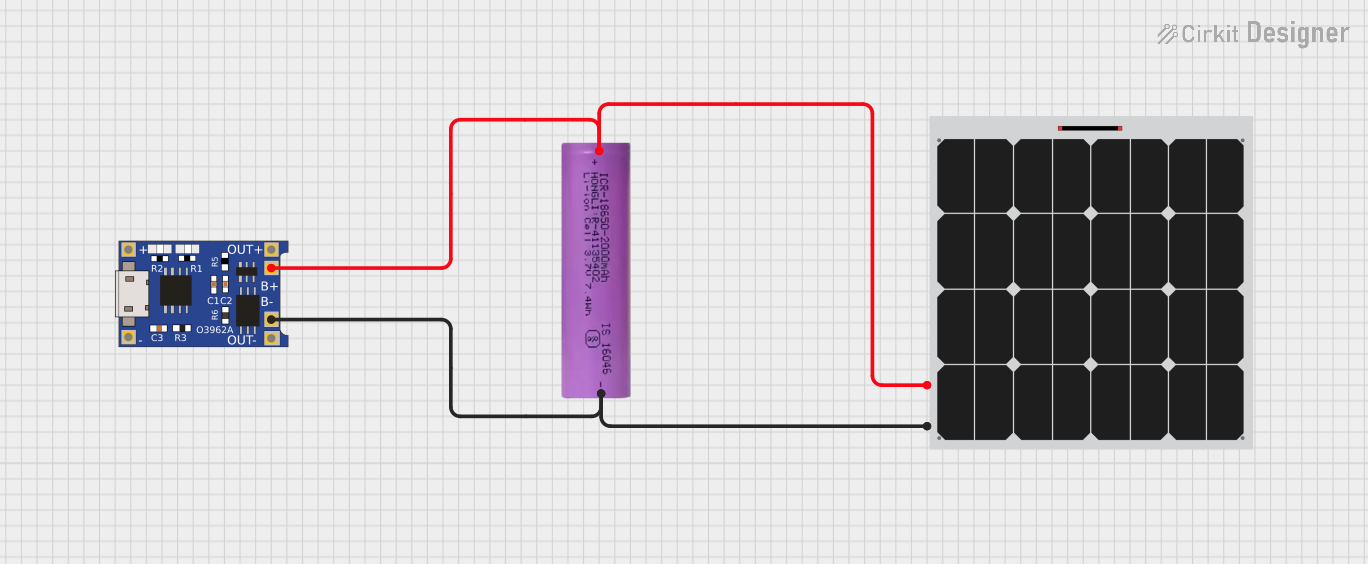
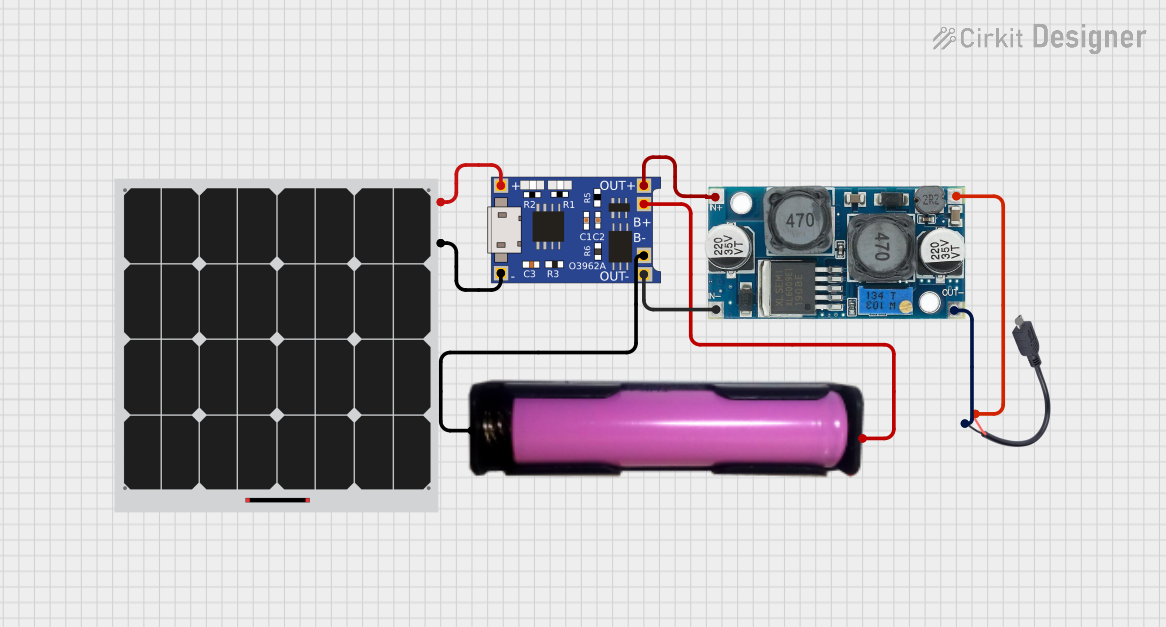

Explore Projects Built with CN3065 Solar Charge Controller
Common Applications and Use Cases
- Solar-powered IoT devices
- Portable solar chargers
- Off-grid solar energy systems
- Solar-powered lighting systems
- Battery management in renewable energy projects
Technical Specifications
The CN3065 is designed to provide reliable and efficient charging for single-cell lithium-ion batteries. Below are its key technical specifications:
| Parameter | Value |
|---|---|
| Input Voltage Range | 4.4V to 6.0V |
| Battery Charge Voltage | 4.2V ± 1% |
| Maximum Charging Current | 900mA |
| MPPT Efficiency | Up to 95% |
| Operating Temperature | -40°C to +85°C |
| Quiescent Current | 50µA (typical) |
| Package Type | SOP-8 |
Pin Configuration and Descriptions
The CN3065 comes in an 8-pin SOP package. Below is the pinout and description:
| Pin Number | Pin Name | Description |
|---|---|---|
| 1 | VIN | Input voltage from the solar panel (4.4V to 6.0V). |
| 2 | GND | Ground connection. |
| 3 | BAT | Battery connection for charging. |
| 4 | PROG | Sets the charging current via an external resistor. |
| 5 | STAT1 | Status indicator pin 1 (used for charge status indication). |
| 6 | STAT2 | Status indicator pin 2 (used for charge status indication). |
| 7 | CE | Chip enable pin (active low, enables the controller when pulled low). |
| 8 | TEMP | Temperature monitoring pin (connect to an NTC thermistor for battery safety). |
Usage Instructions
How to Use the CN3065 in a Circuit
- Connect the Solar Panel: Attach the positive terminal of the solar panel to the VIN pin and the negative terminal to GND.
- Connect the Battery: Connect the positive terminal of the lithium-ion battery to the BAT pin and the negative terminal to GND.
- Set the Charging Current: Use an external resistor on the PROG pin to set the desired charging current. The formula for calculating the resistor value is: [ R_{\text{PROG}} = \frac{1000}{I_{\text{CHG}}} ] where ( I_{\text{CHG}} ) is the charging current in mA.
- Monitor Charging Status: Use the STAT1 and STAT2 pins to monitor the charging status. These pins can be connected to LEDs for visual indication:
- STAT1 = LOW, STAT2 = HIGH: Charging in progress.
- STAT1 = HIGH, STAT2 = LOW: Charging complete.
- STAT1 = HIGH, STAT2 = HIGH: No battery connected or fault condition.
- Enable the Controller: Ensure the CE pin is pulled low to enable the controller. Pulling it high disables the charging function.
Important Considerations and Best Practices
- Input Voltage: Ensure the input voltage from the solar panel is within the range of 4.4V to 6.0V. Exceeding this range may damage the controller.
- Battery Compatibility: The CN3065 is designed for single-cell lithium-ion batteries with a nominal voltage of 3.7V and a full charge voltage of 4.2V.
- Thermal Management: If the charging current is high, ensure proper heat dissipation to prevent overheating.
- Temperature Monitoring: Connect an NTC thermistor to the TEMP pin for battery temperature monitoring. This enhances safety by stopping charging if the battery temperature exceeds safe limits.
Example: Using CN3065 with Arduino UNO
The CN3065 can be used with an Arduino UNO to monitor the charging status. Below is an example code snippet:
// Define pins connected to CN3065 status pins
const int STAT1_PIN = 2; // Connect STAT1 to Arduino pin 2
const int STAT2_PIN = 3; // Connect STAT2 to Arduino pin 3

void setup() {
  pinMode(STAT1_PIN, INPUT); // Set STAT1 as input
  pinMode(STAT2_PIN, INPUT); // Set STAT2 as input
  Serial.begin(9600);        // Initialize serial communication
}

void loop() {
  int stat1 = digitalRead(STAT1_PIN); // Read STAT1 pin
  int stat2 = digitalRead(STAT2_PIN); // Read STAT2 pin

  // Determine charging status based on STAT1 and STAT2
  if (stat1 == LOW && stat2 == HIGH) {
    Serial.println("Charging in progress...");
  } else if (stat1 == HIGH && stat2 == LOW) {
    Serial.println("Charging complete.");
  } else if (stat1 == HIGH && stat2 == HIGH) {
    Serial.println("No battery connected or fault condition.");
  } else {
    Serial.println("Unknown status.");
  }

  delay(1000); // Wait for 1 second before checking again
}
Troubleshooting and FAQs
Common Issues and Solutions
No Charging Occurs
- Cause: Input voltage is too low or too high.
- Solution: Verify that the solar panel provides a voltage between 4.4V and 6.0V.
Overheating
- Cause: Excessive charging current or poor heat dissipation.
- Solution: Reduce the charging current by increasing the PROG resistor value or improve heat dissipation with a heatsink.
Fault Condition Indicated
- Cause: Battery not connected, or temperature out of range.
- Solution: Check the battery connection and ensure the TEMP pin is properly configured with an NTC thermistor.
LEDs Not Working
- Cause: Incorrect connection to STAT1 and STAT2 pins.
- Solution: Verify the connections and ensure the LEDs are connected with appropriate current-limiting resistors.
FAQs
Q: Can the CN3065 charge batteries other than lithium-ion?
A: No, the CN3065 is specifically designed for single-cell lithium-ion batteries with a charge voltage of 4.2V.
Q: What happens if the input voltage exceeds 6.0V?
A: Exceeding the maximum input voltage may damage the CN3065. Always ensure the input voltage is within the specified range.
Q: Is the MPPT algorithm adjustable?
A: No, the MPPT algorithm is built-in and operates automatically to optimize energy harvesting.
Q: Can I use the CN3065 without a solar panel?
A: Yes, you can use a DC power source within the input voltage range (4.4V to 6.0V) instead of a solar panel.