Cirkit Designer Logo
Cirkit Designer
Your all-in-one circuit design IDE
Home / 
Component Documentation

How to Use Speaker Controller: Examples, Pinouts, and Specs

Image of Speaker Controller
Cirkit Designer LogoDesign with Speaker Controller in Cirkit Designer

Introduction

A Speaker Controller is an electronic device designed to manage and manipulate the audio signals sent to speakers. It allows users to adjust volume, balance, equalization, and other audio parameters to enhance the listening experience. Common applications include home theater systems, public address systems, and professional audio setups.

Explore Projects Built with Speaker Controller

Use Cirkit Designer to design, explore, and prototype these projects online. Some projects support real-time simulation. Click "Open Project" to start designing instantly!
ESP32-Based Voice Assistant with Battery-Powered Microphone and Speaker
Image of Minor: A project utilizing Speaker Controller in a practical application
This circuit is a voice-controlled system that uses an ESP32 microcontroller to process audio input from a microphone, send the data to a Gemini API for speech-to-text conversion, and output responses through a speaker. It includes an IR sensor for additional input, an LED for status indication, and a battery with a charging module for power management.
Cirkit Designer LogoOpen Project in Cirkit Designer
ESP32-Based Voice-Controlled Speaker
Image of Main Design: A project utilizing Speaker Controller in a practical application
This circuit is a digital voice playback and recording system powered by a 3.7V battery. It features an ESP32 microcontroller for processing, an Adafruit MAX98357A amplifier to drive a loudspeaker for audio output, and an Adafruit MAX9814 microphone amplifier for audio input. A pushbutton provides user interaction, and a 3.3V regulator ensures stable power supply to the components.
Cirkit Designer LogoOpen Project in Cirkit Designer
ESP32-Powered Voice-Controlled LED Lighting System
Image of ALEXA PROTOTYPE: A project utilizing Speaker Controller in a practical application
This is a voice-activated lighting system powered by a 12V battery, featuring two ESP32 microcontrollers for voice processing and light control. It includes an INMP441 microphone for audio input, a toggle switch for user interaction, and various LEDs for visual feedback. The system is designed to recognize specific voice commands to control the state of the LEDs.
Cirkit Designer LogoOpen Project in Cirkit Designer
ESP32-Powered Smart Audio System with Data Logging
Image of Para Smart Speaker 1 Pro: A project utilizing Speaker Controller in a practical application
This circuit is a sophisticated audio playback and recording system with timekeeping functionality. It features an ESP32 S3 microcontroller for digital signal processing, connected to a DAC, an I2S microphone, an RTC, and a Micro SD card module. The audio output is handled by a 2.1 channel amplifier driving stereo speakers and a subwoofer, with power supplied by a series of 3.7V batteries and regulated by a DC step-down converter.
Cirkit Designer LogoOpen Project in Cirkit Designer

Explore Projects Built with Speaker Controller

Use Cirkit Designer to design, explore, and prototype these projects online. Some projects support real-time simulation. Click "Open Project" to start designing instantly!
Image of Minor: A project utilizing Speaker Controller in a practical application
ESP32-Based Voice Assistant with Battery-Powered Microphone and Speaker
This circuit is a voice-controlled system that uses an ESP32 microcontroller to process audio input from a microphone, send the data to a Gemini API for speech-to-text conversion, and output responses through a speaker. It includes an IR sensor for additional input, an LED for status indication, and a battery with a charging module for power management.
Cirkit Designer LogoOpen Project in Cirkit Designer
Image of Main Design: A project utilizing Speaker Controller in a practical application
ESP32-Based Voice-Controlled Speaker
This circuit is a digital voice playback and recording system powered by a 3.7V battery. It features an ESP32 microcontroller for processing, an Adafruit MAX98357A amplifier to drive a loudspeaker for audio output, and an Adafruit MAX9814 microphone amplifier for audio input. A pushbutton provides user interaction, and a 3.3V regulator ensures stable power supply to the components.
Cirkit Designer LogoOpen Project in Cirkit Designer
Image of ALEXA PROTOTYPE: A project utilizing Speaker Controller in a practical application
ESP32-Powered Voice-Controlled LED Lighting System
This is a voice-activated lighting system powered by a 12V battery, featuring two ESP32 microcontrollers for voice processing and light control. It includes an INMP441 microphone for audio input, a toggle switch for user interaction, and various LEDs for visual feedback. The system is designed to recognize specific voice commands to control the state of the LEDs.
Cirkit Designer LogoOpen Project in Cirkit Designer
Image of Para Smart Speaker 1 Pro: A project utilizing Speaker Controller in a practical application
ESP32-Powered Smart Audio System with Data Logging
This circuit is a sophisticated audio playback and recording system with timekeeping functionality. It features an ESP32 S3 microcontroller for digital signal processing, connected to a DAC, an I2S microphone, an RTC, and a Micro SD card module. The audio output is handled by a 2.1 channel amplifier driving stereo speakers and a subwoofer, with power supplied by a series of 3.7V batteries and regulated by a DC step-down converter.
Cirkit Designer LogoOpen Project in Cirkit Designer

Technical Specifications

General Specifications

  • Input Voltage: 5V DC
  • Output Power: 2W to 20W (depending on model)
  • Frequency Response: 20Hz - 20kHz
  • Signal-to-Noise Ratio (SNR): >90dB
  • Total Harmonic Distortion (THD): <0.1%
  • Control Interface: I2C, SPI, or analog (model dependent)
  • Dimensions: Varies with model

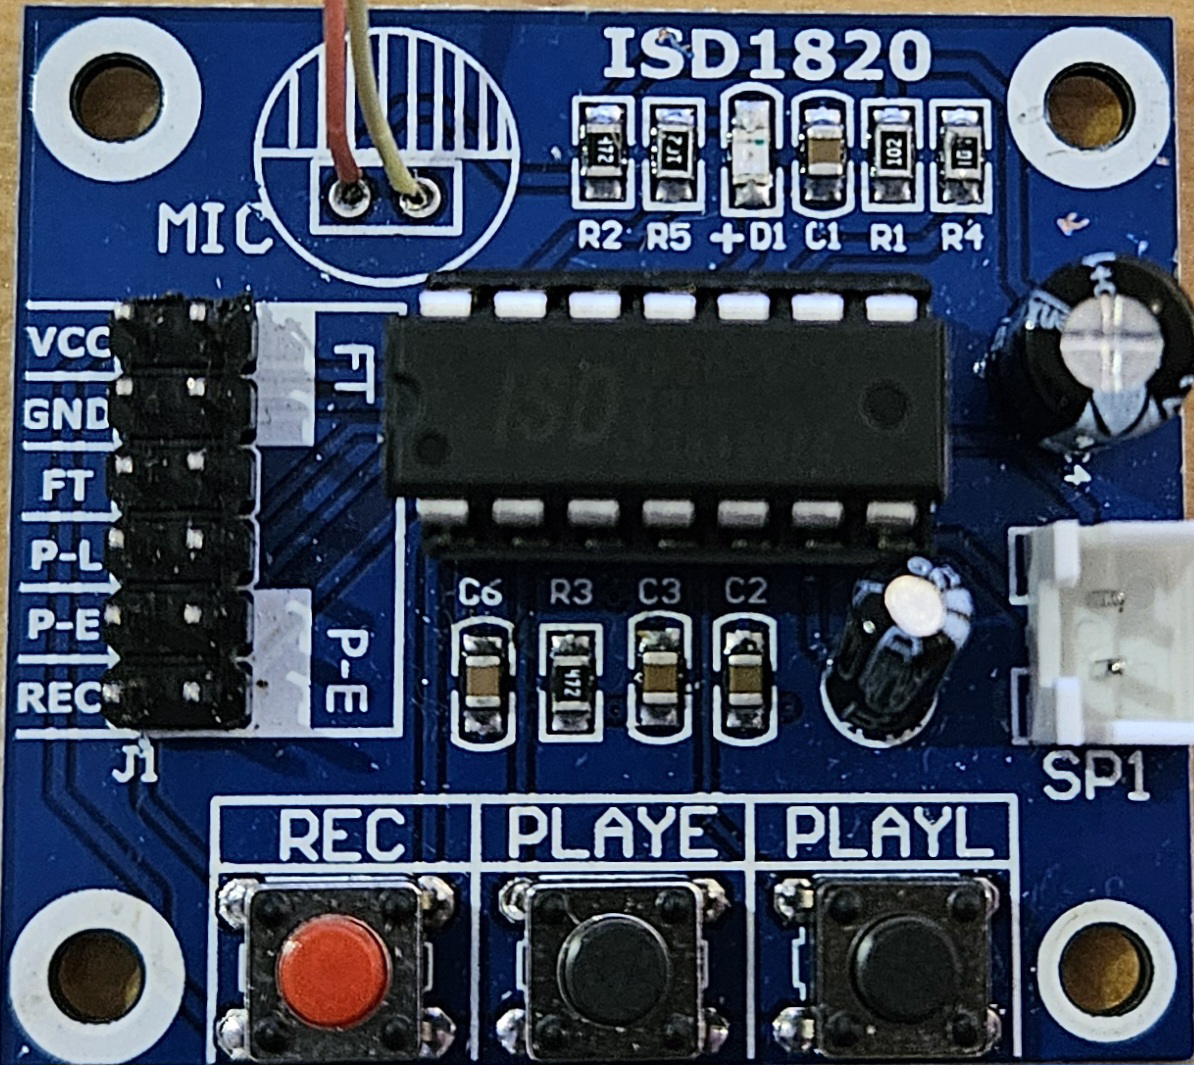
Pin Configuration and Descriptions

Pin Number Name Description
1 VCC Power supply input (5V DC)
2 GND Ground connection
3 IN+ Positive audio input
4 IN- Negative audio input (ground for single-ended input)
5 OUT+ Positive speaker output
6 OUT- Negative speaker output
7 SCL I2C clock (if applicable)
8 SDA I2C data (if applicable)
9 CS SPI chip select (if applicable)
10 MISO SPI Master In Slave Out (if applicable)
11 MOSI SPI Master Out Slave In (if applicable)
12 SCK SPI clock (if applicable)

Usage Instructions

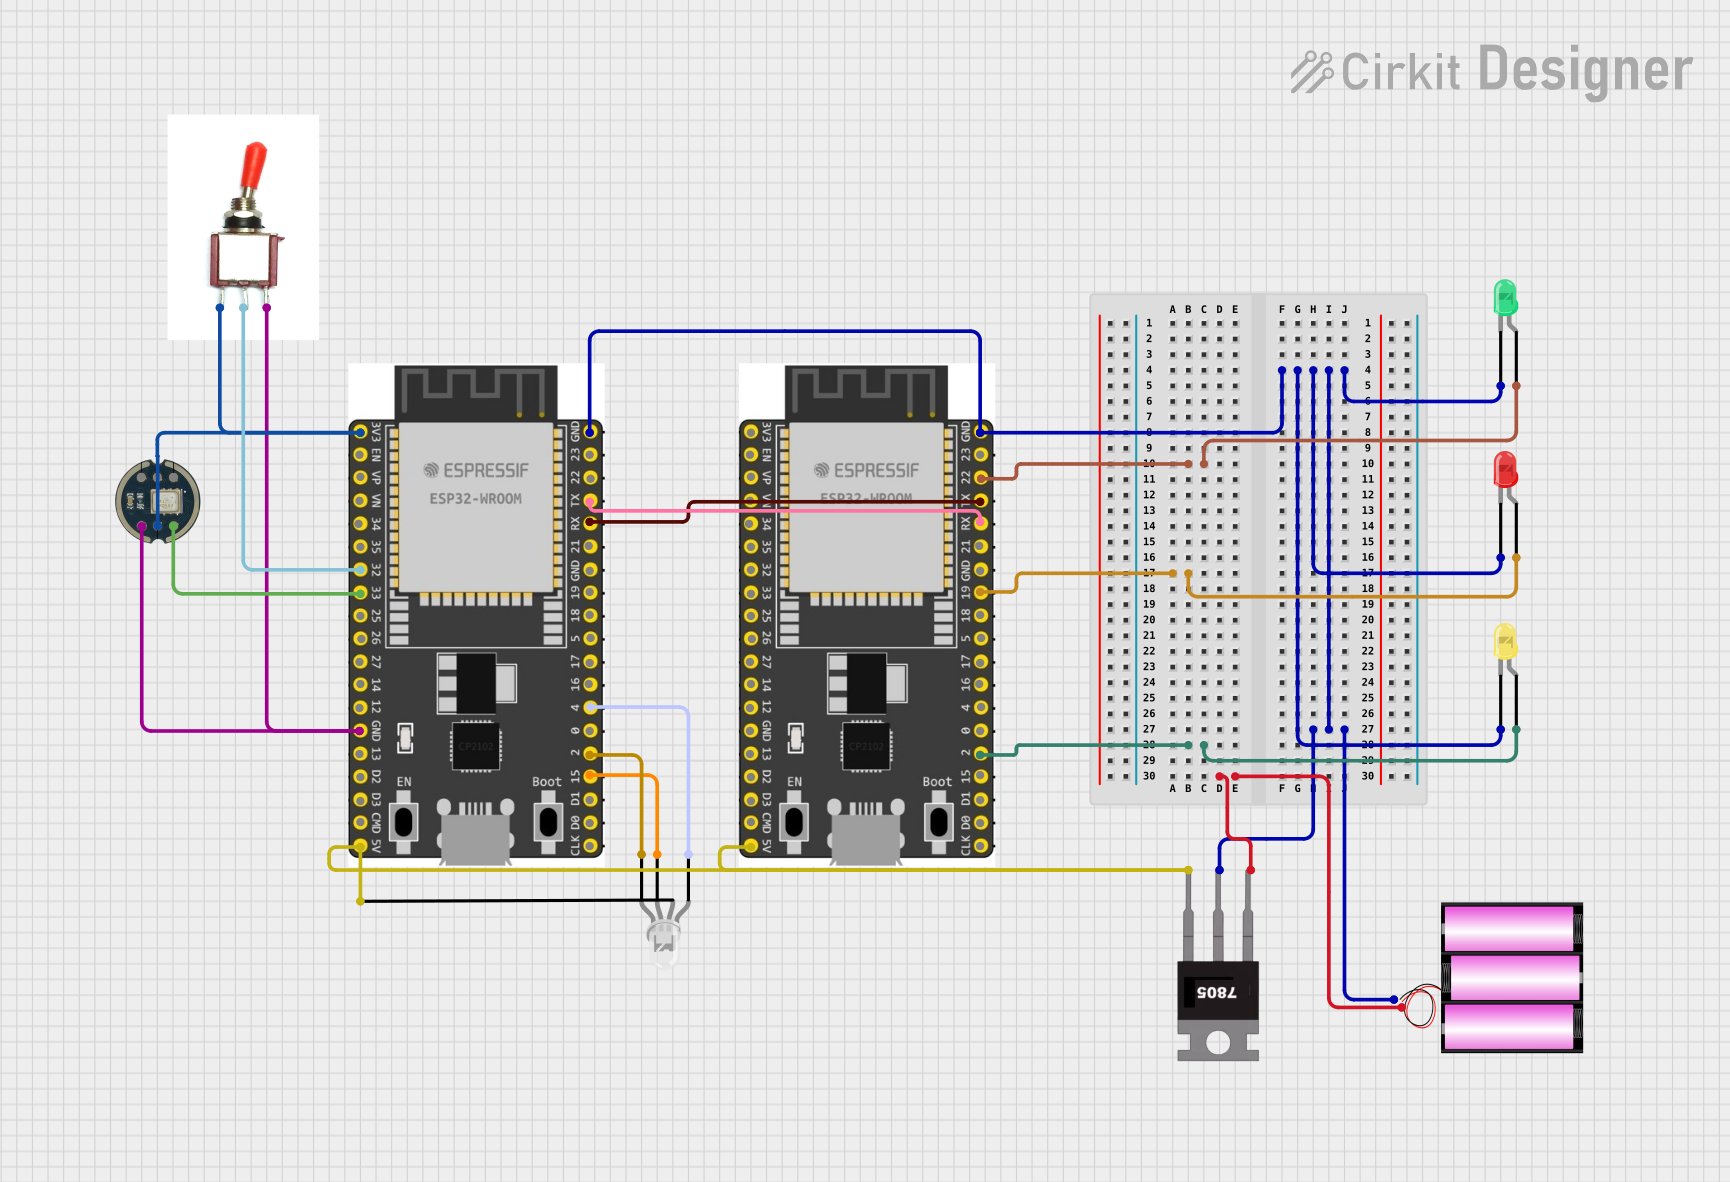
Connecting to a Circuit

  1. Power Supply: Connect the VCC pin to a 5V power source and the GND pin to the common ground.
  2. Audio Input: Connect the audio source to the IN+ and IN- pins. For a single-ended input, connect IN- to ground.
  3. Speaker Output: Connect the speaker terminals to the OUT+ and OUT- pins.
  4. Control Interface: Depending on the model, use I2C or SPI pins to interface with a microcontroller for digital control.

Best Practices

  • Use a regulated power supply to avoid voltage fluctuations that could damage the controller.
  • Ensure that the speaker's power rating is compatible with the output power of the Speaker Controller.
  • Keep audio input signals within the specified range to prevent distortion.
  • Use shielded cables for audio connections to minimize interference.
  • Implement proper decoupling techniques with capacitors close to the power pins of the Speaker Controller.

Example Code for Arduino UNO

#include <Wire.h> // Include the I2C library (required for some Speaker Controller models)

// Define Speaker Controller I2C address (check your model's datasheet)
#define SPEAKER_CONTROLLER_ADDR 0x4D

void setup() {
  Wire.begin(); // Initialize I2C communication
  Serial.begin(9600); // Start serial communication for debugging

  // Initialize the Speaker Controller (example function, replace with actual initialization code)
  initSpeakerController();
}

void loop() {
  // Adjust volume (example function, replace with actual volume control code)
  setVolume(50); // Set volume to 50%

  // Add more code to control other features like equalization, balance, etc.
}

// Function to initialize the Speaker Controller
void initSpeakerController() {
  // Send initialization commands to the Speaker Controller
  // Replace with actual commands from the datasheet
  Wire.beginTransmission(SPEAKER_CONTROLLER_ADDR);
  Wire.write(0x00); // Command to initialize (example)
  Wire.endTransmission();
}

// Function to set the volume
void setVolume(int volume) {
  // Convert volume percentage to the value range of the Speaker Controller
  int volumeValue = map(volume, 0, 100, 0, 255); // Assuming 8-bit volume control

  // Send volume control command
  Wire.beginTransmission(SPEAKER_CONTROLLER_ADDR);
  Wire.write(0x01); // Volume control command (example)
  Wire.write(volumeValue); // Volume value
  Wire.endTransmission();

  Serial.print("Volume set to: ");
  Serial.println(volume);
}

Troubleshooting and FAQs

Common Issues

  • No Sound: Ensure all connections are secure and the power supply is functioning. Check that the audio source is active and the volume is not muted.
  • Distorted Sound: Verify that the audio input level is not too high, causing clipping. Also, check the speaker impedance and power ratings to ensure compatibility with the Speaker Controller.
  • Intermittent Sound: Inspect cables for damage and ensure solid connections. Interference from other electronic devices can also cause this issue.

FAQs

Q: Can I use the Speaker Controller with any type of speaker? A: The Speaker Controller should be compatible with most speakers, but ensure that the speaker's power rating and impedance match the specifications of the controller.

Q: How do I adjust the equalization settings? A: Equalization settings can be adjusted via the control interface (I2C/SPI). Refer to the datasheet for specific commands and register settings.

Q: What should I do if the Speaker Controller overheats? A: Overheating can be a sign of overloading or insufficient ventilation. Reduce the volume or power output and ensure adequate airflow around the component.

For further assistance, consult the Speaker Controller's datasheet or contact technical support.