How to Use Waveshare Laser Sensor: Examples, Pinouts, and Specs

Introduction
The Waveshare Laser Sensor (Part ID: 1031) is a high-precision distance measurement sensor designed for applications requiring accurate and reliable distance detection. Utilizing advanced laser technology, this sensor can measure distances with exceptional precision, making it ideal for robotics, automation, industrial systems, and smart devices. Its compact design and ease of integration make it a versatile choice for both hobbyists and professionals.
Explore Projects Built with Waveshare Laser Sensor
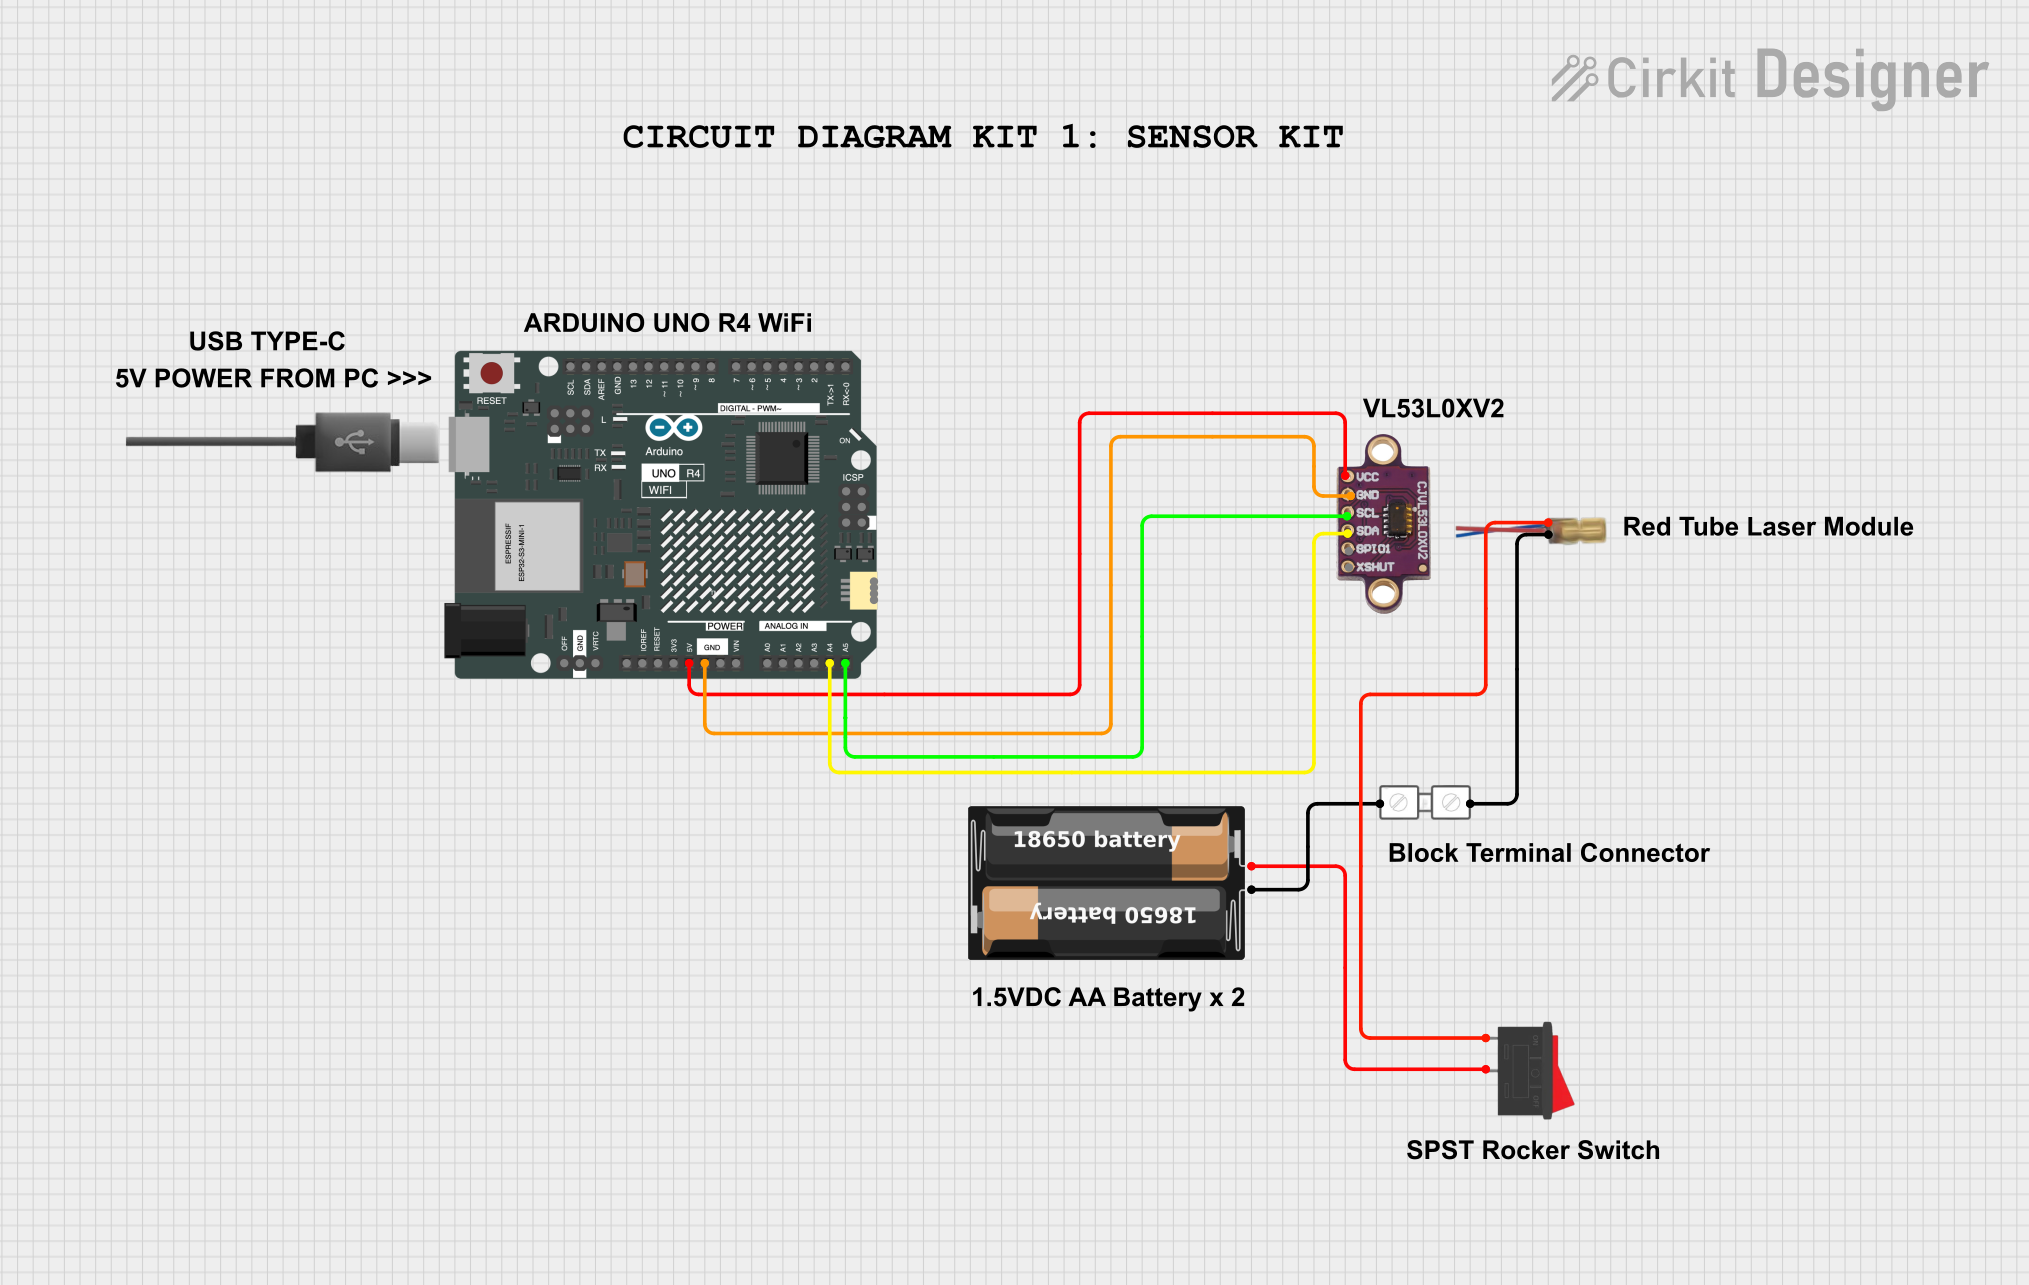
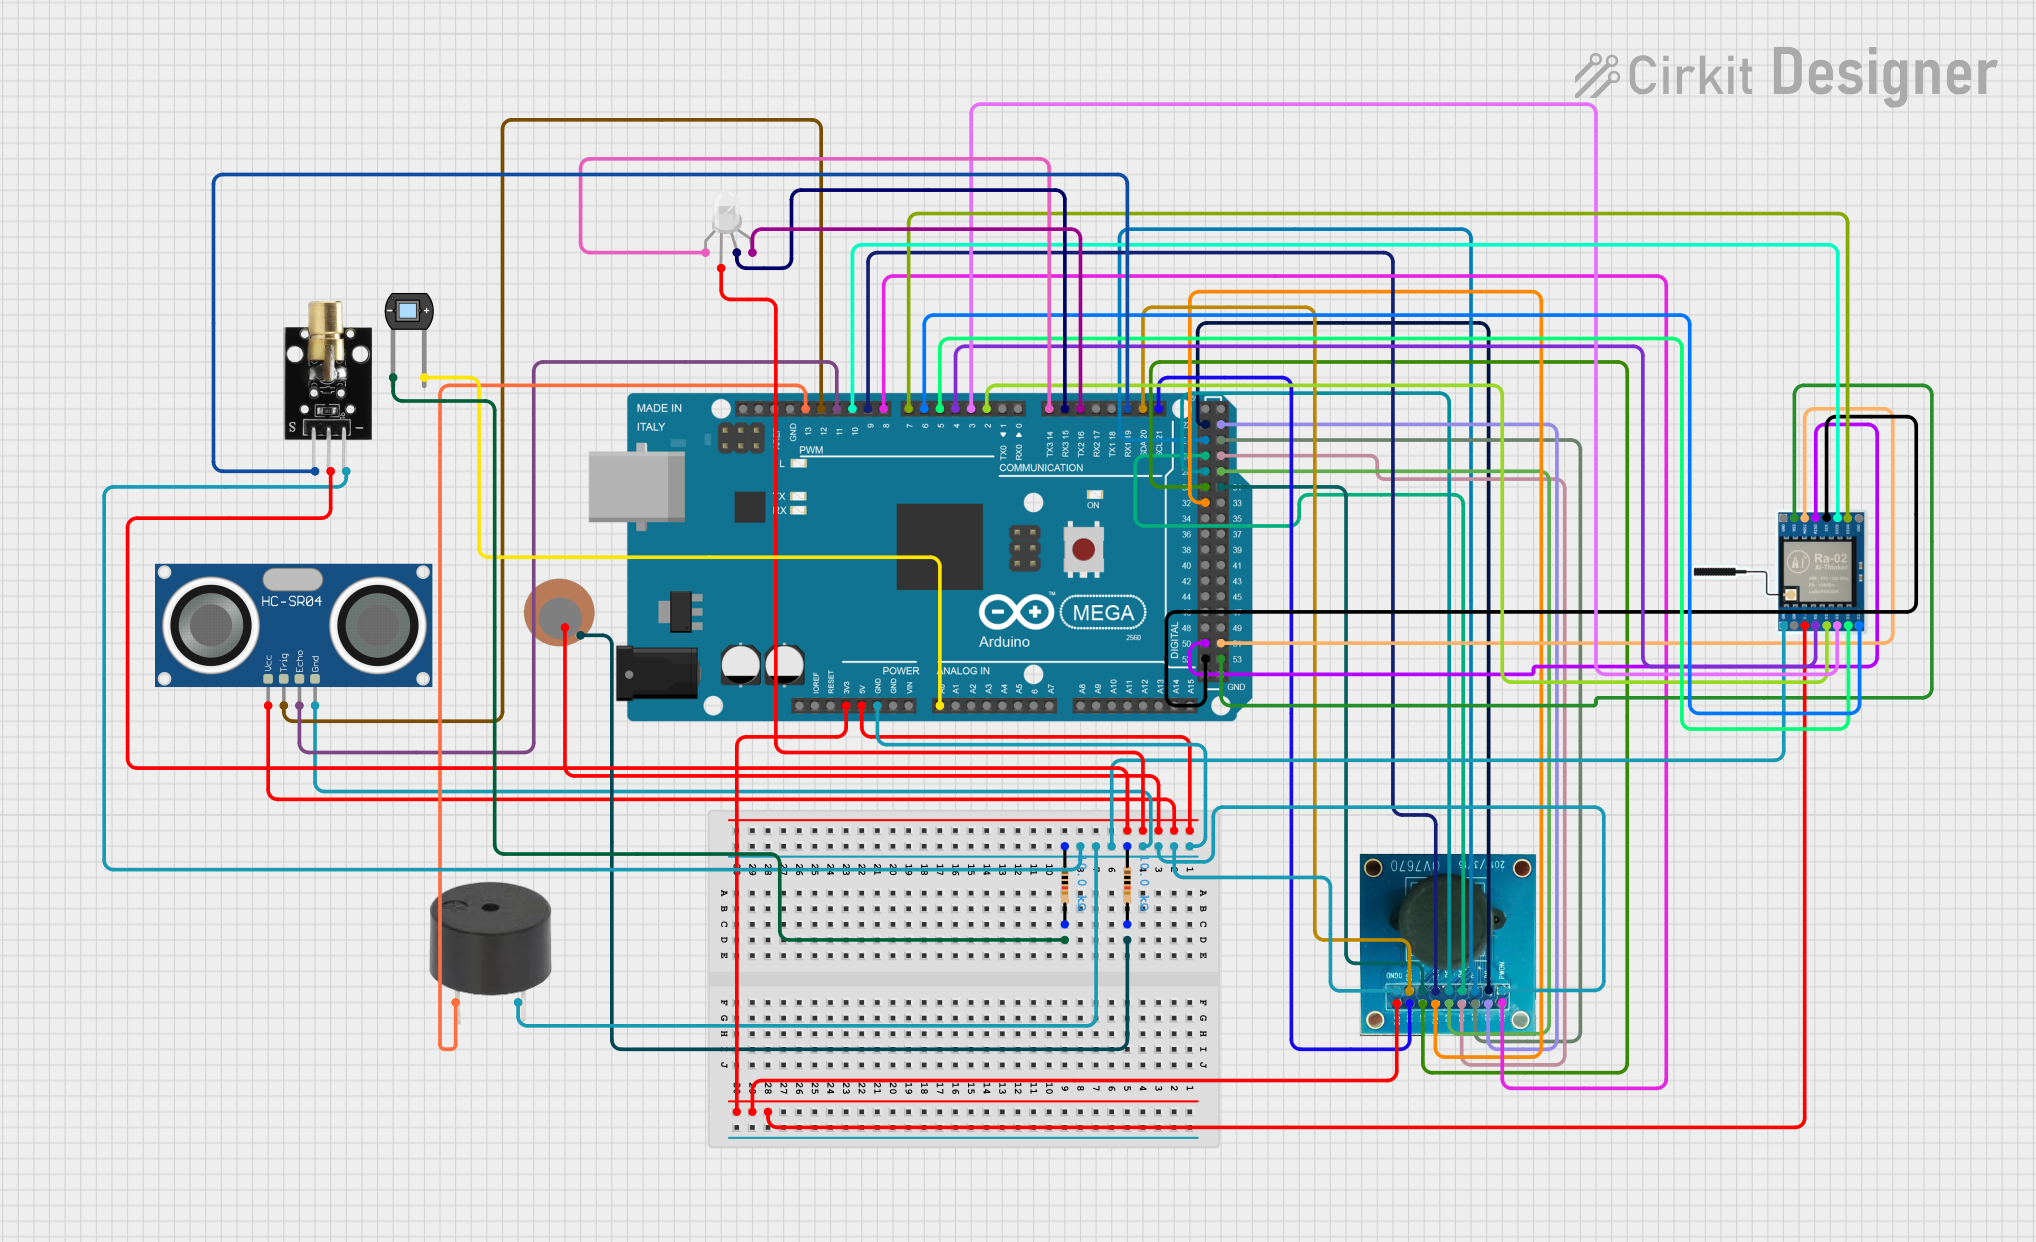
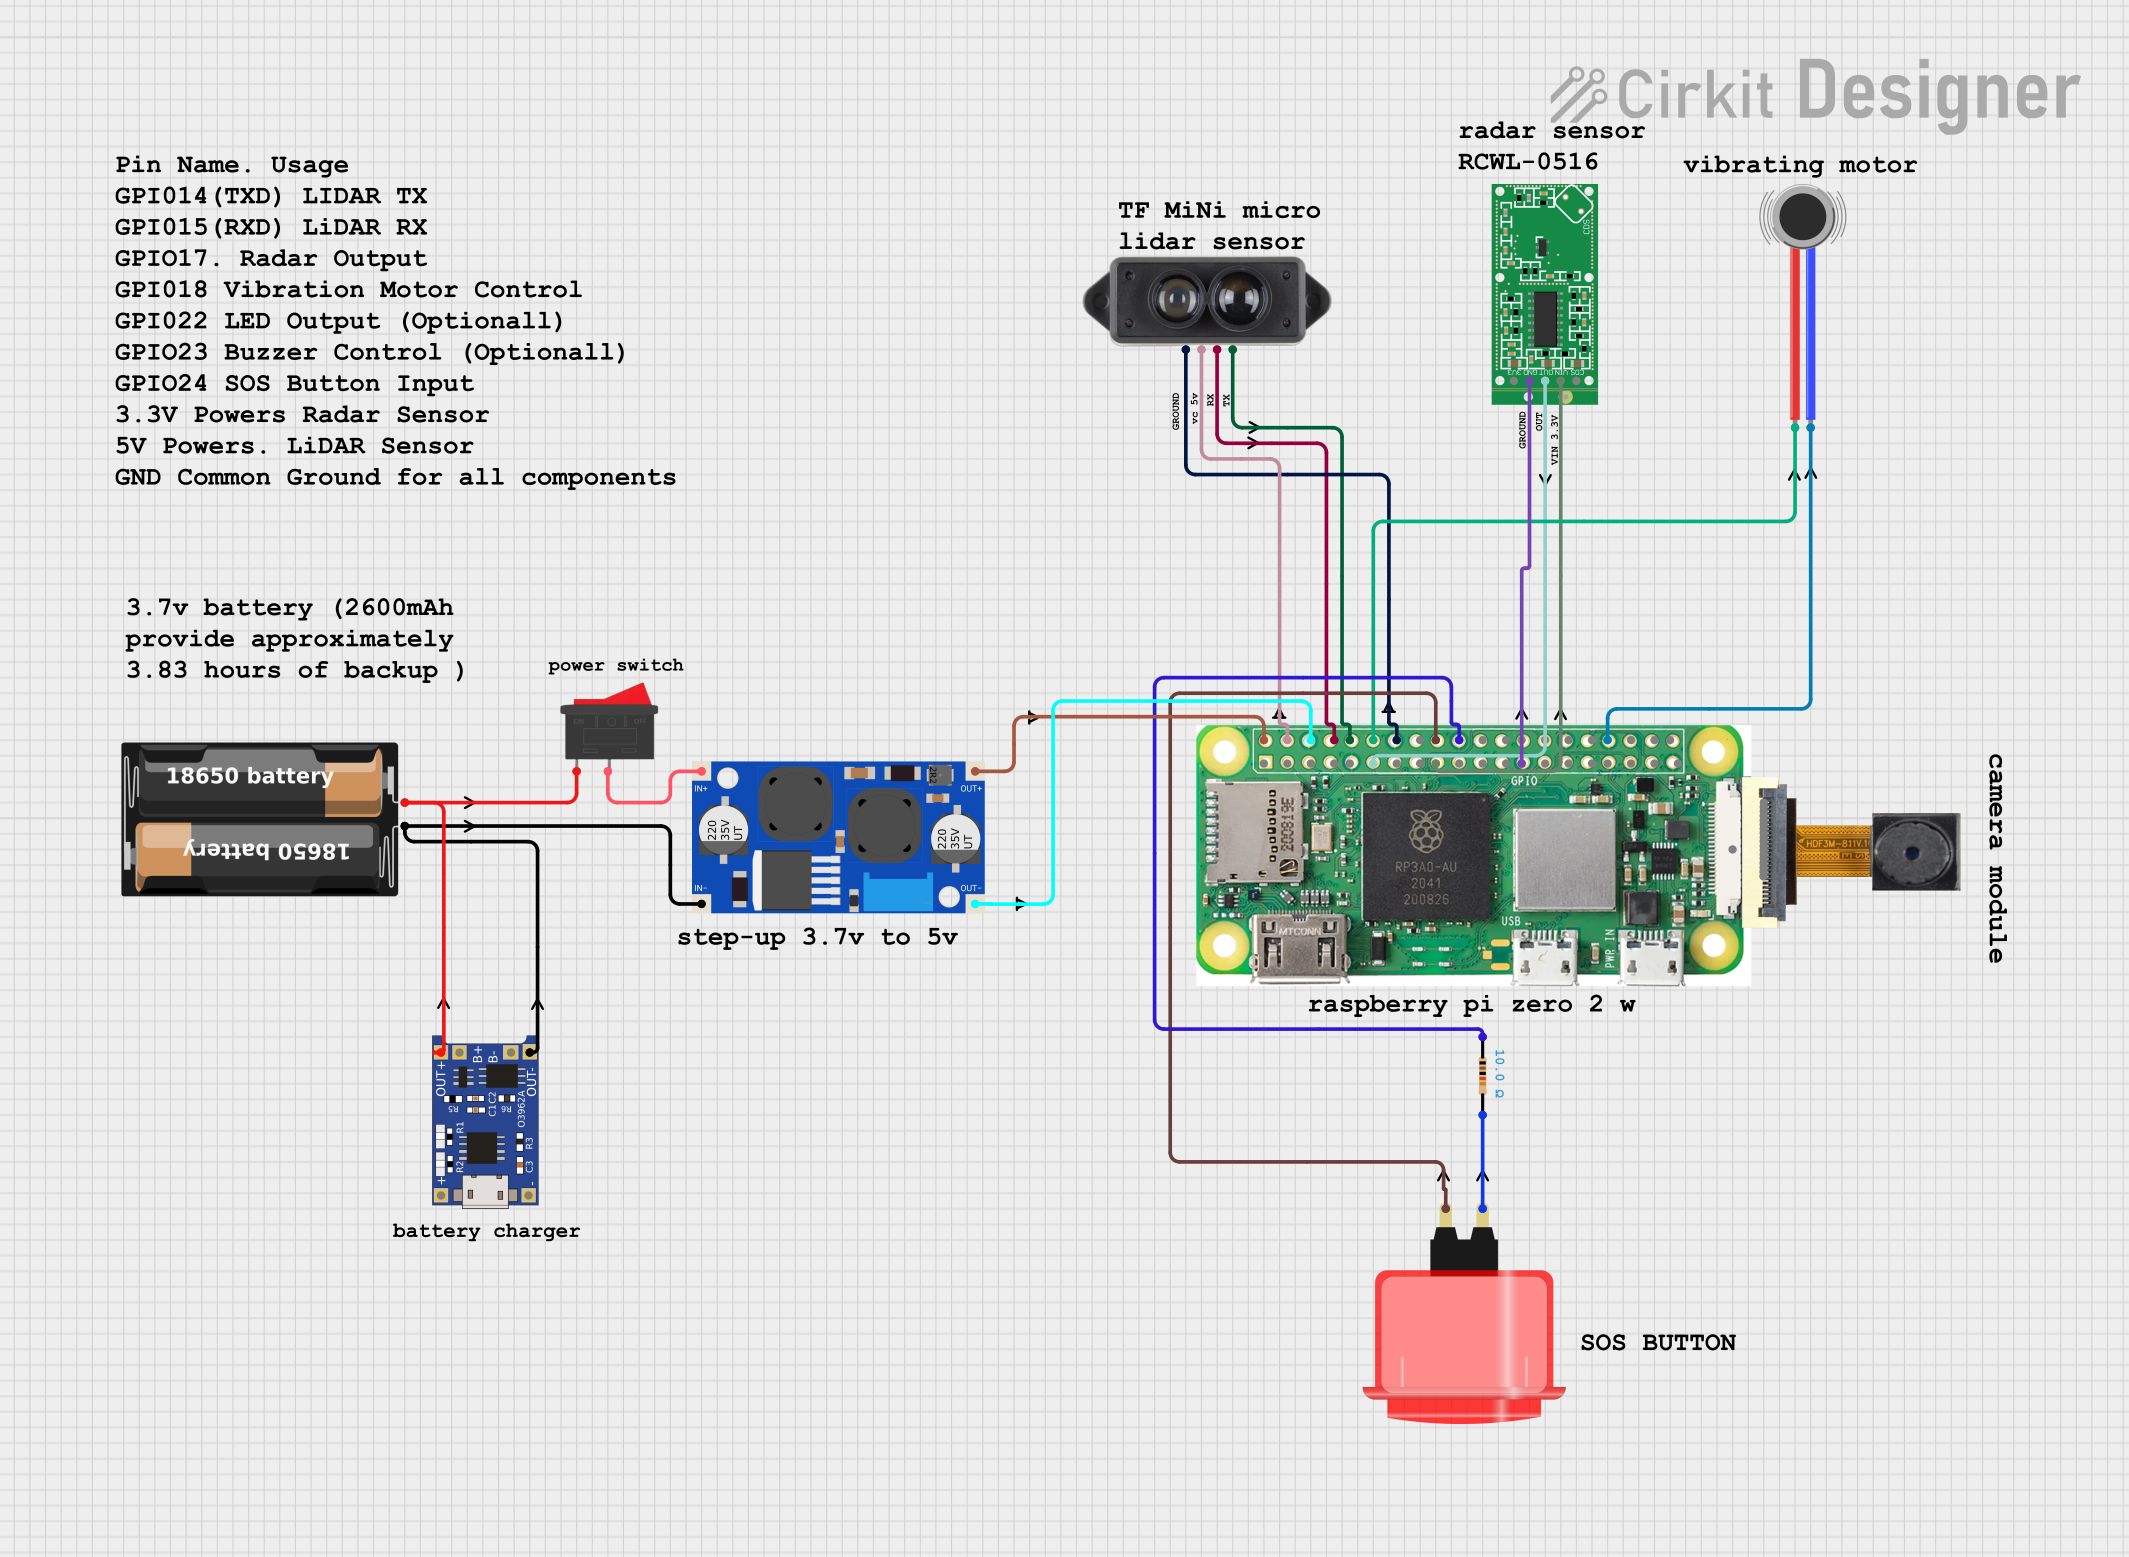
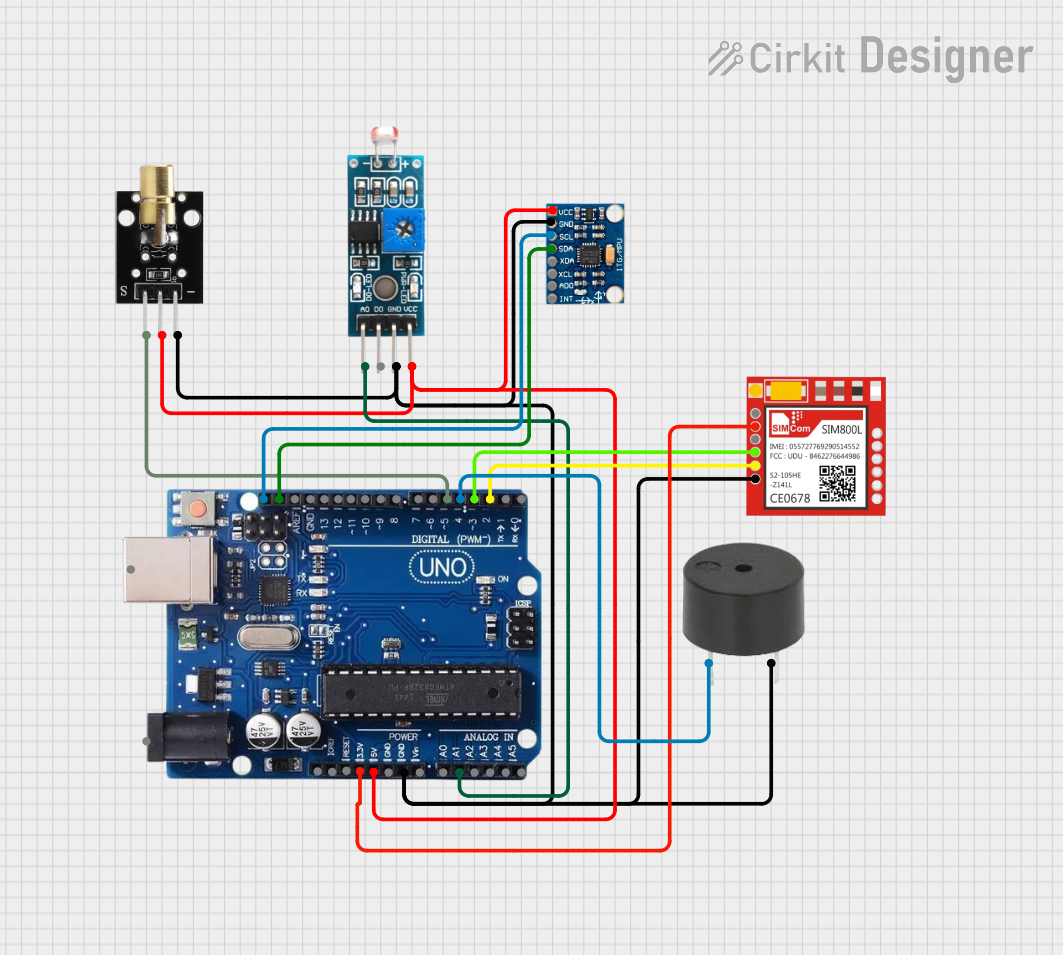
Explore Projects Built with Waveshare Laser Sensor
Common Applications
- Robotics for obstacle detection and navigation
- Industrial automation for object positioning and measurement
- Smart home devices for presence detection
- Drones for altitude measurement and collision avoidance
- Distance measurement in scientific experiments
Technical Specifications
The following table outlines the key technical details of the Waveshare Laser Sensor:
| Parameter | Value |
|---|---|
| Operating Voltage | 3.3V to 5V |
| Operating Current | ≤ 30mA |
| Measurement Range | 0.2m to 12m |
| Measurement Accuracy | ±1% (under standard conditions) |
| Communication Interface | UART (default) / I2C |
| Operating Temperature | -10°C to 60°C |
| Dimensions | 25mm x 15mm x 10mm |
| Weight | 5g |
Pin Configuration
The Waveshare Laser Sensor has a 4-pin interface. The pinout is described in the table below:
| Pin | Name | Description |
|---|---|---|
| 1 | VCC | Power supply input (3.3V to 5V) |
| 2 | GND | Ground connection |
| 3 | TX | UART Transmit pin (data output) |
| 4 | RX | UART Receive pin (data input) |
Usage Instructions
Connecting the Sensor
To use the Waveshare Laser Sensor in a circuit:
- Connect the VCC pin to a 3.3V or 5V power source.
- Connect the GND pin to the ground of your circuit.
- For UART communication:
- Connect the TX pin to the RX pin of your microcontroller.
- Connect the RX pin to the TX pin of your microcontroller.
- For I2C communication (if supported), refer to the manufacturer's datasheet for additional configuration steps.
Important Considerations
- Ensure the sensor is powered within the specified voltage range (3.3V to 5V) to avoid damage.
- Avoid exposing the sensor to direct sunlight or reflective surfaces, as this may affect measurement accuracy.
- Use appropriate pull-up resistors if using the I2C interface.
- Maintain a clear line of sight between the sensor and the target object for optimal performance.
Example: Using with Arduino UNO
The following example demonstrates how to use the Waveshare Laser Sensor with an Arduino UNO via UART communication:
// Include the SoftwareSerial library for UART communication
#include <SoftwareSerial.h>

// Define the RX and TX pins for the sensor
#define SENSOR_RX 10  // Arduino pin connected to sensor TX
#define SENSOR_TX 11  // Arduino pin connected to sensor RX

// Create a SoftwareSerial object
SoftwareSerial laserSensor(SENSOR_RX, SENSOR_TX);

void setup() {
  // Initialize serial communication with the sensor
  laserSensor.begin(9600); // Sensor default baud rate is 9600
  Serial.begin(9600);      // Initialize Serial Monitor for debugging

  Serial.println("Waveshare Laser Sensor Initialized");
}

void loop() {
  // Check if data is available from the sensor
  if (laserSensor.available()) {
    // Read and print the distance data
    String distance = laserSensor.readStringUntil('\n');
    Serial.print("Distance: ");
    Serial.println(distance);
  }

  delay(100); // Small delay to prevent overwhelming the sensor
}
Notes:
- Ensure the sensor's baud rate matches the value specified in the
laserSensor.begin()function. - Use a logic level shifter if your Arduino operates at 5V logic levels and the sensor requires 3.3V logic.
Troubleshooting and FAQs
Common Issues
No data received from the sensor:
- Verify the wiring connections, especially the TX and RX pins.
- Ensure the sensor is powered correctly and the baud rate matches the configuration.
Inaccurate distance measurements:
- Check for obstructions or reflective surfaces in the sensor's line of sight.
- Ensure the target object is within the sensor's measurement range (0.2m to 12m).
Sensor not responding:
- Confirm that the sensor is not exposed to extreme temperatures or environmental conditions.
- Test the sensor with a different microcontroller to rule out hardware issues.
FAQs
Q: Can the sensor measure distances through glass or transparent materials?
A: The sensor may not perform accurately through transparent materials, as the laser beam can refract or reflect unpredictably.
Q: How do I switch between UART and I2C modes?
A: Refer to the manufacturer's datasheet for instructions on configuring the communication mode. This typically involves setting specific pins or sending configuration commands.
Q: What is the maximum update rate of the sensor?
A: The sensor can provide distance measurements at a rate of up to 10Hz, depending on the communication interface and environmental conditions.
Q: Can I use this sensor with a Raspberry Pi?
A: Yes, the sensor can be connected to a Raspberry Pi using the UART or I2C interface. Ensure the appropriate libraries and configurations are used for communication.
By following this documentation, you can effectively integrate the Waveshare Laser Sensor into your projects and achieve accurate distance measurements.