How to Use type c plug: Examples, Pinouts, and Specs

 Design with type c plug in Cirkit Designer
Introduction
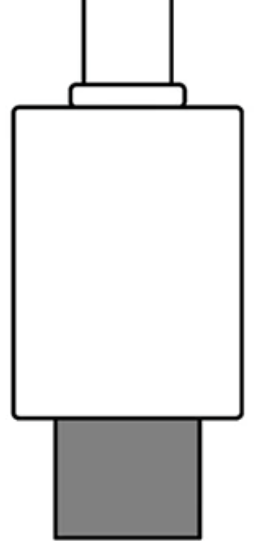
A Type-C plug is a USB connector that supports reversible insertion and can handle higher power and faster data transfer rates compared to previous USB types. It is designed to be a universal connector for various devices, including smartphones, laptops, and other peripherals. The Type-C plug is known for its compact design and enhanced capabilities, making it a popular choice in modern electronics.
Explore Projects Built with type c plug

 Open Project in Cirkit Designer
 Open Project in Cirkit Designer
 Open Project in Cirkit Designer
 Open Project in Cirkit Designer
Explore Projects Built with type c plug

 Open Project in Cirkit Designer
 Open Project in Cirkit Designer
 Open Project in Cirkit Designer
 Open Project in Cirkit Designer
Common Applications and Use Cases
- Smartphones and Tablets: Charging and data transfer.
- Laptops and Desktops: Power delivery, data transfer, and video output.
- Peripheral Devices: Connecting external hard drives, monitors, and other accessories.
- Power Banks: Fast charging and power delivery.
- Audio Devices: Connecting headphones and speakers.
Technical Specifications
Key Technical Details
| Parameter | Value |
|---|---|
| Voltage Rating | 5V, 9V, 12V, 15V, 20V |
| Current Rating | Up to 5A |
| Power Delivery | Up to 100W |
| Data Transfer Rate | Up to 10 Gbps (USB 3.1 Gen 2) |
| Connector Type | Reversible |
| Pin Count | 24 pins |
Pin Configuration and Descriptions
| Pin Number | Name | Description |
|---|---|---|
| 1 | GND | Ground |
| 2 | TX1+ | Transmit Data + (SuperSpeed) |
| 3 | TX1- | Transmit Data - (SuperSpeed) |
| 4 | VBUS | Power Supply |
| 5 | CC1 | Configuration Channel 1 |
| 6 | D+ | Data + (USB 2.0) |
| 7 | D- | Data - (USB 2.0) |
| 8 | SBU1 | Sideband Use 1 |
| 9 | VBUS | Power Supply |
| 10 | RX2+ | Receive Data + (SuperSpeed) |
| 11 | RX2- | Receive Data - (SuperSpeed) |
| 12 | GND | Ground |
| 13 | GND | Ground |
| 14 | RX1+ | Receive Data + (SuperSpeed) |
| 15 | RX1- | Receive Data - (SuperSpeed) |
| 16 | VBUS | Power Supply |
| 17 | SBU2 | Sideband Use 2 |
| 18 | D- | Data - (USB 2.0) |
| 19 | D+ | Data + (USB 2.0) |
| 20 | CC2 | Configuration Channel 2 |
| 21 | VBUS | Power Supply |
| 22 | TX2- | Transmit Data - (SuperSpeed) |
| 23 | TX2+ | Transmit Data + (SuperSpeed) |
| 24 | GND | Ground |
Usage Instructions
How to Use the Component in a Circuit
- Identify the Pins: Refer to the pin configuration table to identify the pins on the Type-C plug.
- Connect Power Supply: Connect the VBUS pins to the power supply. Ensure the voltage and current ratings are within the specified limits.
- Data Lines: Connect the D+ and D- pins for USB 2.0 data transfer. For USB 3.1, connect the TX and RX pairs.
- Ground Connections: Connect the GND pins to the ground of your circuit.
- Configuration Channels: Use the CC1 and CC2 pins for configuration and power delivery negotiation.
Important Considerations and Best Practices
- Reversible Insertion: The Type-C plug can be inserted in either orientation, making it user-friendly.
- Power Delivery: Ensure your power supply and devices support the required power delivery specifications.
- Data Transfer Rates: Use appropriate cables and connectors to achieve the desired data transfer rates.
- Heat Dissipation: High power delivery can generate heat. Ensure proper ventilation and heat dissipation mechanisms.
Example: Connecting a Type-C Plug to an Arduino UNO
To connect a Type-C plug to an Arduino UNO for power and data transfer, follow these steps:
- Power Supply: Connect the VBUS pin of the Type-C plug to the 5V pin on the Arduino.
- Ground: Connect the GND pin of the Type-C plug to the GND pin on the Arduino.
- Data Lines: Connect the D+ and D- pins of the Type-C plug to the corresponding pins on the Arduino.
// Example code to read data from a Type-C connected device
void setup() {
  Serial.begin(9600); // Initialize serial communication at 9600 baud rate
}

void loop() {
  if (Serial.available() > 0) {
    char data = Serial.read(); // Read data from the Type-C connected device
    Serial.print("Received: ");
    Serial.println(data); // Print the received data
  }
}
Troubleshooting and FAQs
Common Issues Users Might Face
No Power Delivery:
- Solution: Check the VBUS and GND connections. Ensure the power supply meets the required specifications.
Data Transfer Issues:
- Solution: Verify the connections of the D+ and D- pins. Ensure the cable and connectors support the desired data transfer rate.
Overheating:
- Solution: Ensure proper ventilation and heat dissipation. Check the current rating and reduce the load if necessary.
Device Not Recognized:
- Solution: Check the configuration channels (CC1 and CC2) for proper negotiation. Ensure the device drivers are installed.
FAQs
Q1: Can I use a Type-C plug for both power and data transfer?
- A1: Yes, the Type-C plug supports simultaneous power delivery and data transfer.
Q2: What is the maximum power delivery of a Type-C plug?
- A2: The Type-C plug can deliver up to 100W of power.
Q3: Is the Type-C plug compatible with older USB devices?
- A3: Yes, with appropriate adapters, the Type-C plug can be used with older USB devices.
Q4: How do I ensure the correct orientation of the Type-C plug?
- A4: The Type-C plug is reversible, so it can be inserted in either orientation.
Q5: Can I use a Type-C plug for video output?
- A5: Yes, the Type-C plug supports video output with compatible devices and cables.
This documentation provides a comprehensive guide to understanding and using the Type-C plug in various applications. Whether you are a beginner or an experienced user, this guide will help you make the most of this versatile connector.