How to Use PAM8406: Examples, Pinouts, and Specs
Introduction
The PAM8406 is a high-efficiency Class D audio amplifier manufactured by Diodes Incorporated. It is capable of delivering up to 6W per channel into a 4Ω load, making it ideal for driving speakers in portable and compact audio applications. The PAM8406 is designed to operate with low distortion and high output power, ensuring excellent audio quality. Its small size and low power consumption make it suitable for battery-powered devices.
Explore Projects Built with PAM8406


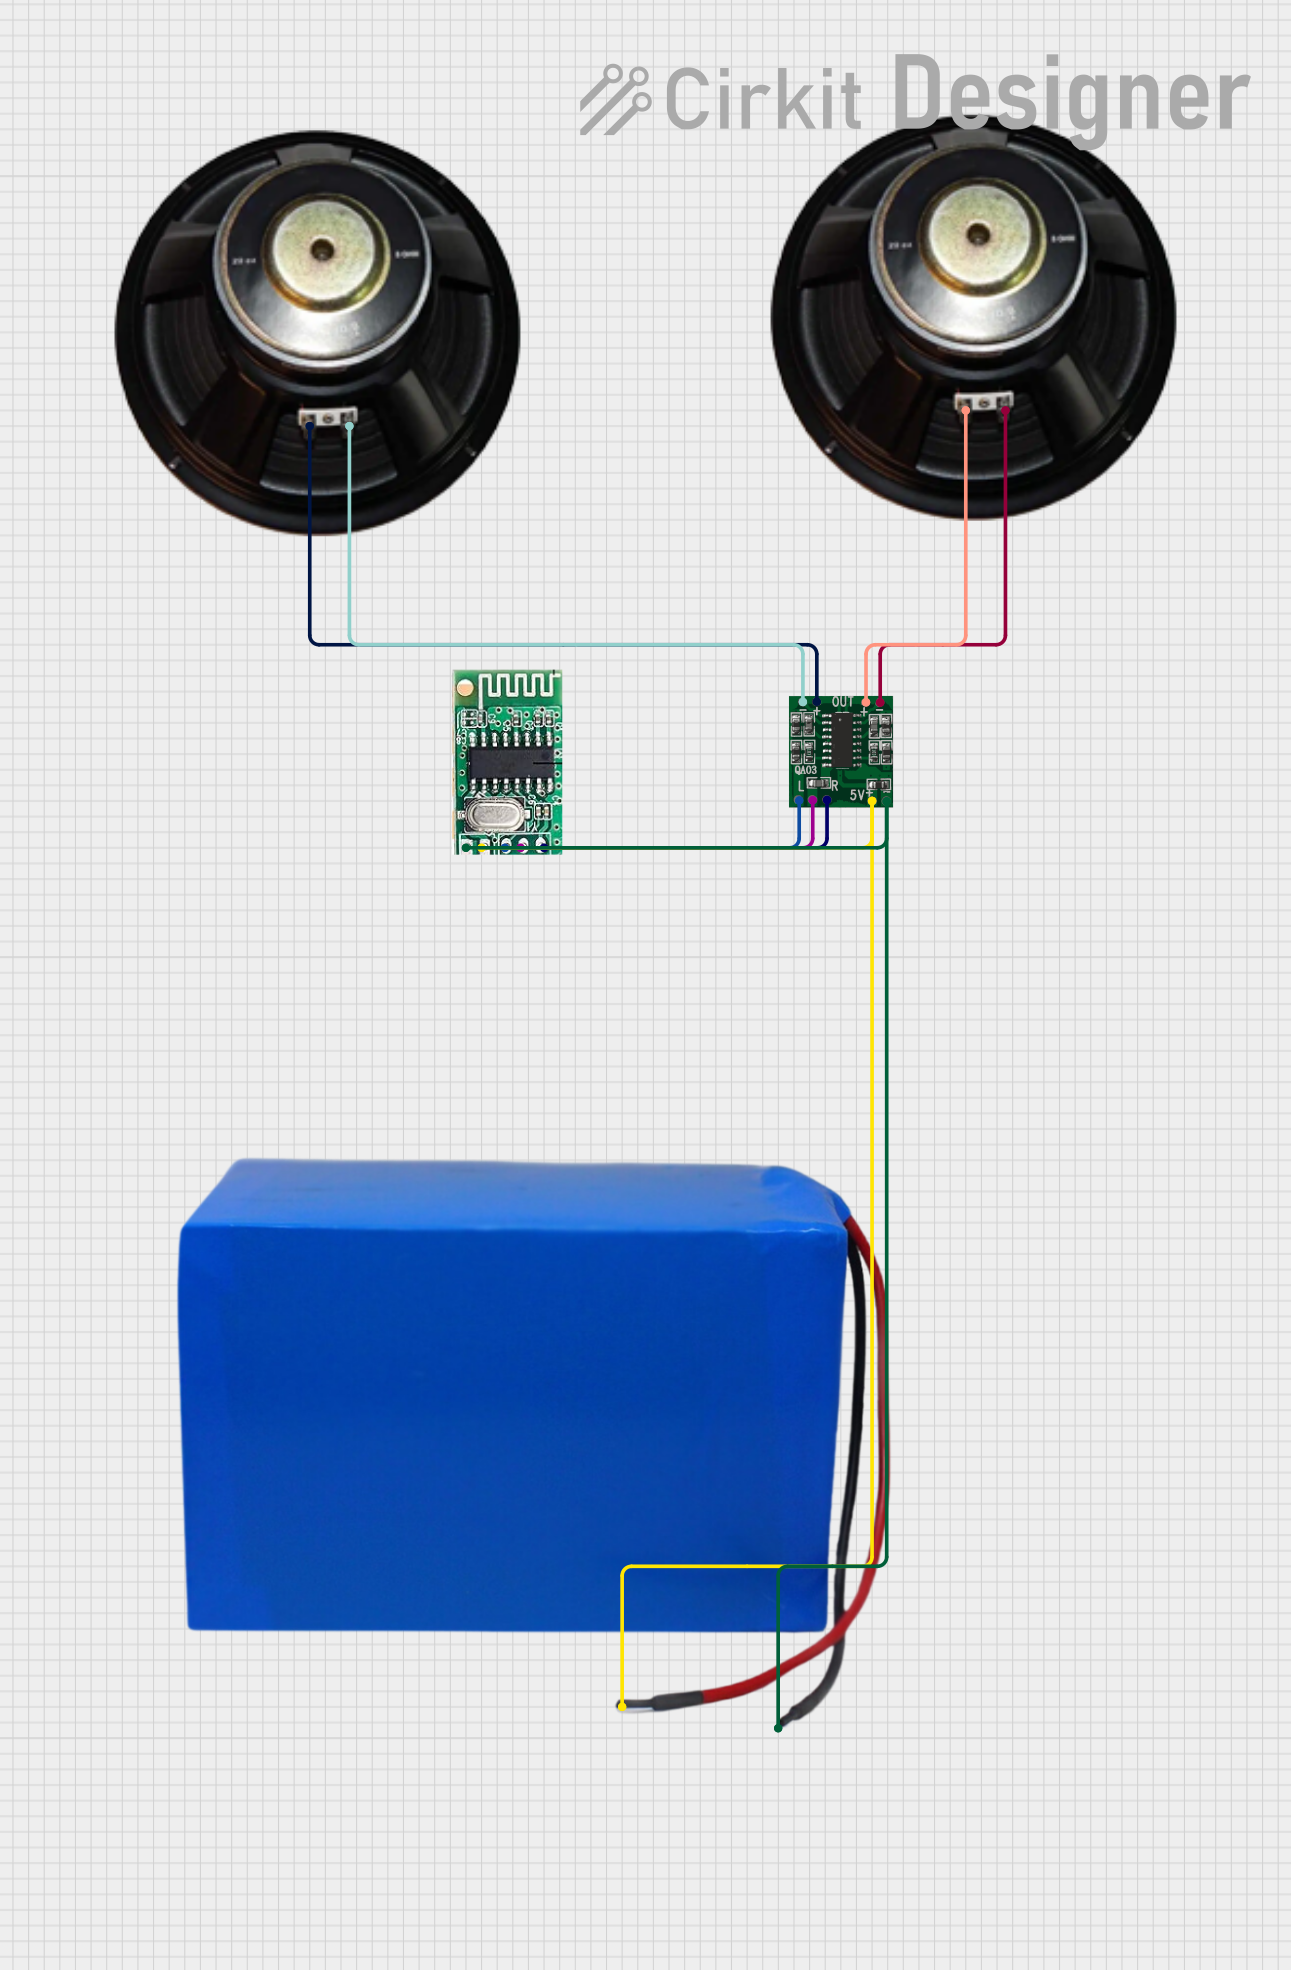
Explore Projects Built with PAM8406
Common Applications
- Portable speakers
- Bluetooth audio systems
- Soundbars
- Home audio systems
- DIY audio projects
Technical Specifications
The PAM8406 is a versatile and efficient audio amplifier with the following key specifications:
| Parameter | Value |
|---|---|
| Supply Voltage Range | 4.5V to 6V |
| Output Power | 6W per channel (at 10% THD, 4Ω) |
| Efficiency | Up to 90% |
| Total Harmonic Distortion (THD) | 0.1% (typical, 1W, 8Ω) |
| Signal-to-Noise Ratio (SNR) | 90 dB |
| Gain Settings | Adjustable via external resistors |
| Operating Temperature Range | -40°C to +85°C |
| Package Type | SOP-16 |
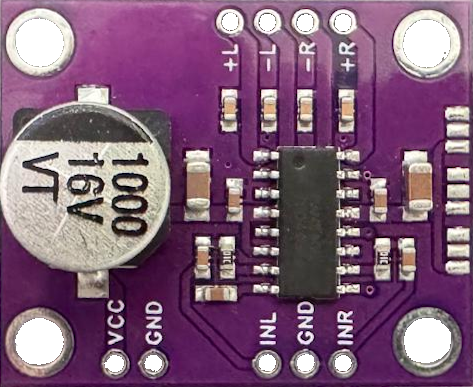
Pin Configuration and Descriptions
The PAM8406 is available in a 16-pin SOP package. The pinout and descriptions are as follows:
| Pin Number | Pin Name | Description |
|---|---|---|
| 1 | INL+ | Positive input for the left channel |
| 2 | INL- | Negative input for the left channel |
| 3 | INR+ | Positive input for the right channel |
| 4 | INR- | Negative input for the right channel |
| 5 | AVDD | Analog power supply |
| 6 | VREF | Reference voltage output |
| 7 | NC | No connection |
| 8 | GND | Ground |
| 9 | OUTR+ | Positive output for the right channel |
| 10 | OUTR- | Negative output for the right channel |
| 11 | OUTL+ | Positive output for the left channel |
| 12 | OUTL- | Negative output for the left channel |
| 13 | PVDD | Power supply for the output stage |
| 14 | MUTE | Mute control (active high) |
| 15 | SHDN | Shutdown control (active low) |
| 16 | NC | No connection |
Usage Instructions
How to Use the PAM8406 in a Circuit
- Power Supply: Connect a stable DC power supply (4.5V to 6V) to the AVDD and PVDD pins. Ensure proper decoupling capacitors (e.g., 10µF and 0.1µF) are placed close to the power pins to reduce noise.
- Audio Input: Connect the audio signal to the INL+/INL- and INR+/INR- pins. Use coupling capacitors (e.g., 1µF) to block DC offset from the input signal.
- Speaker Connection: Connect the speakers to the OUTL+/OUTL- and OUTR+/OUTR- pins. Ensure the speaker impedance matches the amplifier's specifications (4Ω or 8Ω).
- Mute and Shutdown: Use the MUTE pin to mute the output (active high) and the SHDN pin to enable/disable the amplifier (active low).
- Gain Adjustment: Adjust the gain by selecting appropriate external resistors as specified in the datasheet.
Important Considerations and Best Practices
- Thermal Management: Ensure adequate heat dissipation by using a proper PCB layout with thermal vias and copper planes.
- Decoupling: Place decoupling capacitors close to the power supply pins to minimize noise and improve stability.
- Speaker Protection: Avoid shorting the output pins to ground or each other to prevent damage to the amplifier.
- Input Signal: Ensure the input signal does not exceed the maximum allowable voltage to avoid distortion or damage.
Example: Connecting PAM8406 to an Arduino UNO
The PAM8406 can be used with an Arduino UNO to amplify audio signals. Below is an example of how to generate a simple tone using the Arduino and output it to the PAM8406:
// Example code to generate a tone using Arduino UNO and PAM8406
// Connect the Arduino's PWM pin (e.g., pin 9) to the PAM8406 input (INR+).
// Use a coupling capacitor (e.g., 1µF) between the Arduino and PAM8406 input.

const int pwmPin = 9; // PWM pin connected to PAM8406 INR+ input

void setup() {
  pinMode(pwmPin, OUTPUT); // Set the PWM pin as an output
}

void loop() {
  // Generate a 1kHz tone using PWM
  tone(pwmPin, 1000); // Output a 1kHz square wave
  delay(5000);        // Play the tone for 5 seconds
  noTone(pwmPin);     // Stop the tone
  delay(2000);        // Wait for 2 seconds before repeating
}
Note: Use a low-pass filter (e.g., an RC filter) to smooth the PWM signal before feeding it into the PAM8406 for better audio quality.
Troubleshooting and FAQs
Common Issues and Solutions
No Output Sound
- Cause: The MUTE pin is high or the SHDN pin is low.
- Solution: Ensure the MUTE pin is low and the SHDN pin is high for normal operation.
Distorted Audio
- Cause: Input signal voltage is too high or the power supply is unstable.
- Solution: Reduce the input signal amplitude and ensure a stable power supply with proper decoupling.
Overheating
- Cause: Insufficient heat dissipation or speaker impedance is too low.
- Solution: Improve thermal management and ensure the speaker impedance matches the amplifier's specifications.
Noise or Humming
- Cause: Poor grounding or inadequate decoupling.
- Solution: Check the grounding connections and add decoupling capacitors close to the power pins.
FAQs
Can the PAM8406 drive headphones?
- Yes, the PAM8406 can drive headphones, but ensure the impedance is within the supported range (typically 4Ω or higher).
What is the maximum input voltage for the audio signal?
- The maximum input voltage depends on the gain setting. Refer to the datasheet for detailed information.
Can I use the PAM8406 with a 3.3V power supply?
- No, the PAM8406 requires a minimum supply voltage of 4.5V for proper operation.
Is the PAM8406 suitable for battery-powered devices?
- Yes, the PAM8406 is highly efficient and suitable for battery-powered applications.