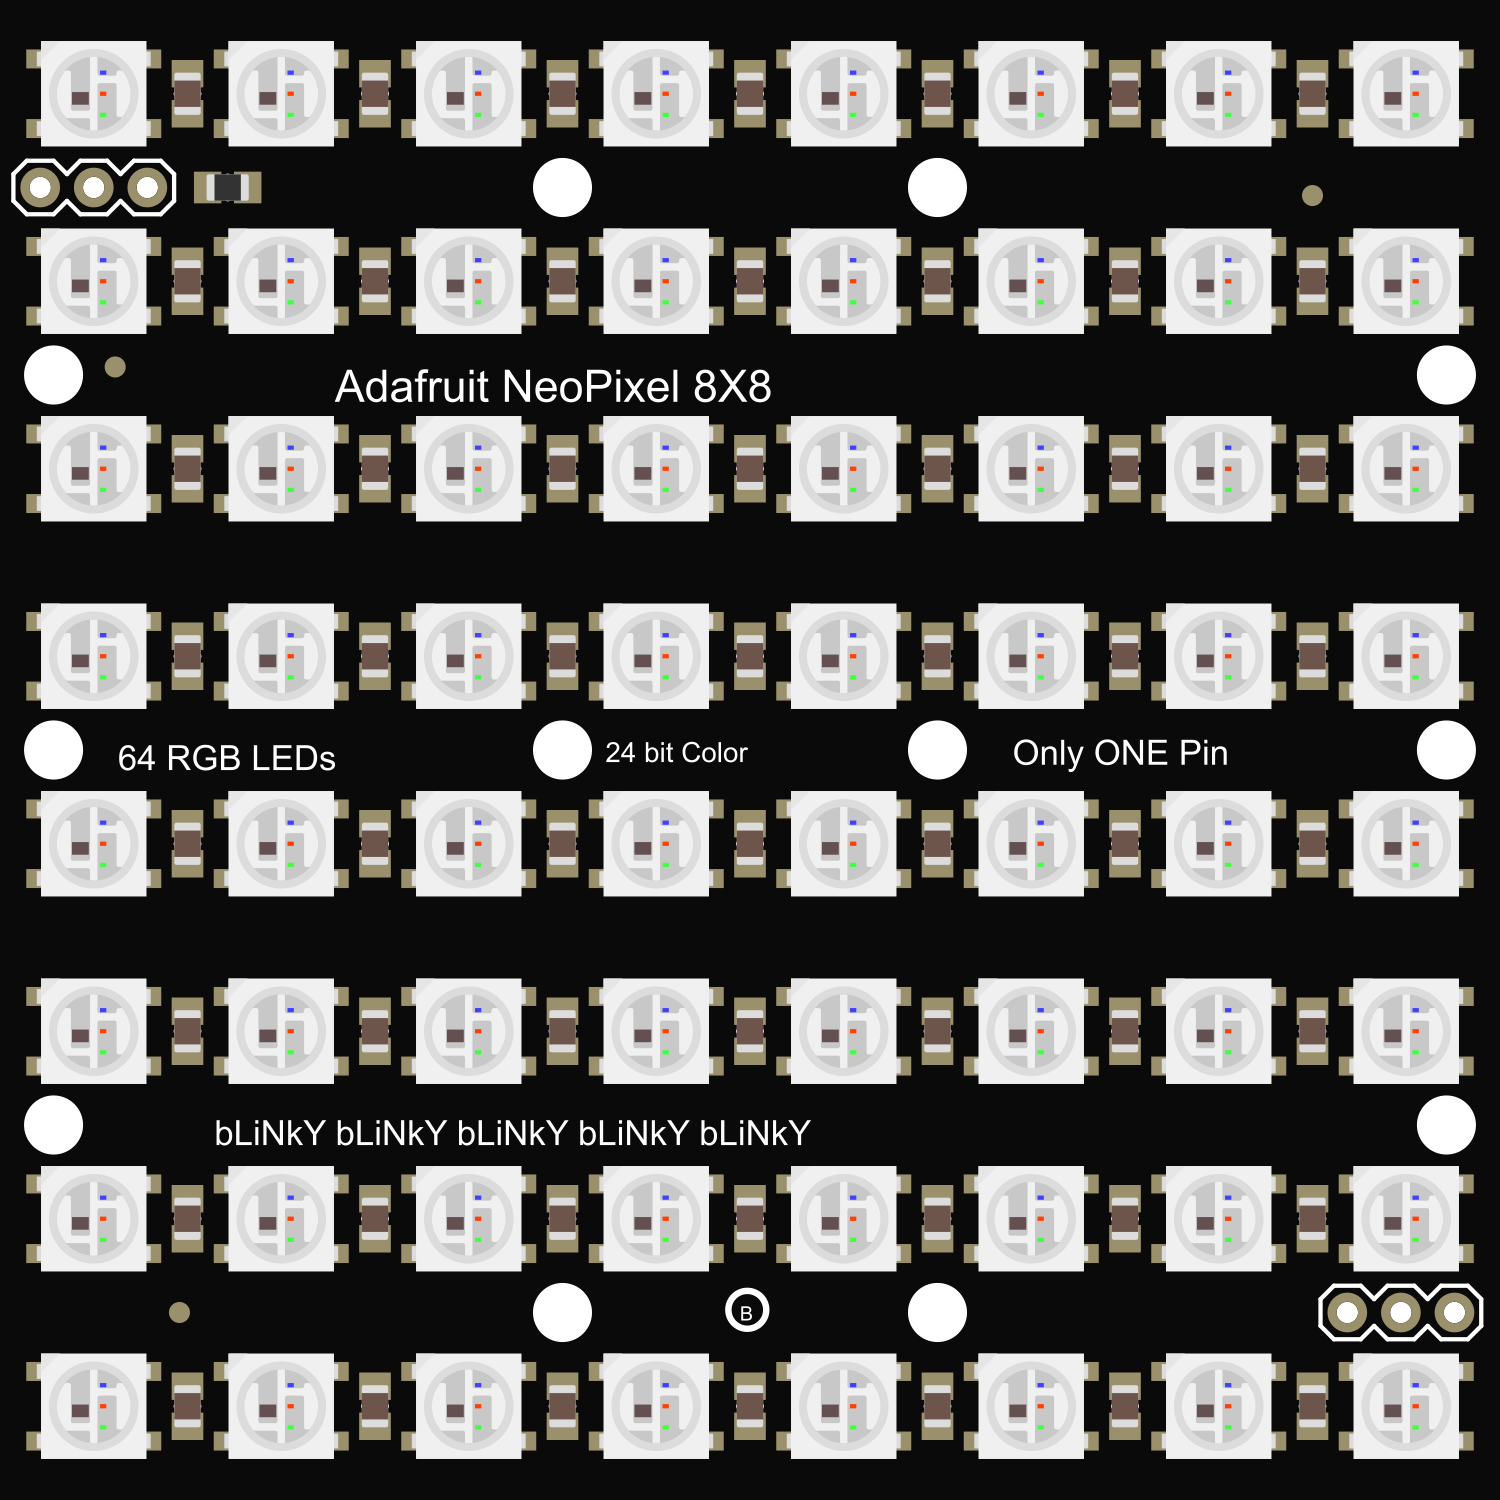
The Adafruit NeoPixel NeoMatrix 8x8 is a versatile and vibrant matrix of 64 individually addressable RGB LEDs, organized in an 8x8 grid. This component is part of the NeoPixel family, which integrates control circuitry directly into each LED, enabling users to control the color and brightness of each pixel independently. Common applications include creating colorful displays, animations, indicators, and other visually engaging projects.
Explore Projects Built with Adafruit NeoPixel NeoMatrix 8x8
Use Cirkit Designer to design, explore, and prototype these projects online. Some projects support real-time simulation. Click "Open Project" to start designing instantly!
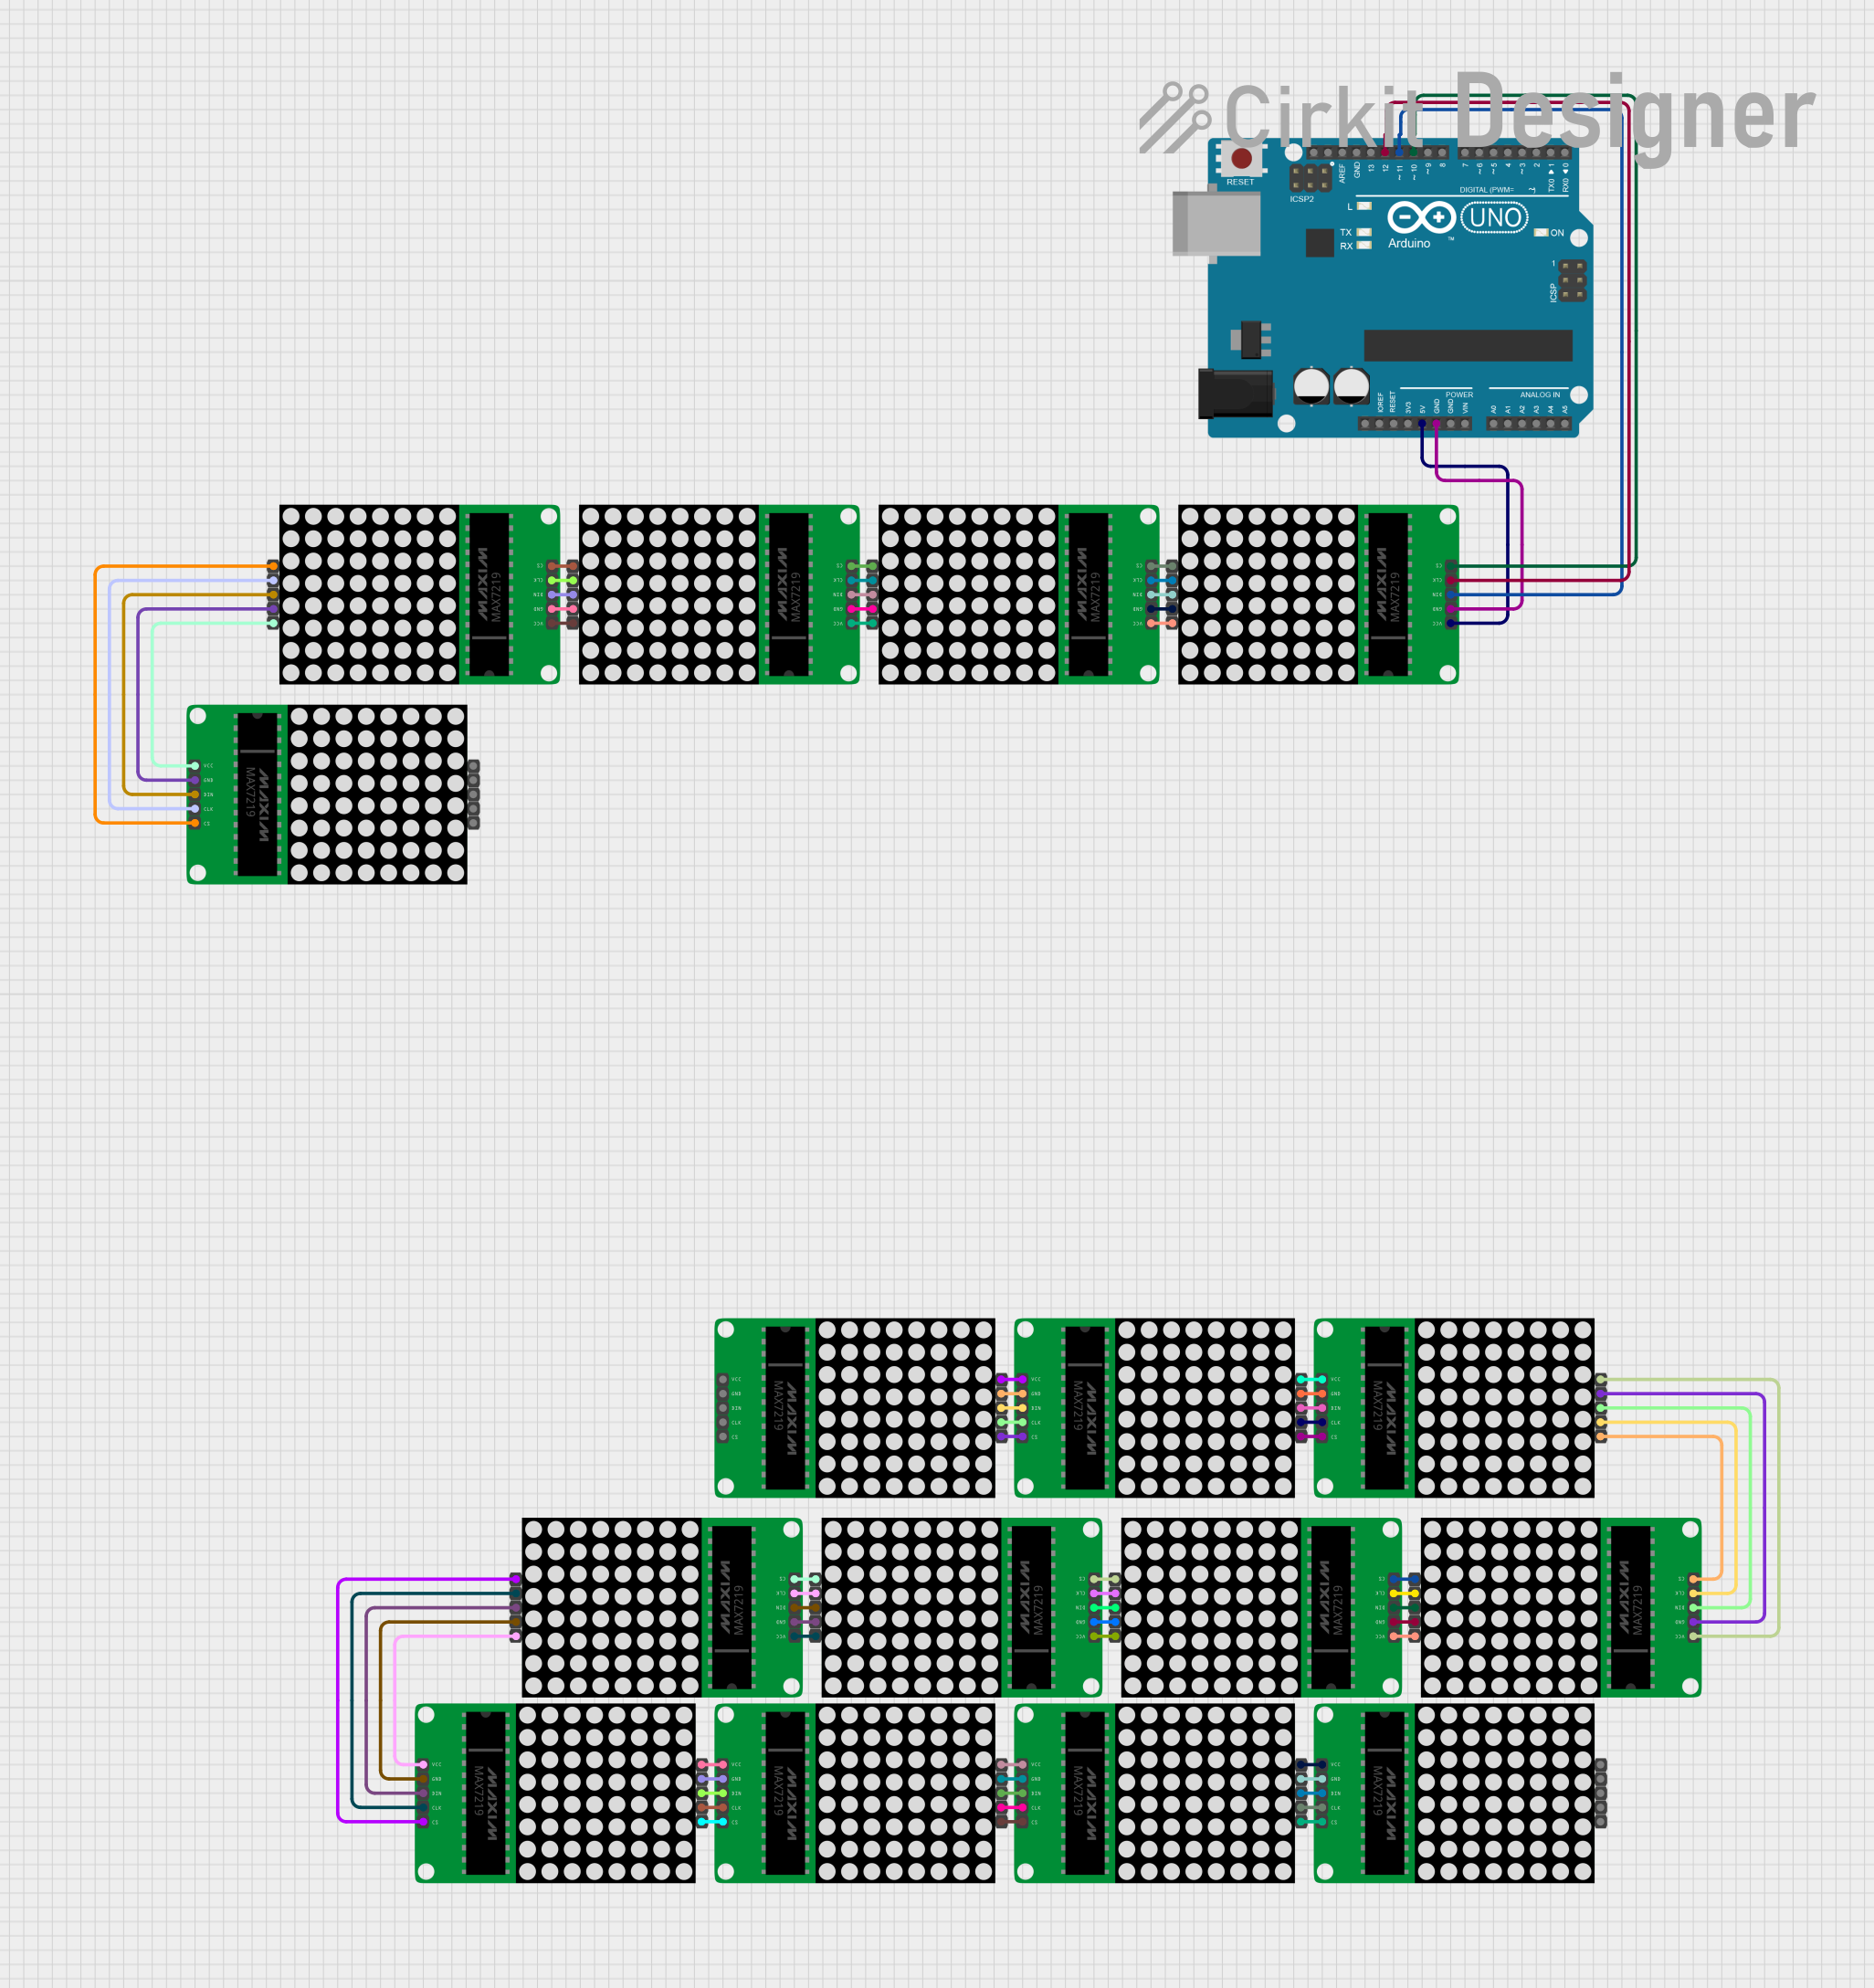
This circuit consists of an Arduino UNO microcontroller connected to multiple MAX7219 8x8 LED Matrix modules arranged in a daisy-chain configuration. The Arduino controls the LED matrices using a software-implemented SPI communication protocol, with the purpose of displaying complex patterns or animations across the combined matrix display. The provided code handles the initialization and updating of the LED matrices, creating visual effects by manipulating the framebuffer and sending the data to the LED matrices in the correct order.
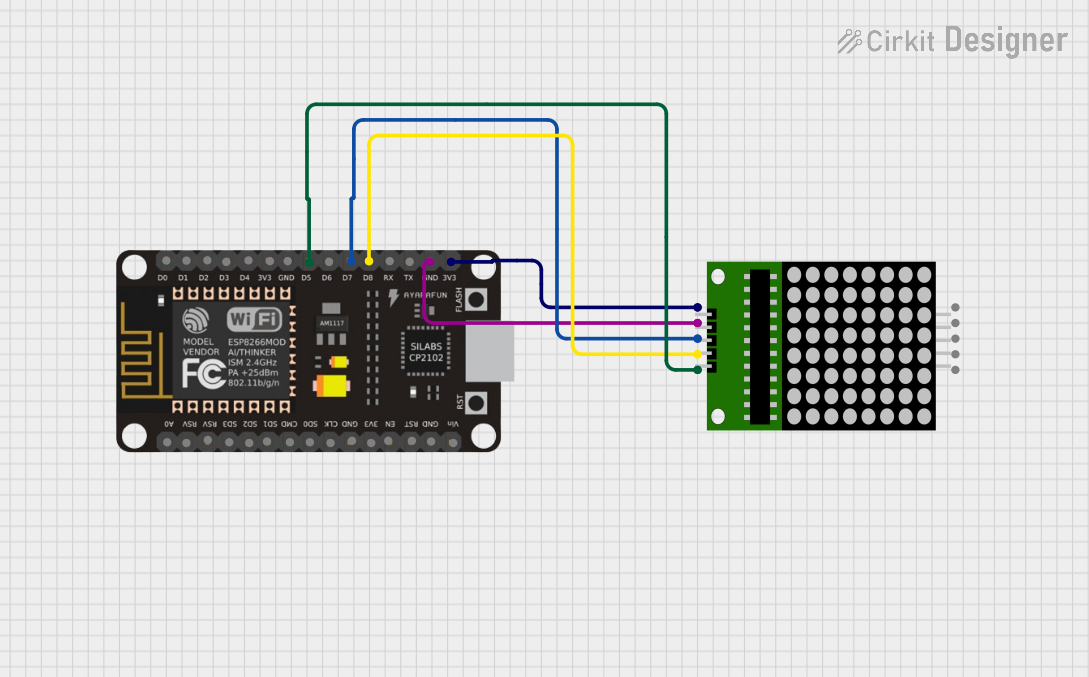
This circuit connects an ESP8266 NodeMCU microcontroller to an 8x8 LED matrix display. The NodeMCU controls the matrix using digital pins D5, D7, and D8 for chip select (CS), data input (DIN), and clock (CLK) signals, respectively. The circuit is designed to display patterns or characters on the LED matrix, which are driven by the microcontroller.
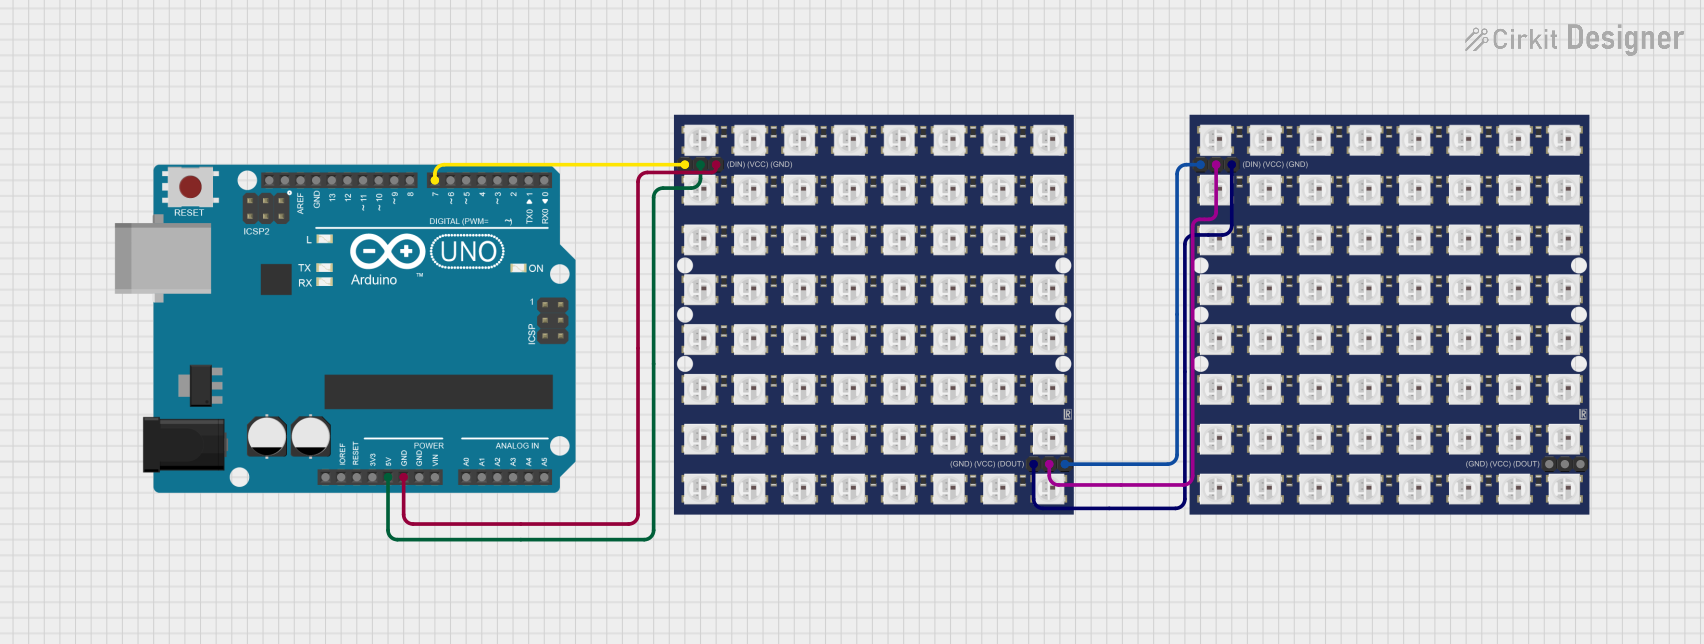
This circuit consists of an Arduino UNO microcontroller connected to two daisy-chained WS2812 RGB LED 8x8 matrices. The Arduino controls the LED matrices to display patterns that simulate a slow blinking human eyes effect. The code for the Arduino is written to create and cycle through different eye patterns, varying from open to half-closed to closed, to achieve the blinking effect.
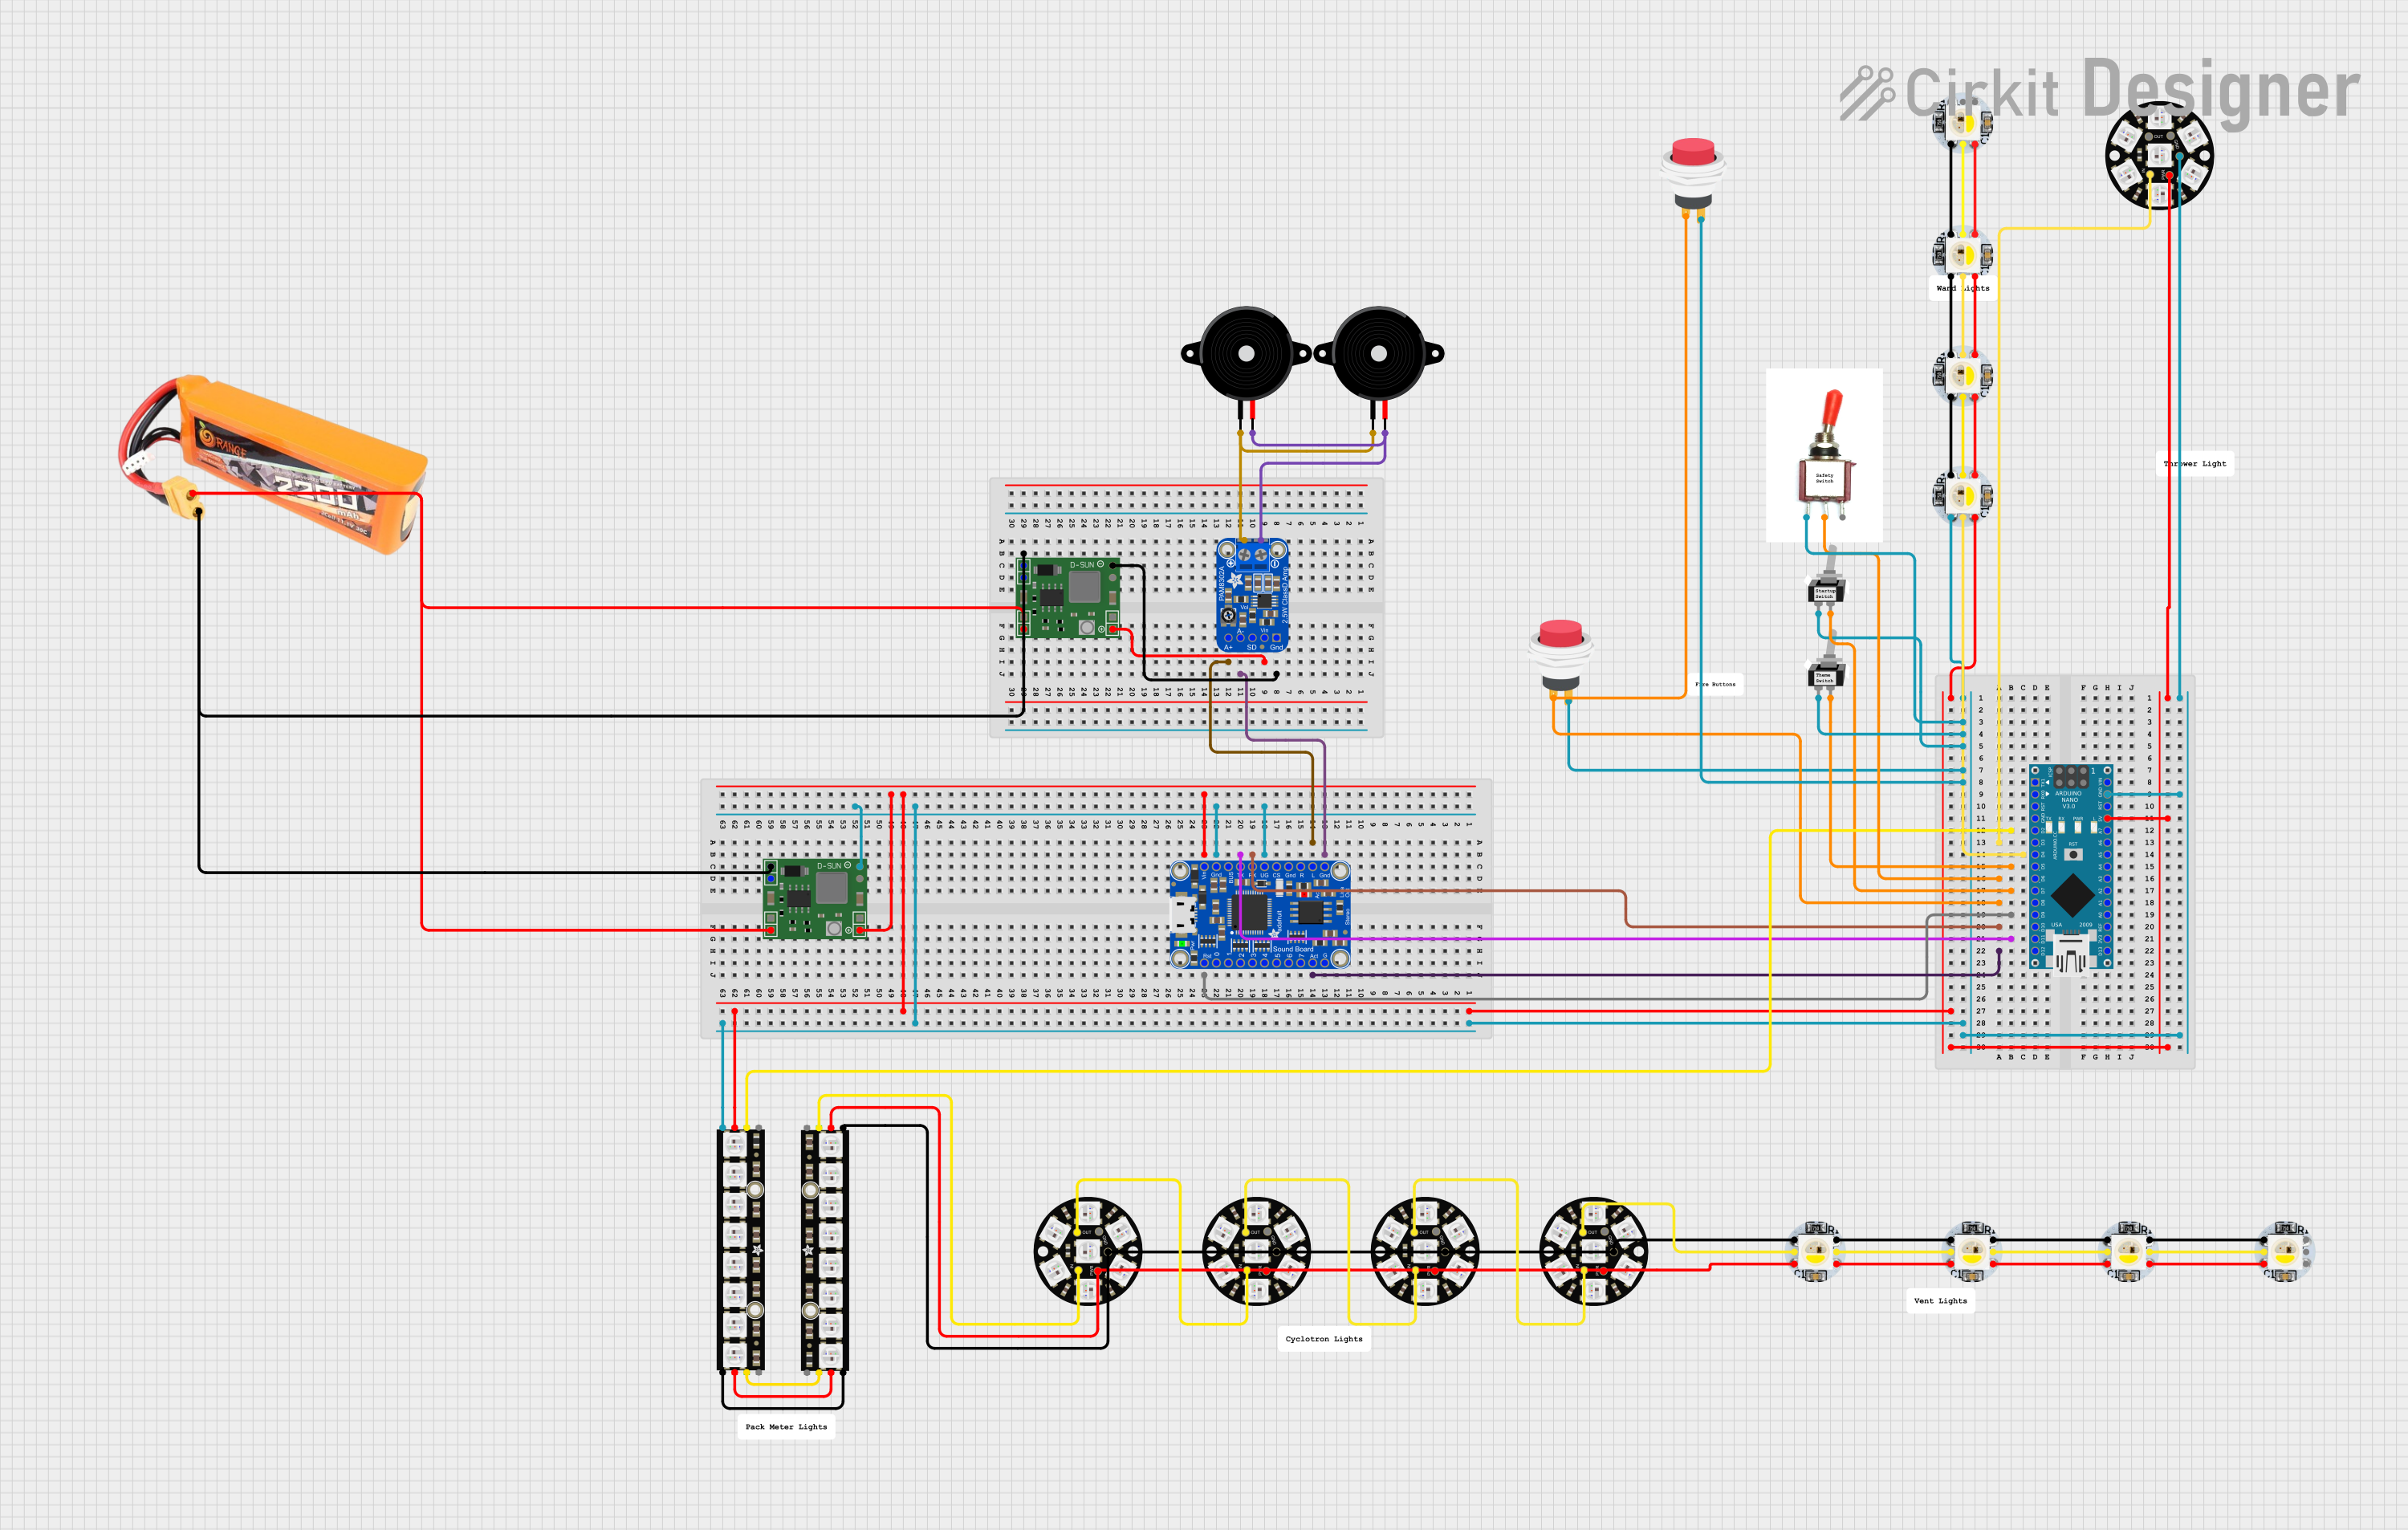
This circuit features an Arduino Nano microcontroller connected to a series of WS2812B LEDs, Adafruit NeoPixel Jewels, and Sticks, forming an addressable LED array. The Arduino controls the LED patterns and sequences, and interfaces with an Adafruit Audio FX Mini Sound Board for audio playback, which is amplified by an Adafruit PAM8302 amplifier connected to piezo speakers. The circuit includes toggle and push switches for user interaction, and uses a lipo battery with MP1584EN power regulators for power management. The embedded code on the Arduino facilitates complex lighting effects and sound playback, responding to switch states and button presses to create an interactive experience.
Power Consumption: Up to ~1.15A at full brightness (all LEDs)
Communication Protocol: Single-wire digital control (WS2812B protocol)
Operating Temperature: -25°C to 80°C
Pin Configuration and Descriptions
Pin
Description
5V
Power supply voltage (4.5V to 5.5V)
GND
Ground
DIN
Data input from microcontroller
DOUT
Data output for cascading multiple matrices
Usage Instructions
Connecting to a Circuit
Power Supply: Connect the 5V and GND pins to a suitable 5V power supply. Ensure that the power supply can handle the maximum current draw.
Data Signal: Connect the DIN pin to a digital output pin on your microcontroller, such as an Arduino UNO.
Cascading Matrices: If you're using multiple matrices, connect the DOUT pin of the first matrix to the DIN pin of the next.
Important Considerations and Best Practices
Power Requirements: Always provide a sufficient power supply that can handle the current requirements, especially when all LEDs are at full brightness.
Level Shifting: If using a 3.3V microcontroller, use a level shifter to bring the data signal up to 5V.
Capacitor: Place a 1000µF capacitor across the power supply pins as close to the matrix as possible to smooth out power supply fluctuations.
Resistor: Add a 300-500 Ohm resistor on the data input line to prevent spikes that can damage the first LED.
Refresh Rate: To avoid flickering, maintain a high refresh rate, typically by updating the matrix at least 30 times per second.
Example Arduino Code
#include <Adafruit_NeoPixel.h>

#define PIN            6 // Define the pin for data input
#define NUMPIXELS      64 // Number of pixels in the NeoMatrix

Adafruit_NeoPixel pixels = Adafruit_NeoPixel(NUMPIXELS, PIN, NEO_GRB + NEO_KHZ800);

void setup() {
  pixels.begin(); // Initialize the NeoPixel matrix
  pixels.show(); // Initialize all pixels to 'off'
}

void loop() {
  for(int i=0; i<NUMPIXELS; i++) {
    pixels.setPixelColor(i, pixels.Color(150, 0, 90)); // Set color to purple
    pixels.show(); // Update the matrix to show the new color
    delay(50); // Delay for visibility
    pixels.setPixelColor(i, pixels.Color(0, 0, 0)); // Turn off the pixel
  }
}
Troubleshooting and FAQs
Common Issues
LEDs Not Lighting Up: Ensure that the power supply is correctly connected and rated for the current draw. Check the data input connection and ensure the correct pin is being used in the code.
Flickering LEDs: This can be due to an insufficient refresh rate or power supply fluctuations. Ensure the code updates the matrix frequently and that a capacitor is used to stabilize the power supply.
Incorrect Colors: Verify that the correct color order (e.g., GRB) is specified in the code. Adjust the color order if necessary.
Solutions and Tips
Power Supply Issues: If the LEDs are dim or flickering, consider using a separate power supply for the matrix, especially when using multiple matrices.
Data Signal Integrity: Keep the data line as short as possible to prevent signal degradation. Use a level shifter if necessary.
Code Debugging: Use serial output to debug the code and ensure that the correct values are being sent to the matrix.
FAQs
Q: Can I control each LED individually?
A: Yes, each LED can be controlled individually with its own color and brightness.
Q: How do I cascade multiple NeoMatrix panels?
A: Connect the DOUT pin of one matrix to the DIN pin of the next. Ensure your microcontroller code addresses the increased number of LEDs.
Q: What is the maximum number of matrices I can cascade?
A: The maximum is limited by the power supply and the microcontroller's memory. Ensure that the power supply can handle the current for all cascaded matrices and that the microcontroller has enough memory to store the LED color data.

 Open Project in Cirkit Designer