Cirkit Designer Logo
Cirkit Designer
Your all-in-one circuit design IDE
Home / 
Component Documentation

How to Use motor VEX 2-were 393: Examples, Pinouts, and Specs

Image of motor VEX 2-were 393
Cirkit Designer LogoDesign with motor VEX 2-were 393 in Cirkit Designer

Introduction

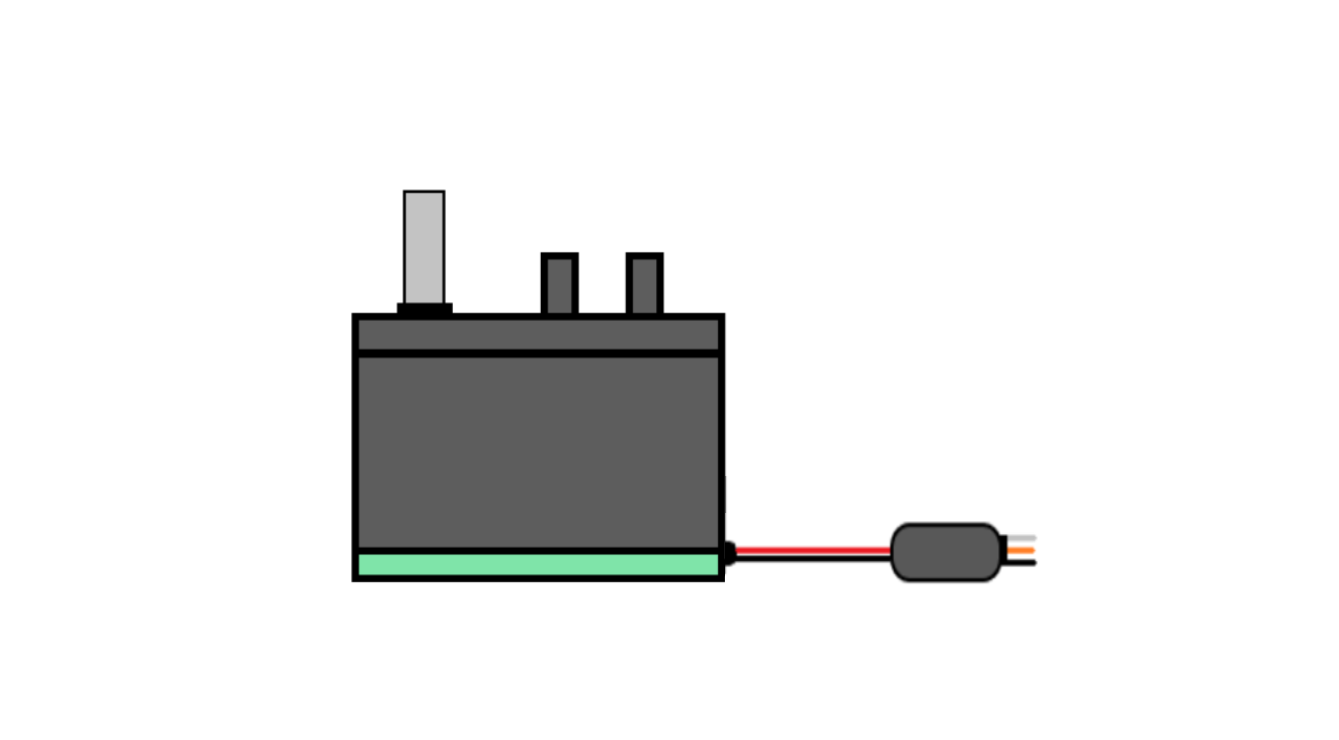
The Motor VEX 2-Wire 393 is a versatile DC motor designed for use in robotics and other mechanical systems. Manufactured by Arduino (Part ID: MEGA), this motor is known for its reliability, efficiency, and ease of integration. Its 2-wire connection simplifies control system integration, making it a popular choice for hobbyists and professionals alike.

Explore Projects Built with motor VEX 2-were 393

Use Cirkit Designer to design, explore, and prototype these projects online. Some projects support real-time simulation. Click "Open Project" to start designing instantly!
Arduino 101 Battery-Powered Robotic Vehicle with Distance Sensing
Image of Mobil Wall Follower_Kelompok 4_Siskon: A project utilizing motor VEX 2-were 393 in a practical application
This circuit is a motor control system using an Arduino 101 to drive two gear motors with integrated encoders via an L298N motor driver. It also includes a VL53L0X distance sensor for obstacle detection, powered by a 2x 18650 battery pack through a power jack.
Cirkit Designer LogoOpen Project in Cirkit Designer
Nucleo 401RE Controlled Robotic Motor with Vibration Feedback and ADXL345 Accelerometer
Image of MLKIT: A project utilizing motor VEX 2-were 393 in a practical application
This circuit features a Nucleo 401RE microcontroller as the central processing unit, interfacing with an ADXL345 accelerometer and an INA219 current sensor over an I2C bus for motion sensing and power monitoring, respectively. A DC motor with an encoder is driven by an L298N motor driver, with speed control potentially provided by a connected potentiometer and vibration feedback through a vibration motor. The system is powered by a 12V battery, with voltage regulation provided for the various components.
Cirkit Designer LogoOpen Project in Cirkit Designer
Arduino UNO Controlled Robotic Car with L298N Motor Driver and LM393 Sensors
Image of Copy of  Robot Bluetooth car: A project utilizing motor VEX 2-were 393 in a practical application
This circuit is designed to control a two-wheeled robotic car using an Arduino UNO microcontroller and an L298N DC motor driver. The Arduino receives commands via Bluetooth to drive two motors connected to the L298N, allowing the car to move forward, backward, and turn left or right. Additionally, two LM393 sensors are connected to the Arduino's analog inputs for potential obstacle detection or line following capabilities.
Cirkit Designer LogoOpen Project in Cirkit Designer
ESP32 and L298N Motor Driver-Based Wi-Fi Controlled Robotic Vehicle with GPS and Metal Detection
Image of Revolutioning Demining: AI Powered Landmine Detection: A project utilizing motor VEX 2-were 393 in a practical application
This circuit is a robotic vehicle control system that uses an ESP32 microcontroller to drive four DC gear motors via an L298N motor driver. It also includes a GPS module for location tracking, a metal detector for object detection, and an ESP32 CAM for capturing images or video, all powered by a 12V battery.
Cirkit Designer LogoOpen Project in Cirkit Designer

Explore Projects Built with motor VEX 2-were 393

Use Cirkit Designer to design, explore, and prototype these projects online. Some projects support real-time simulation. Click "Open Project" to start designing instantly!
Image of Mobil Wall Follower_Kelompok 4_Siskon: A project utilizing motor VEX 2-were 393 in a practical application
Arduino 101 Battery-Powered Robotic Vehicle with Distance Sensing
This circuit is a motor control system using an Arduino 101 to drive two gear motors with integrated encoders via an L298N motor driver. It also includes a VL53L0X distance sensor for obstacle detection, powered by a 2x 18650 battery pack through a power jack.
Cirkit Designer LogoOpen Project in Cirkit Designer
Image of MLKIT: A project utilizing motor VEX 2-were 393 in a practical application
Nucleo 401RE Controlled Robotic Motor with Vibration Feedback and ADXL345 Accelerometer
This circuit features a Nucleo 401RE microcontroller as the central processing unit, interfacing with an ADXL345 accelerometer and an INA219 current sensor over an I2C bus for motion sensing and power monitoring, respectively. A DC motor with an encoder is driven by an L298N motor driver, with speed control potentially provided by a connected potentiometer and vibration feedback through a vibration motor. The system is powered by a 12V battery, with voltage regulation provided for the various components.
Cirkit Designer LogoOpen Project in Cirkit Designer
Image of Copy of  Robot Bluetooth car: A project utilizing motor VEX 2-were 393 in a practical application
Arduino UNO Controlled Robotic Car with L298N Motor Driver and LM393 Sensors
This circuit is designed to control a two-wheeled robotic car using an Arduino UNO microcontroller and an L298N DC motor driver. The Arduino receives commands via Bluetooth to drive two motors connected to the L298N, allowing the car to move forward, backward, and turn left or right. Additionally, two LM393 sensors are connected to the Arduino's analog inputs for potential obstacle detection or line following capabilities.
Cirkit Designer LogoOpen Project in Cirkit Designer
Image of Revolutioning Demining: AI Powered Landmine Detection: A project utilizing motor VEX 2-were 393 in a practical application
ESP32 and L298N Motor Driver-Based Wi-Fi Controlled Robotic Vehicle with GPS and Metal Detection
This circuit is a robotic vehicle control system that uses an ESP32 microcontroller to drive four DC gear motors via an L298N motor driver. It also includes a GPS module for location tracking, a metal detector for object detection, and an ESP32 CAM for capturing images or video, all powered by a 12V battery.
Cirkit Designer LogoOpen Project in Cirkit Designer

Common Applications and Use Cases

  • Robotics: Driving wheels, arms, and other mechanical components.
  • Conveyor systems: Powering small-scale conveyor belts.
  • Automated systems: Actuating mechanisms in automated devices.
  • Educational projects: Ideal for learning about motor control and robotics.

Technical Specifications

The following table outlines the key technical details of the Motor VEX 2-Wire 393:

Parameter Value
Operating Voltage 7.2V (Nominal), 4.0V - 12.0V
Stall Current 4.8A
Stall Torque 13.5 kg·cm
Free Speed (High Torque) 100 RPM
Free Speed (High Speed) 160 RPM
Power Output 4.3W
Motor Type Brushed DC Motor
Weight 0.17 lbs (77 g)

Pin Configuration and Descriptions

The Motor VEX 2-Wire 393 has a simple 2-wire connection for power and control. The pin configuration is as follows:

Wire Color Function
Red Positive Voltage (+)
Black Ground (-)

Usage Instructions

How to Use the Motor in a Circuit

  1. Power Supply: Connect the motor to a power source within the operating voltage range (4.0V to 12.0V). A 7.2V battery is recommended for optimal performance.
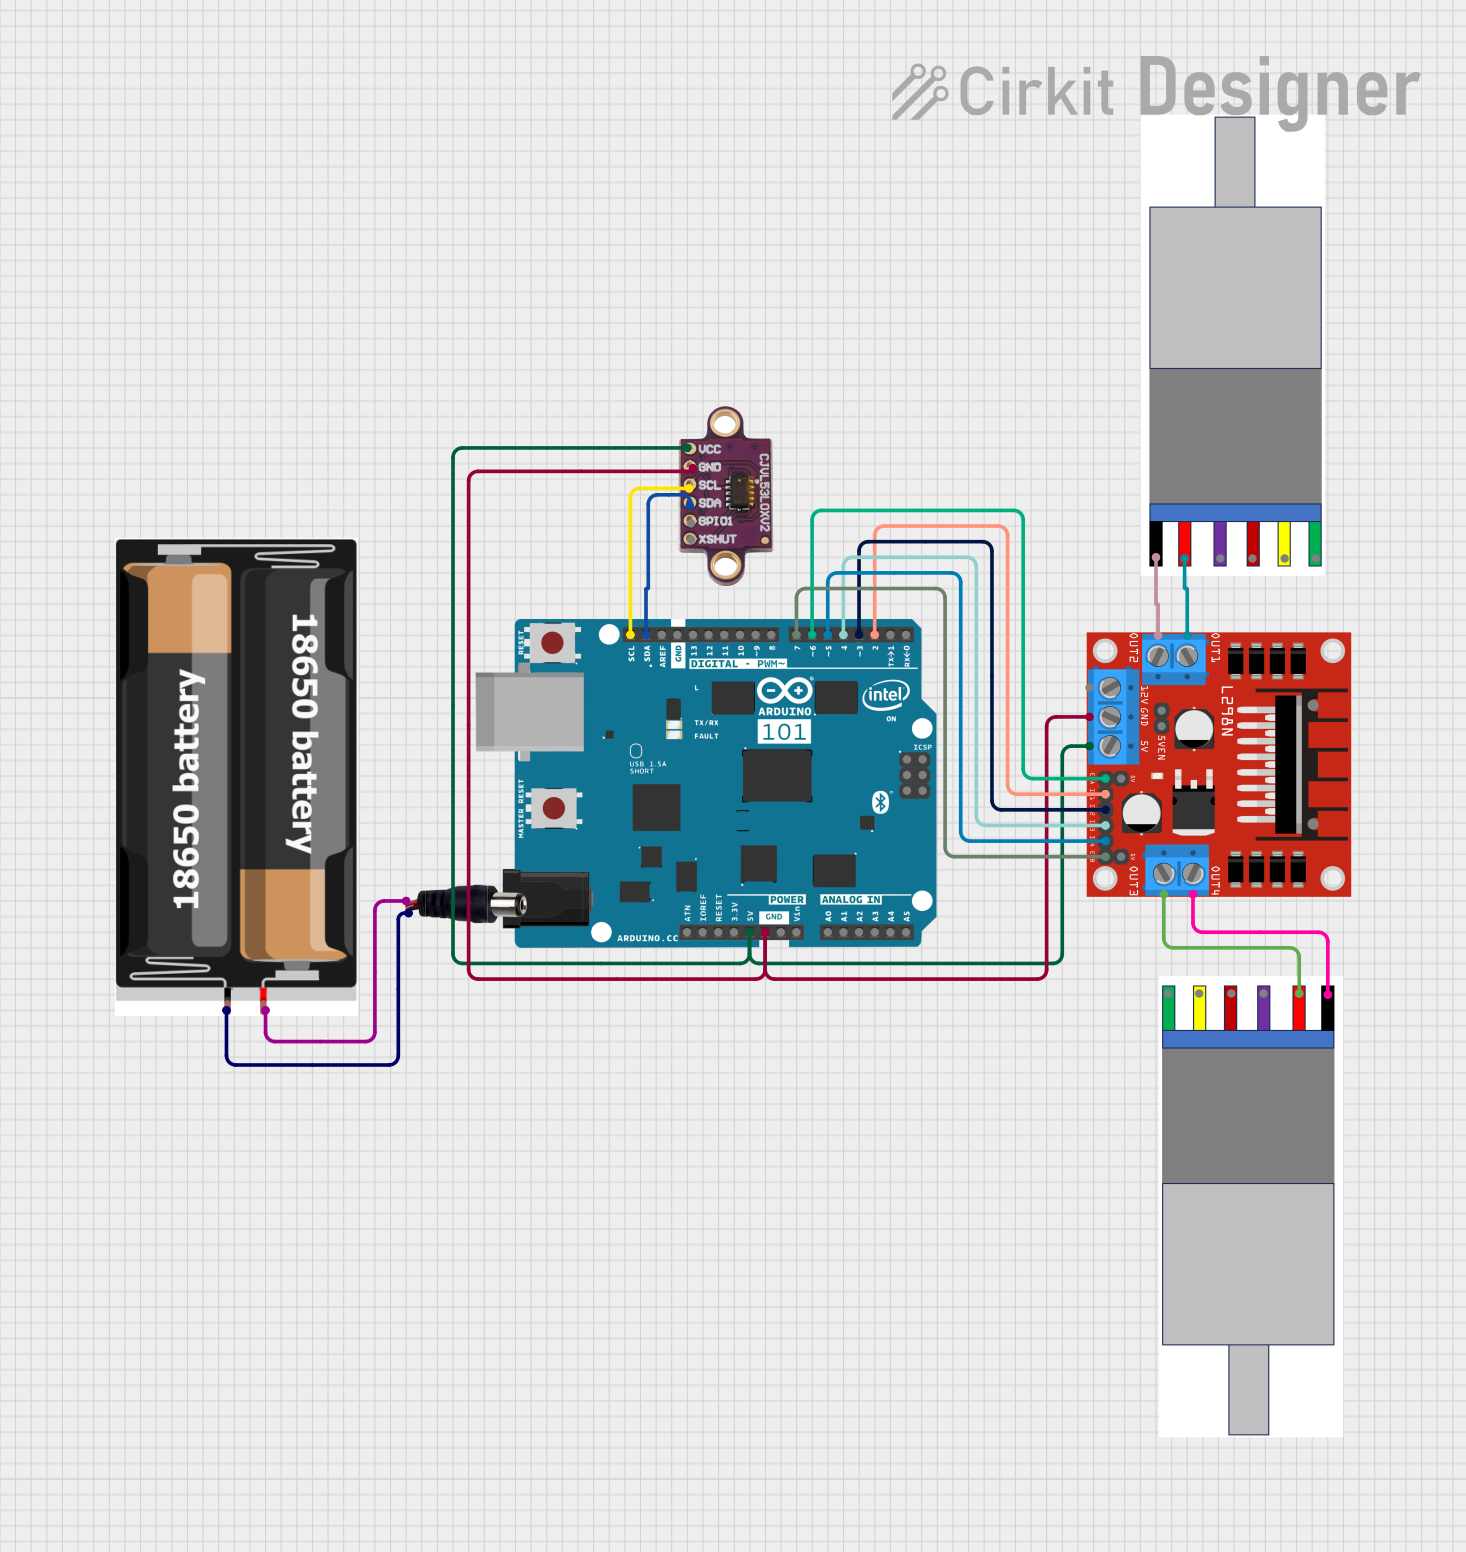
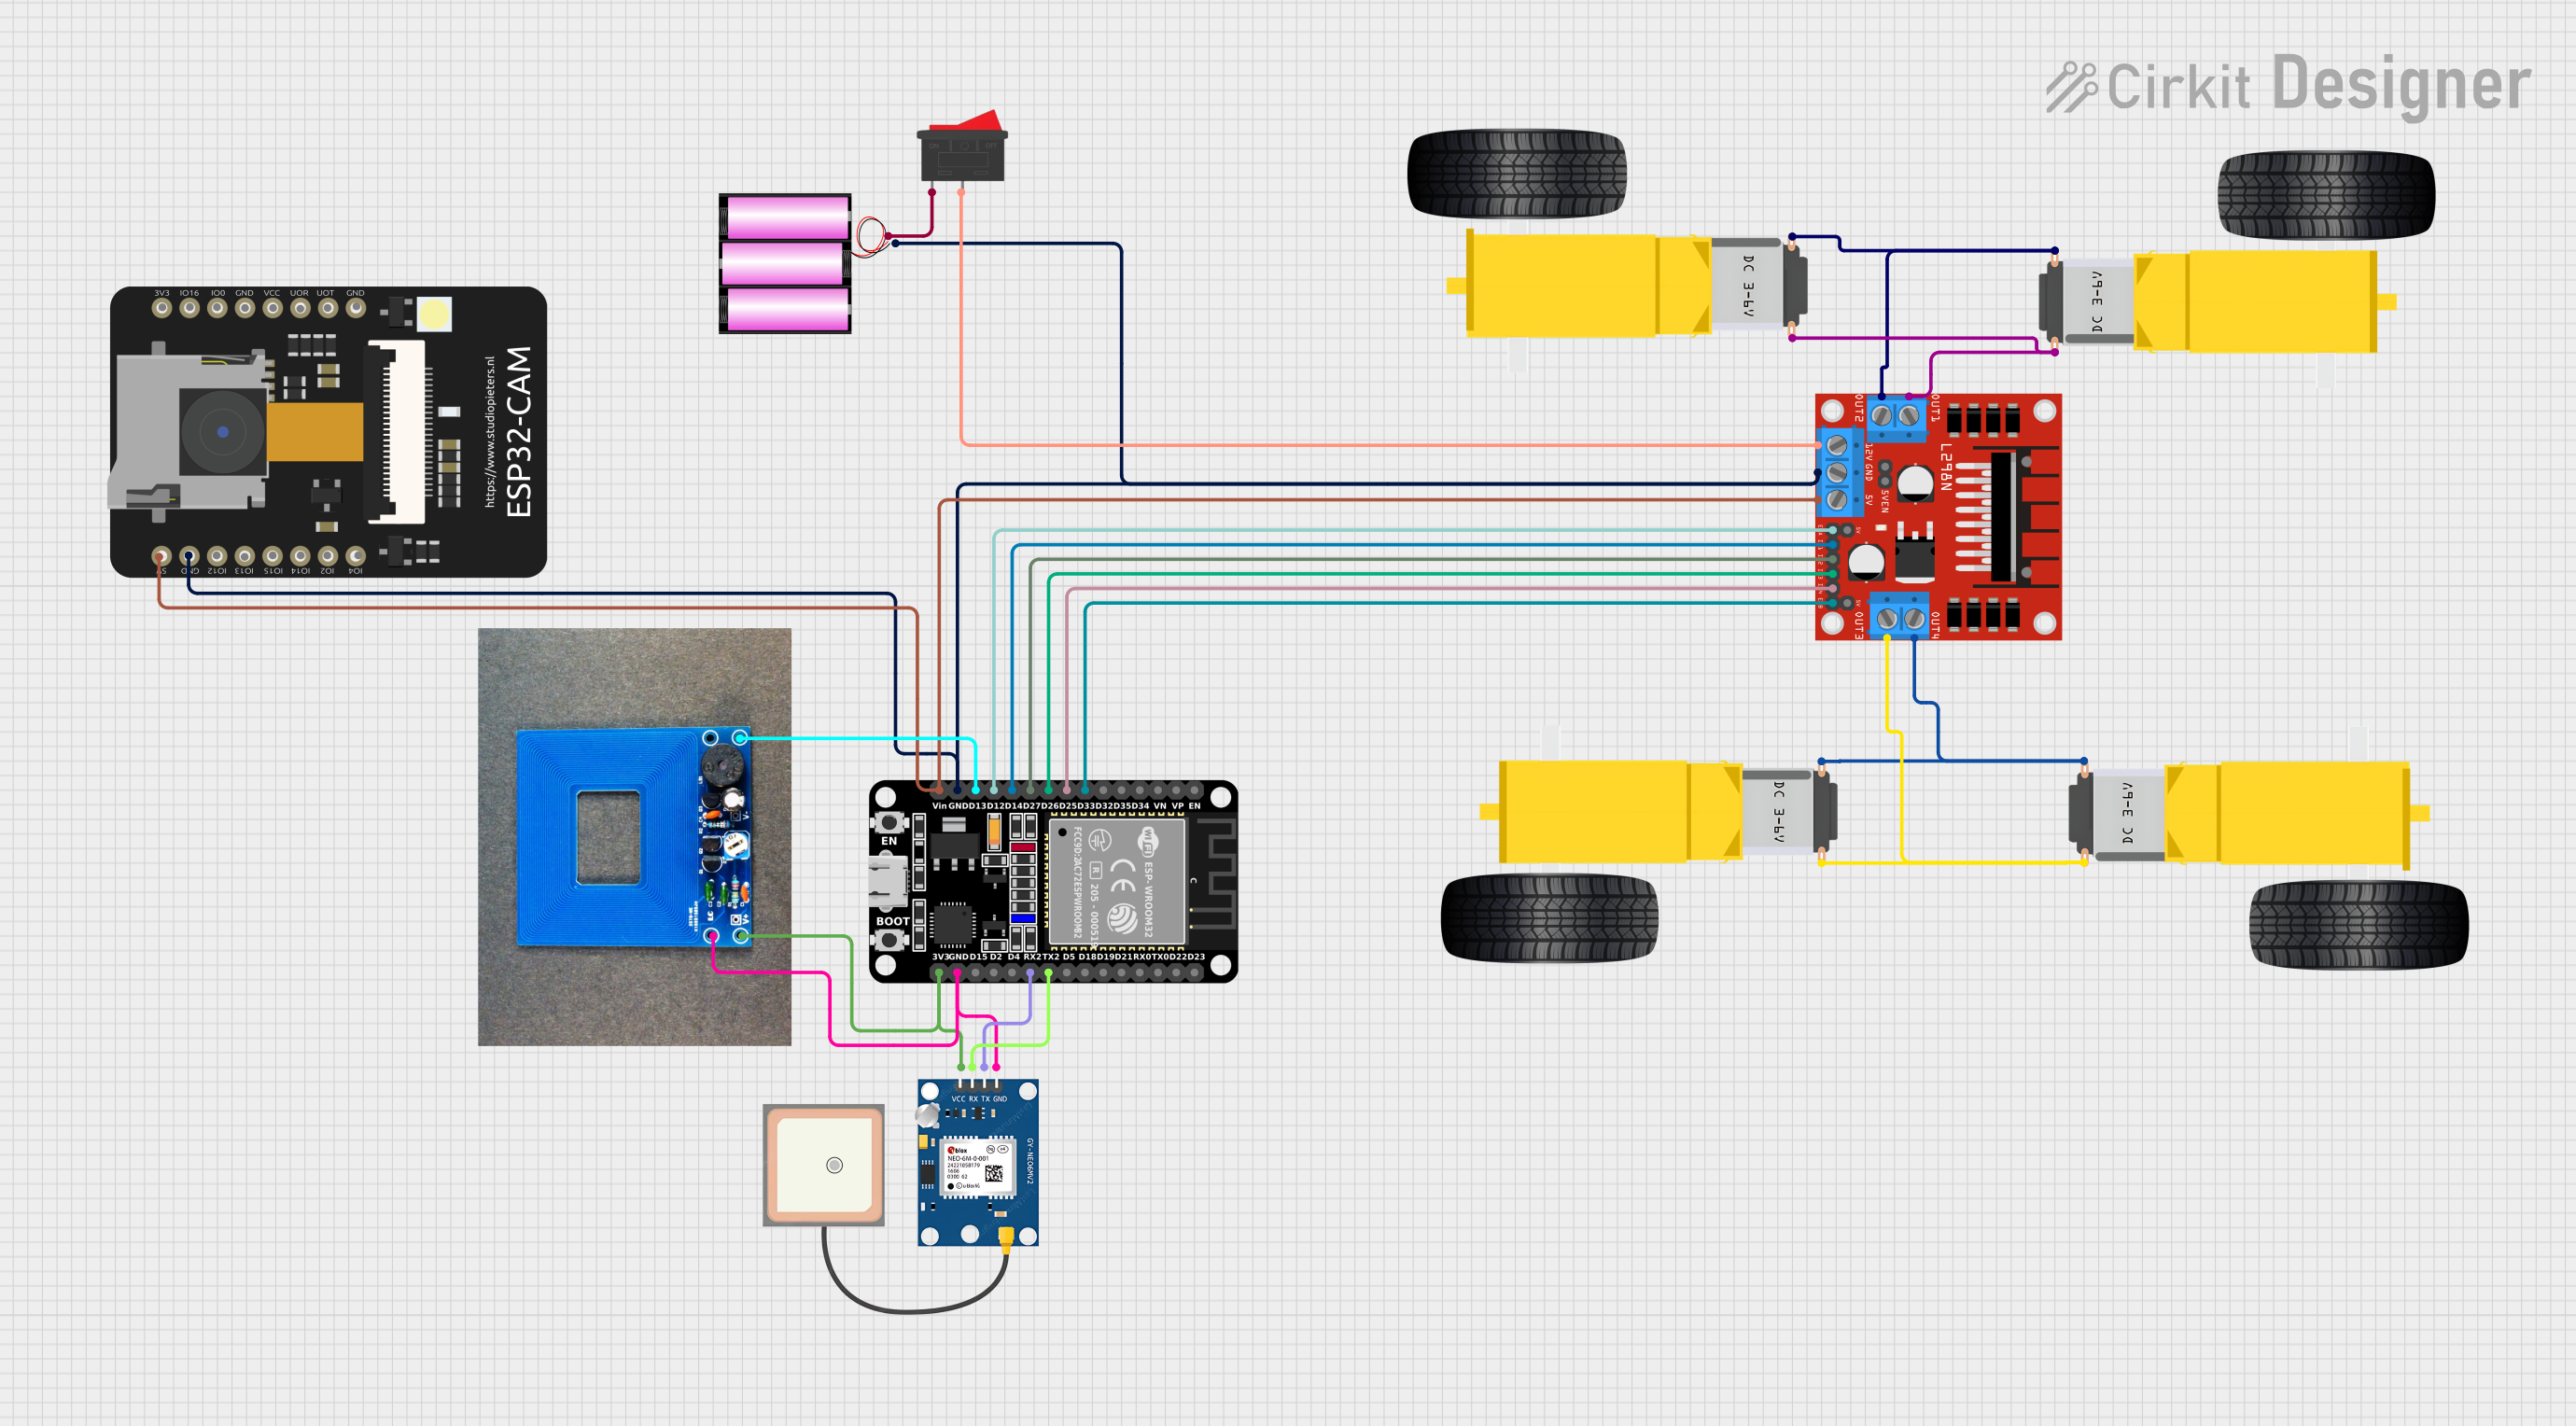
  2. Motor Controller: Use a motor driver or H-bridge (e.g., L298N or L293D) to control the motor's speed and direction. Directly connecting the motor to a microcontroller is not recommended due to high current requirements.
  3. Connections:
    • Connect the red wire to the motor driver's output terminal for positive voltage.
    • Connect the black wire to the motor driver's ground terminal.
  4. Control Signals: Use PWM (Pulse Width Modulation) signals from a microcontroller (e.g., Arduino MEGA) to control the motor's speed.

Important Considerations and Best Practices

  • Current Handling: Ensure the motor driver can handle the stall current (4.8A) to prevent damage.
  • Heat Dissipation: Prolonged use at high loads may cause the motor to heat up. Allow for adequate cooling.
  • Direction Control: Reverse the polarity of the wires to change the motor's direction.
  • Gear Ratios: The motor supports interchangeable gear cartridges for adjusting speed and torque.

Example Code for Arduino MEGA

Below is an example of how to control the Motor VEX 2-Wire 393 using an Arduino MEGA and an L298N motor driver:

// Define motor control pins
const int motorEnablePin = 9;  // PWM pin for speed control
const int motorInput1 = 7;     // Input 1 for direction control
const int motorInput2 = 8;     // Input 2 for direction control

void setup() {
  // Set motor control pins as outputs
  pinMode(motorEnablePin, OUTPUT);
  pinMode(motorInput1, OUTPUT);
  pinMode(motorInput2, OUTPUT);
}

void loop() {
  // Rotate motor forward
  digitalWrite(motorInput1, HIGH);  // Set Input 1 HIGH
  digitalWrite(motorInput2, LOW);   // Set Input 2 LOW
  analogWrite(motorEnablePin, 128); // Set speed (0-255)

  delay(2000); // Run motor for 2 seconds

  // Rotate motor backward
  digitalWrite(motorInput1, LOW);   // Set Input 1 LOW
  digitalWrite(motorInput2, HIGH);  // Set Input 2 HIGH
  analogWrite(motorEnablePin, 128); // Set speed (0-255)

  delay(2000); // Run motor for 2 seconds

  // Stop motor
  digitalWrite(motorInput1, LOW);   // Set Input 1 LOW
  digitalWrite(motorInput2, LOW);   // Set Input 2 LOW
  analogWrite(motorEnablePin, 0);   // Set speed to 0

  delay(2000); // Wait for 2 seconds
}

Troubleshooting and FAQs

Common Issues and Solutions

  1. Motor Not Spinning:

    • Check the power supply voltage and connections.
    • Ensure the motor driver is functioning and properly connected.
    • Verify that the PWM signal is being sent from the microcontroller.
  2. Motor Overheating:

    • Reduce the load on the motor.
    • Operate the motor within its recommended voltage range.
    • Allow the motor to cool down between extended uses.
  3. Inconsistent Speed:

    • Check for loose connections or damaged wires.
    • Ensure the power supply provides a stable voltage.
  4. Motor Driver Overheating:

    • Use a motor driver with a higher current rating.
    • Add a heat sink or cooling fan to the motor driver.

FAQs

Q: Can I connect the motor directly to an Arduino MEGA?
A: No, the motor's current requirements exceed the Arduino MEGA's output capabilities. Use a motor driver or H-bridge.

Q: How do I reverse the motor's direction?
A: Swap the polarity of the red and black wires or adjust the control signals on the motor driver.

Q: What is the difference between high torque and high speed modes?
A: High torque mode provides more force at a lower speed, while high speed mode offers faster rotation with less torque. Adjust the internal gear cartridge to switch modes.

Q: Can I use this motor with other microcontrollers?
A: Yes, the Motor VEX 2-Wire 393 is compatible with any microcontroller that can provide PWM signals and control a motor driver.

This documentation provides all the necessary details to effectively use the Motor VEX 2-Wire 393 in your projects.