How to Use USB Host Shield 2.0: Examples, Pinouts, and Specs
Introduction
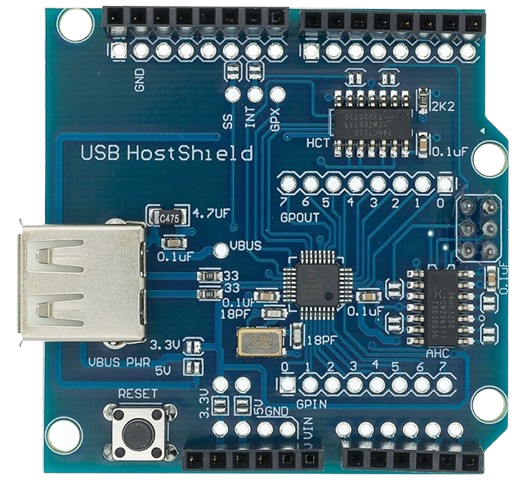
The USB Host Shield 2.0, manufactured by Arduino (Part ID: UNO), is a hardware module designed to enable microcontrollers to communicate with USB devices. This shield allows embedded systems to interface with peripherals such as keyboards, mice, game controllers, USB storage devices, and more. It is particularly useful in applications requiring USB connectivity, such as robotics, data logging, and human-machine interfaces.
Explore Projects Built with USB Host Shield 2.0


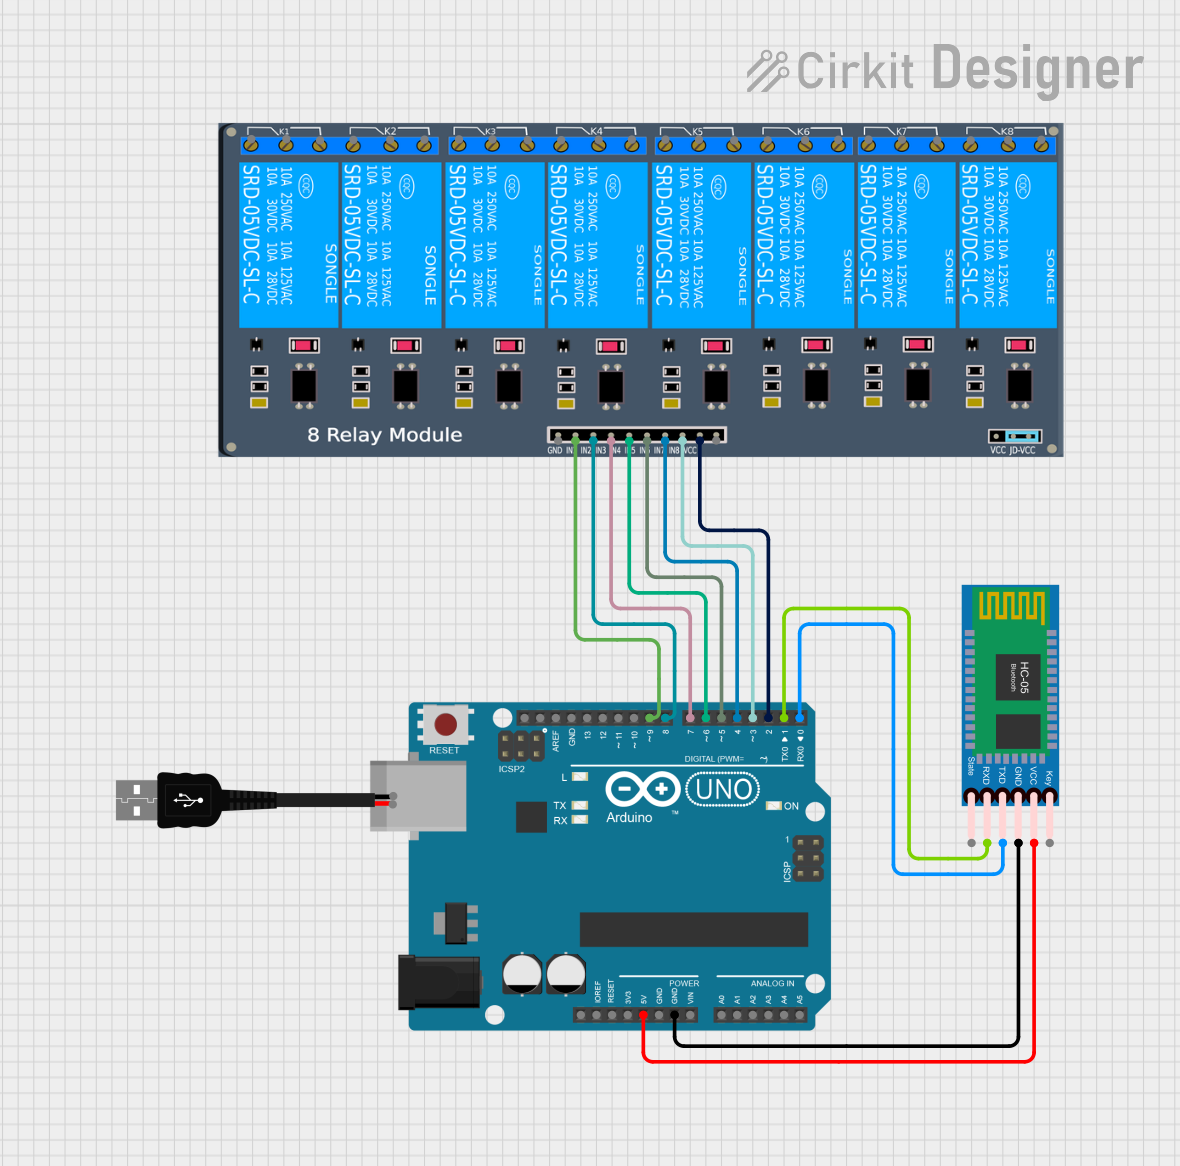
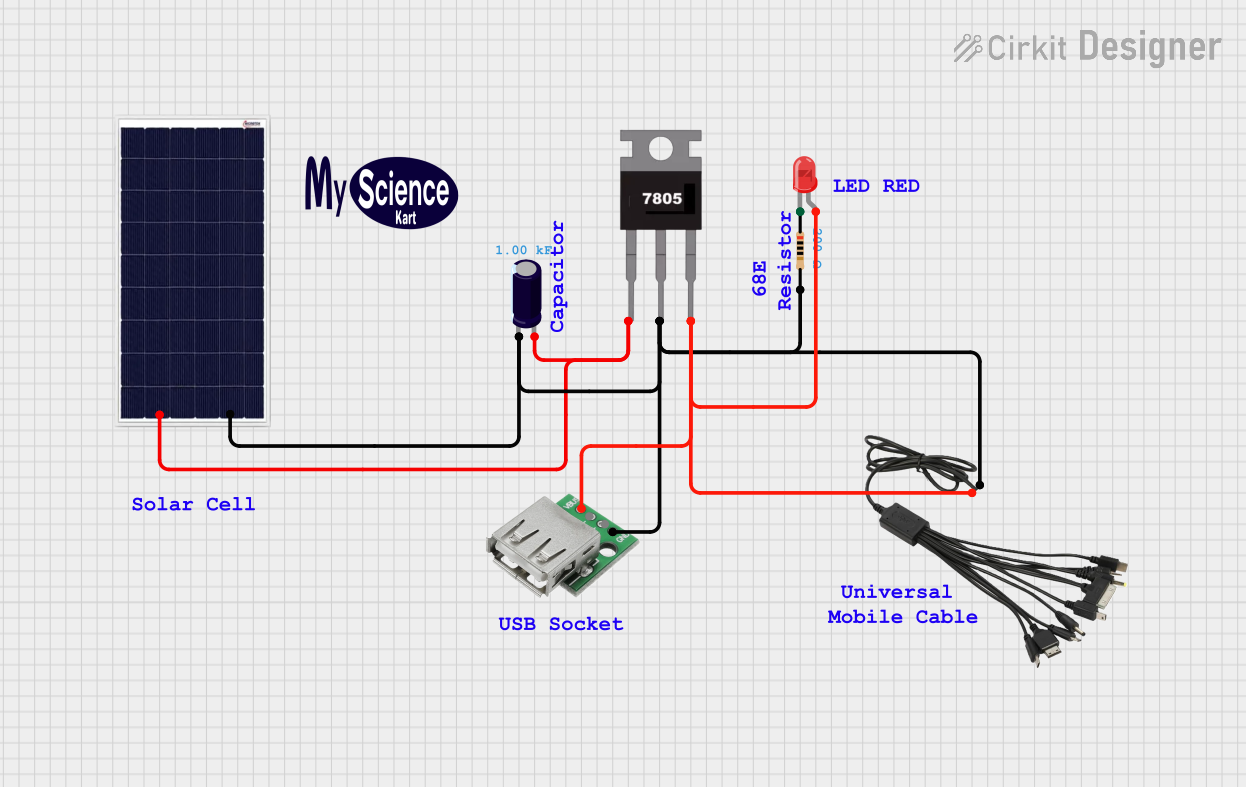
Explore Projects Built with USB Host Shield 2.0
Common Applications and Use Cases
- Connecting USB keyboards or mice to microcontroller-based systems.
- Reading and writing data to USB flash drives.
- Interfacing with USB game controllers for robotics or gaming projects.
- Enabling USB communication in custom embedded systems.
- Developing USB host applications for Arduino-based projects.
Technical Specifications
The USB Host Shield 2.0 is based on the MAX3421E USB peripheral/host controller IC. Below are the key technical details and pin configurations:
Key Technical Details
| Parameter | Specification |
|---|---|
| Operating Voltage | 5V (from Arduino UNO) |
| Communication Interface | SPI |
| USB Standard Supported | USB 2.0 Full-Speed (12 Mbps) |
| Current Consumption | ~100 mA (excluding connected devices) |
| Dimensions | 68.6 mm x 53.4 mm (fits Arduino UNO) |
| IC Used | MAX3421E |
| USB Connector Type | Standard Type-A Female |
Pin Configuration and Descriptions
The USB Host Shield 2.0 connects to the Arduino UNO via the SPI interface and uses the following pins:
| Pin on Shield | Arduino Pin | Description |
|---|---|---|
| D10 | D10 | SPI Chip Select (SS) |
| D11 | D11 | SPI Master Out Slave In (MOSI) |
| D12 | D12 | SPI Master In Slave Out (MISO) |
| D13 | D13 | SPI Clock (SCK) |
| D9 | D9 | Interrupt Pin (INT) |
| GND | GND | Ground |
| 5V | 5V | Power Supply |
Usage Instructions
How to Use the USB Host Shield 2.0 in a Circuit
Hardware Setup:
- Mount the USB Host Shield 2.0 onto the Arduino UNO by aligning the pins and headers.
- Connect the USB device (e.g., keyboard, mouse, or flash drive) to the Type-A USB port on the shield.
- Ensure the Arduino UNO is powered via USB or an external power source.
Install Required Libraries:
- Download and install the
USB_Host_Shield_2.0library from the Arduino Library Manager or GitHub. - Navigate to Sketch > Include Library > Manage Libraries, search for "USB Host Shield 2.0," and install it.
- Download and install the
Write and Upload Code:
- Use the example sketches provided in the library to test the shield. Below is a sample code snippet for detecting a USB device:
#include <Usb.h>
#include <usbhub.h>

// Create USB and USBHub objects
USB Usb;
USBHub Hub(&Usb);

void setup() {
  Serial.begin(9600); // Initialize serial communication
  if (Usb.Init() == -1) {
    Serial.println("USB Host Shield initialization failed!");
    while (1); // Halt execution if initialization fails
  }
  Serial.println("USB Host Shield initialized successfully.");
}

void loop() {
  Usb.Task(); // Poll the USB bus for connected devices
}
- Run the Program:
- Open the Serial Monitor in the Arduino IDE to view messages about the connected USB device.
Important Considerations and Best Practices
- Ensure the USB device does not exceed the shield's current supply limit (500 mA for most USB devices).
- Use a powered USB hub if connecting high-power devices.
- Avoid hot-plugging USB devices while the shield is in operation to prevent damage.
- Verify that the USB device is compatible with the USB Host Shield 2.0 library.
Troubleshooting and FAQs
Common Issues and Solutions
USB Host Shield Initialization Fails:
- Cause: Improper connection or insufficient power supply.
- Solution: Check the shield's connection to the Arduino UNO and ensure the power supply is adequate.
USB Device Not Detected:
- Cause: Incompatible USB device or missing library.
- Solution: Verify that the USB device is supported by the
USB_Host_Shield_2.0library. Ensure the library is correctly installed.
Serial Monitor Shows No Output:
- Cause: Incorrect baud rate or faulty code.
- Solution: Ensure the Serial Monitor is set to the correct baud rate (e.g., 9600). Double-check the code for errors.
Overcurrent Protection Triggered:
- Cause: USB device draws too much current.
- Solution: Use a powered USB hub or a lower-power device.
FAQs
Q1: Can I use the USB Host Shield 2.0 with boards other than Arduino UNO?
A1: Yes, the shield is compatible with other Arduino boards like Mega 2560 and Leonardo, but you may need to adjust the pin configurations.
Q2: Does the shield support USB 3.0 devices?
A2: The shield supports USB 2.0 devices. USB 3.0 devices may work if they are backward compatible with USB 2.0.
Q3: Can I connect multiple USB devices simultaneously?
A3: Yes, but you will need a powered USB hub to connect multiple devices.
Q4: Is it possible to use the shield for USB device mode (not host mode)?
A4: No, the USB Host Shield 2.0 is designed specifically for USB host mode operation.
By following this documentation, you can effectively integrate the USB Host Shield 2.0 into your projects and troubleshoot common issues.