How to Use car: Examples, Pinouts, and Specs
Introduction
- A car is a wheeled motor vehicle primarily used for transportation. It is designed to carry passengers and typically features four wheels. Cars are powered by either an internal combustion engine or an electric motor.
- Common applications include personal transportation, commercial use (e.g., taxis, delivery services), and specialized purposes such as emergency response vehicles or off-road vehicles.
Explore Projects Built with car
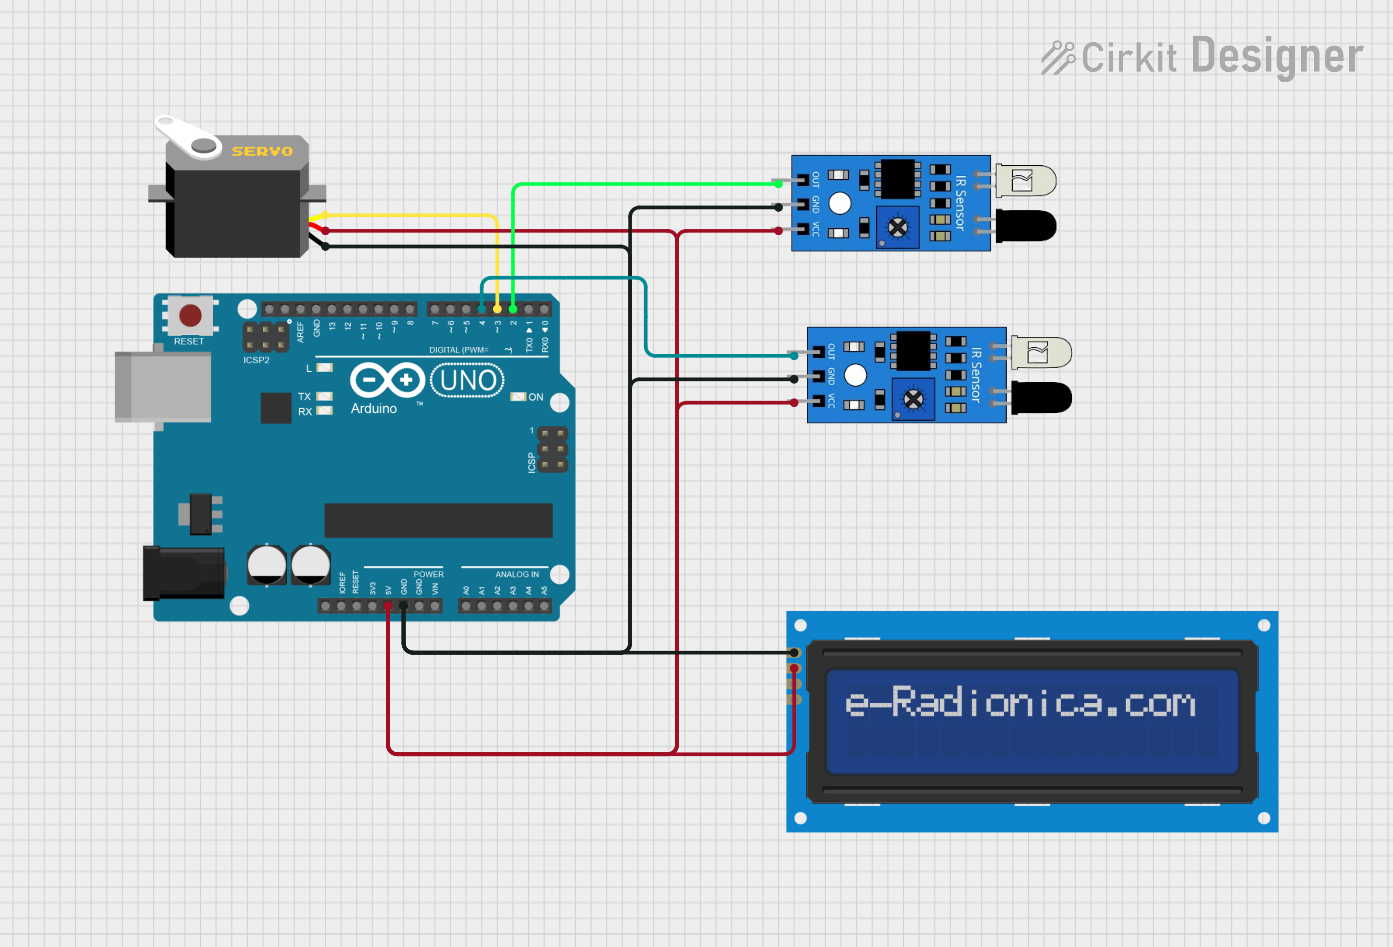
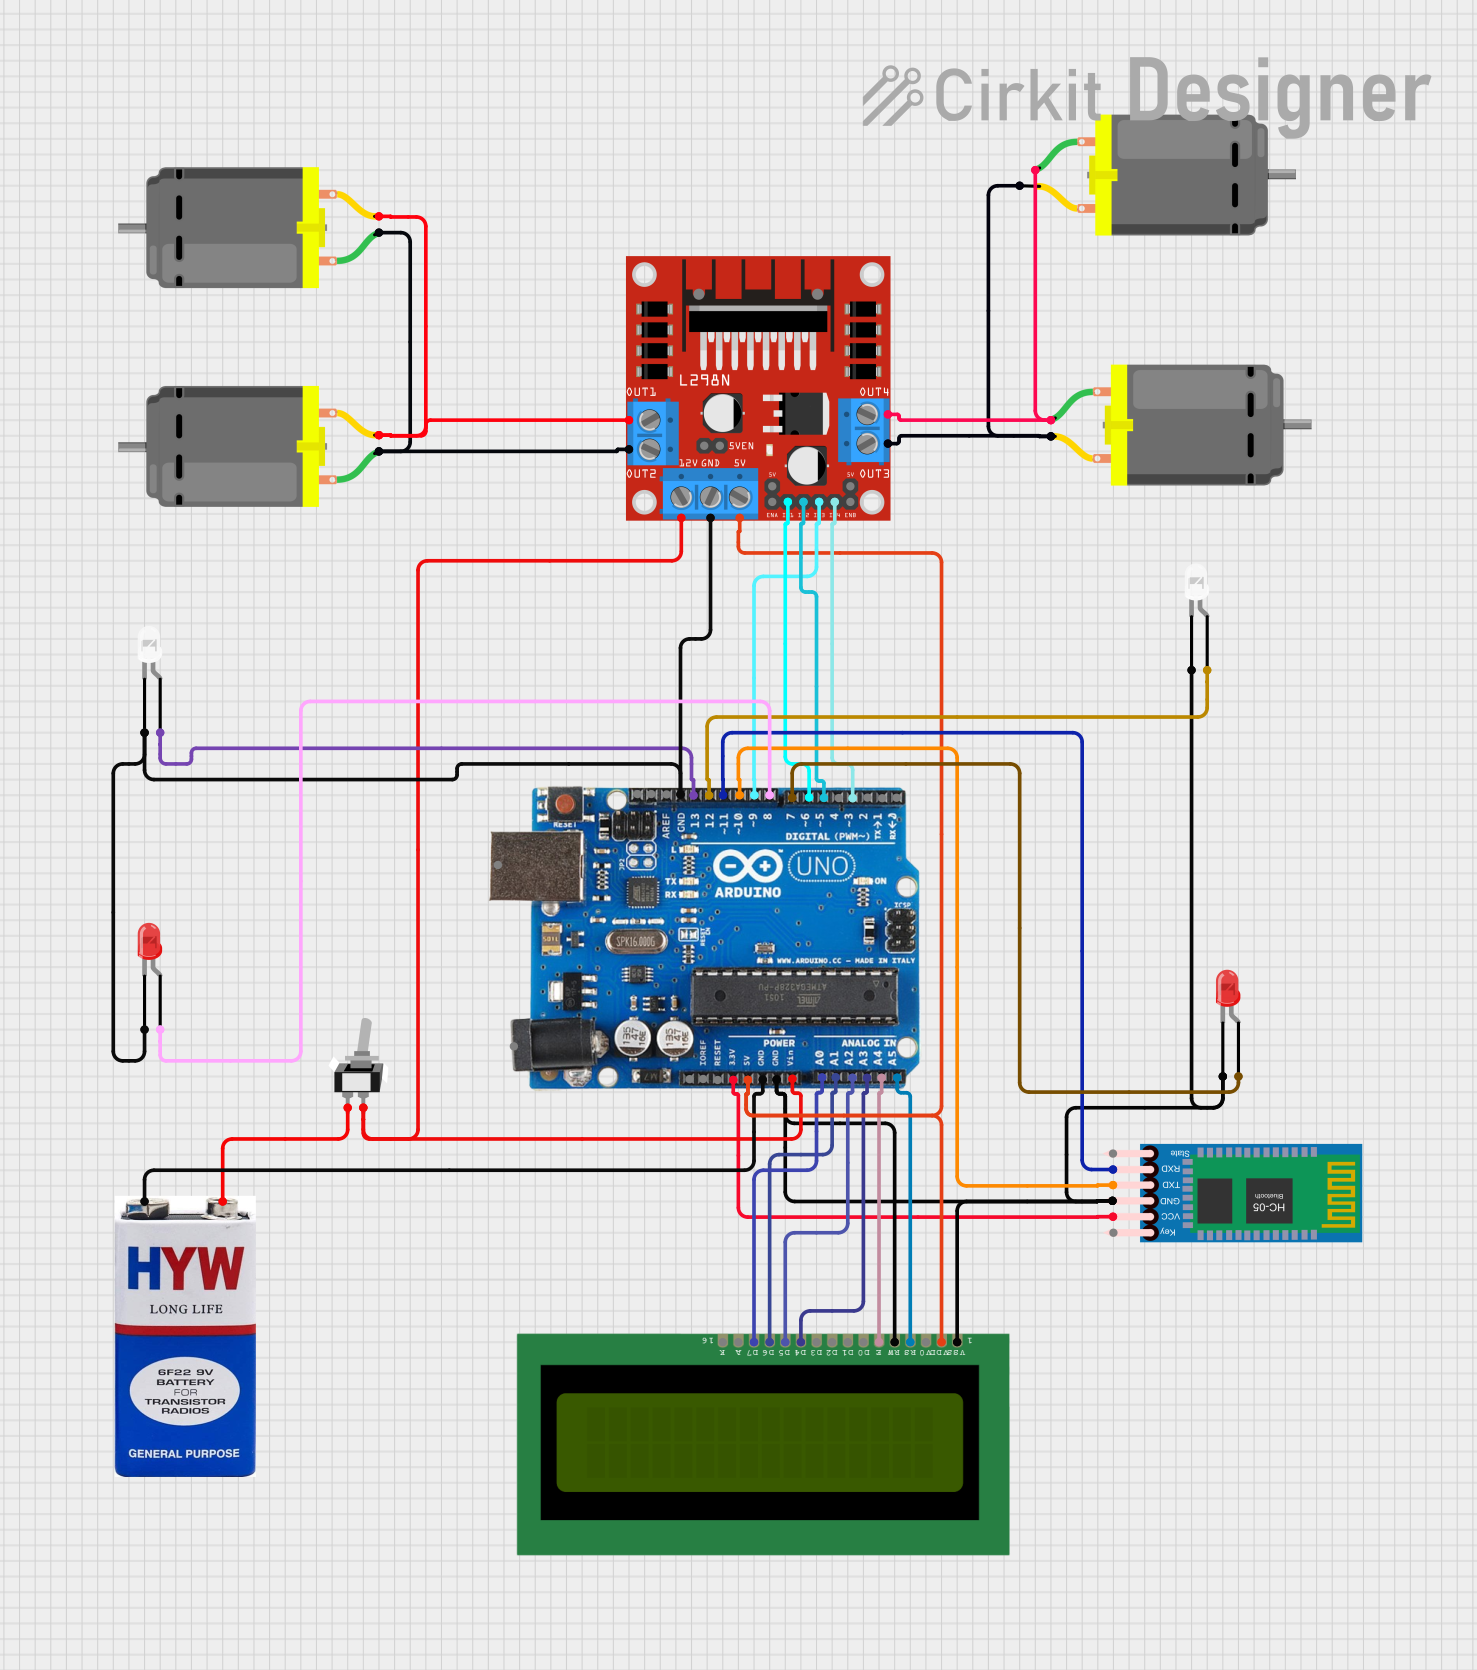
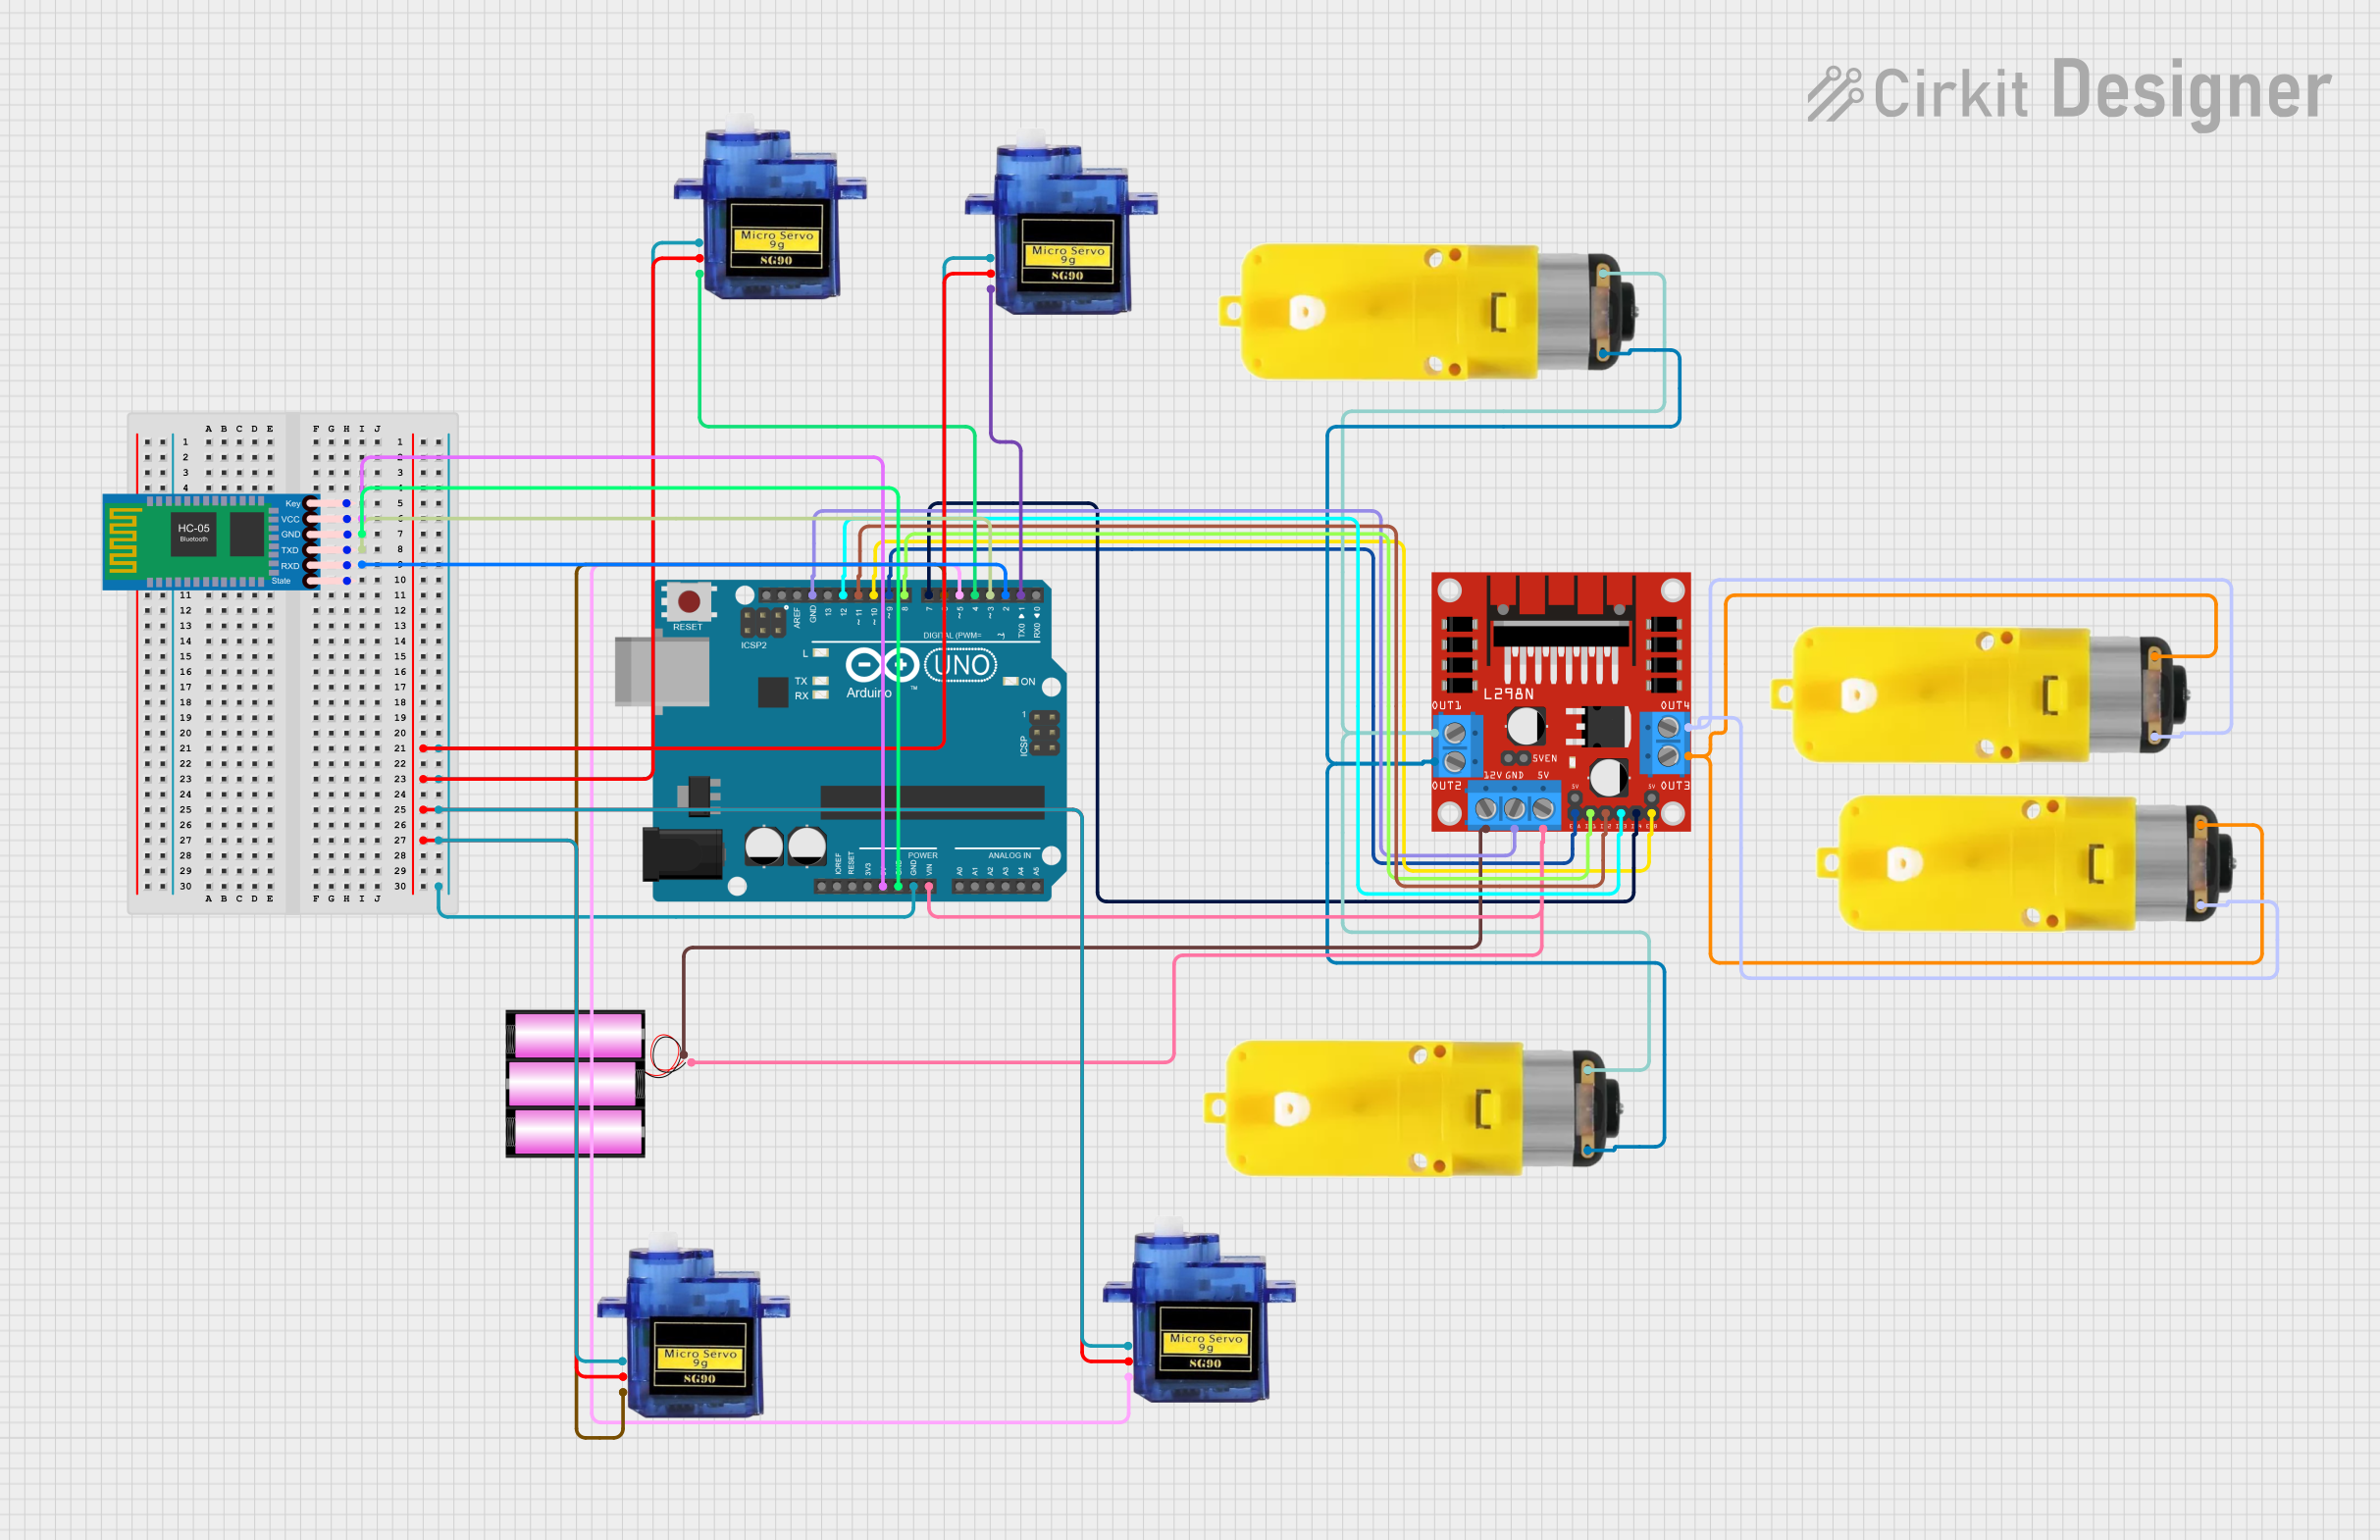
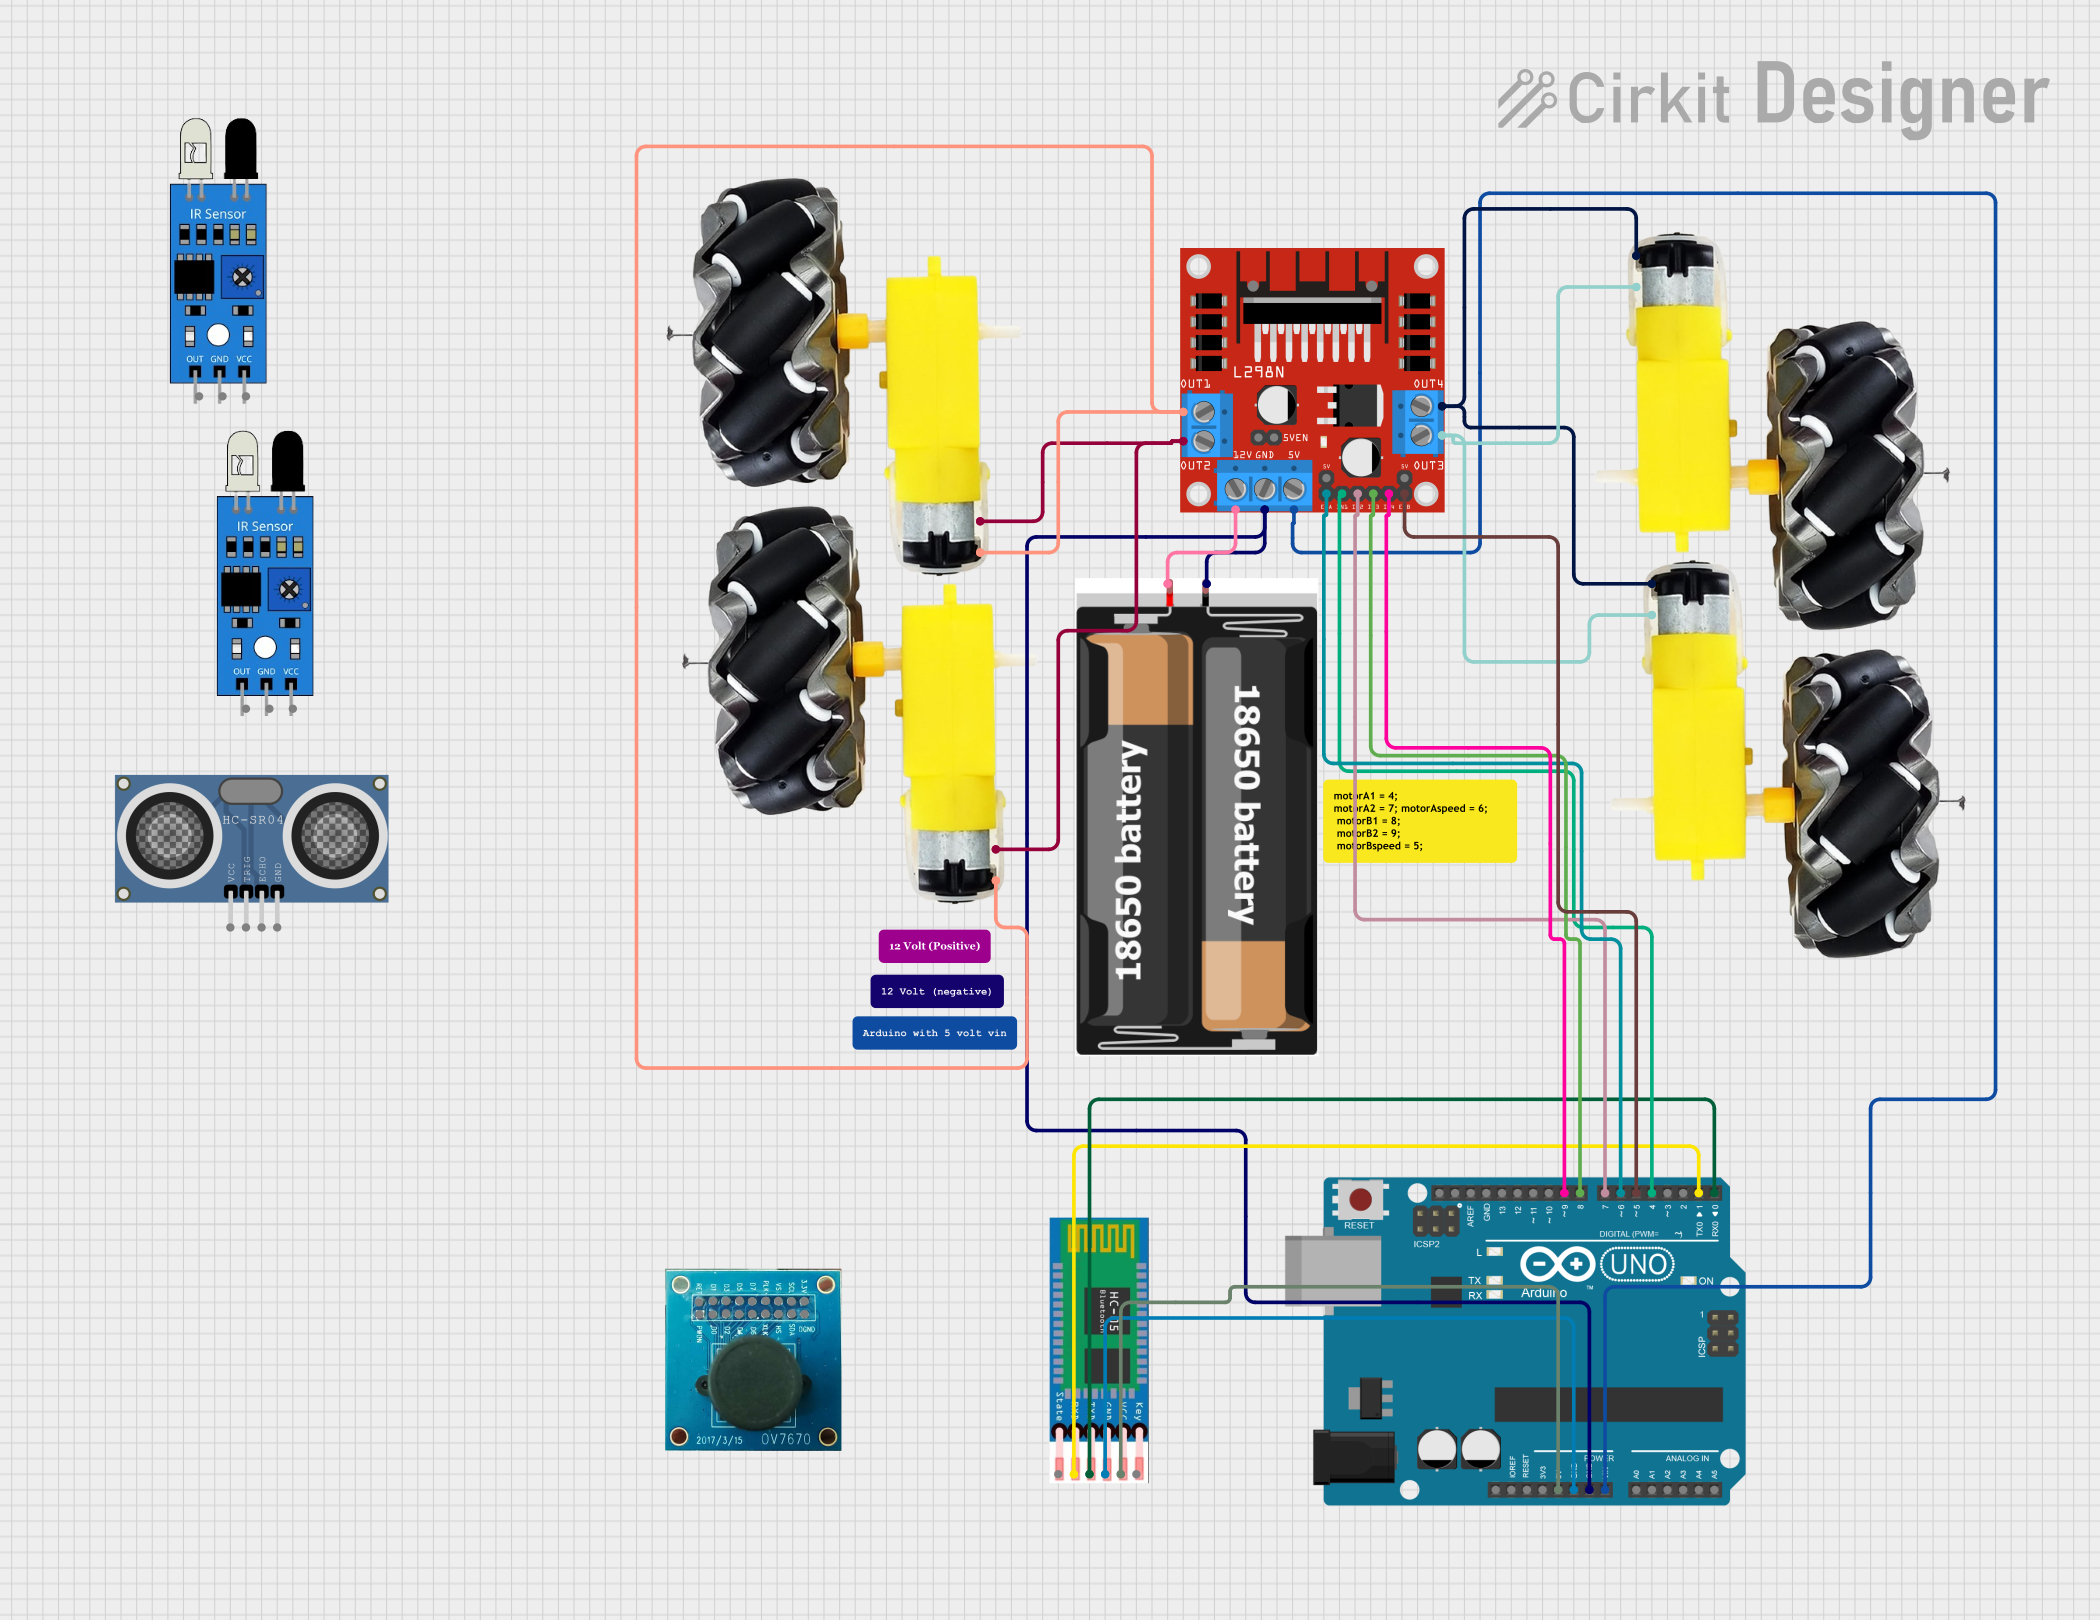
Explore Projects Built with car
Technical Specifications
- Below are the general technical specifications for a car. Note that these values may vary depending on the make and model.
| Specification | Description |
|---|---|
| Power Source | Internal Combustion Engine (Gasoline/Diesel) or Electric Motor |
| Number of Wheels | 4 |
| Passenger Capacity | Typically 4-5 (varies by model) |
| Fuel Efficiency | 15-30 miles per gallon (for combustion engines, varies by model) |
| Battery Capacity | 40-100 kWh (for electric vehicles, varies by model) |
| Maximum Speed | 100-200 mph (varies by model and type) |
| Transmission | Manual or Automatic |
| Dimensions | Length: 4-5 meters, Width: 1.8-2 meters, Height: 1.4-1.8 meters |
| Weight | 1,000-2,500 kg (varies by model) |
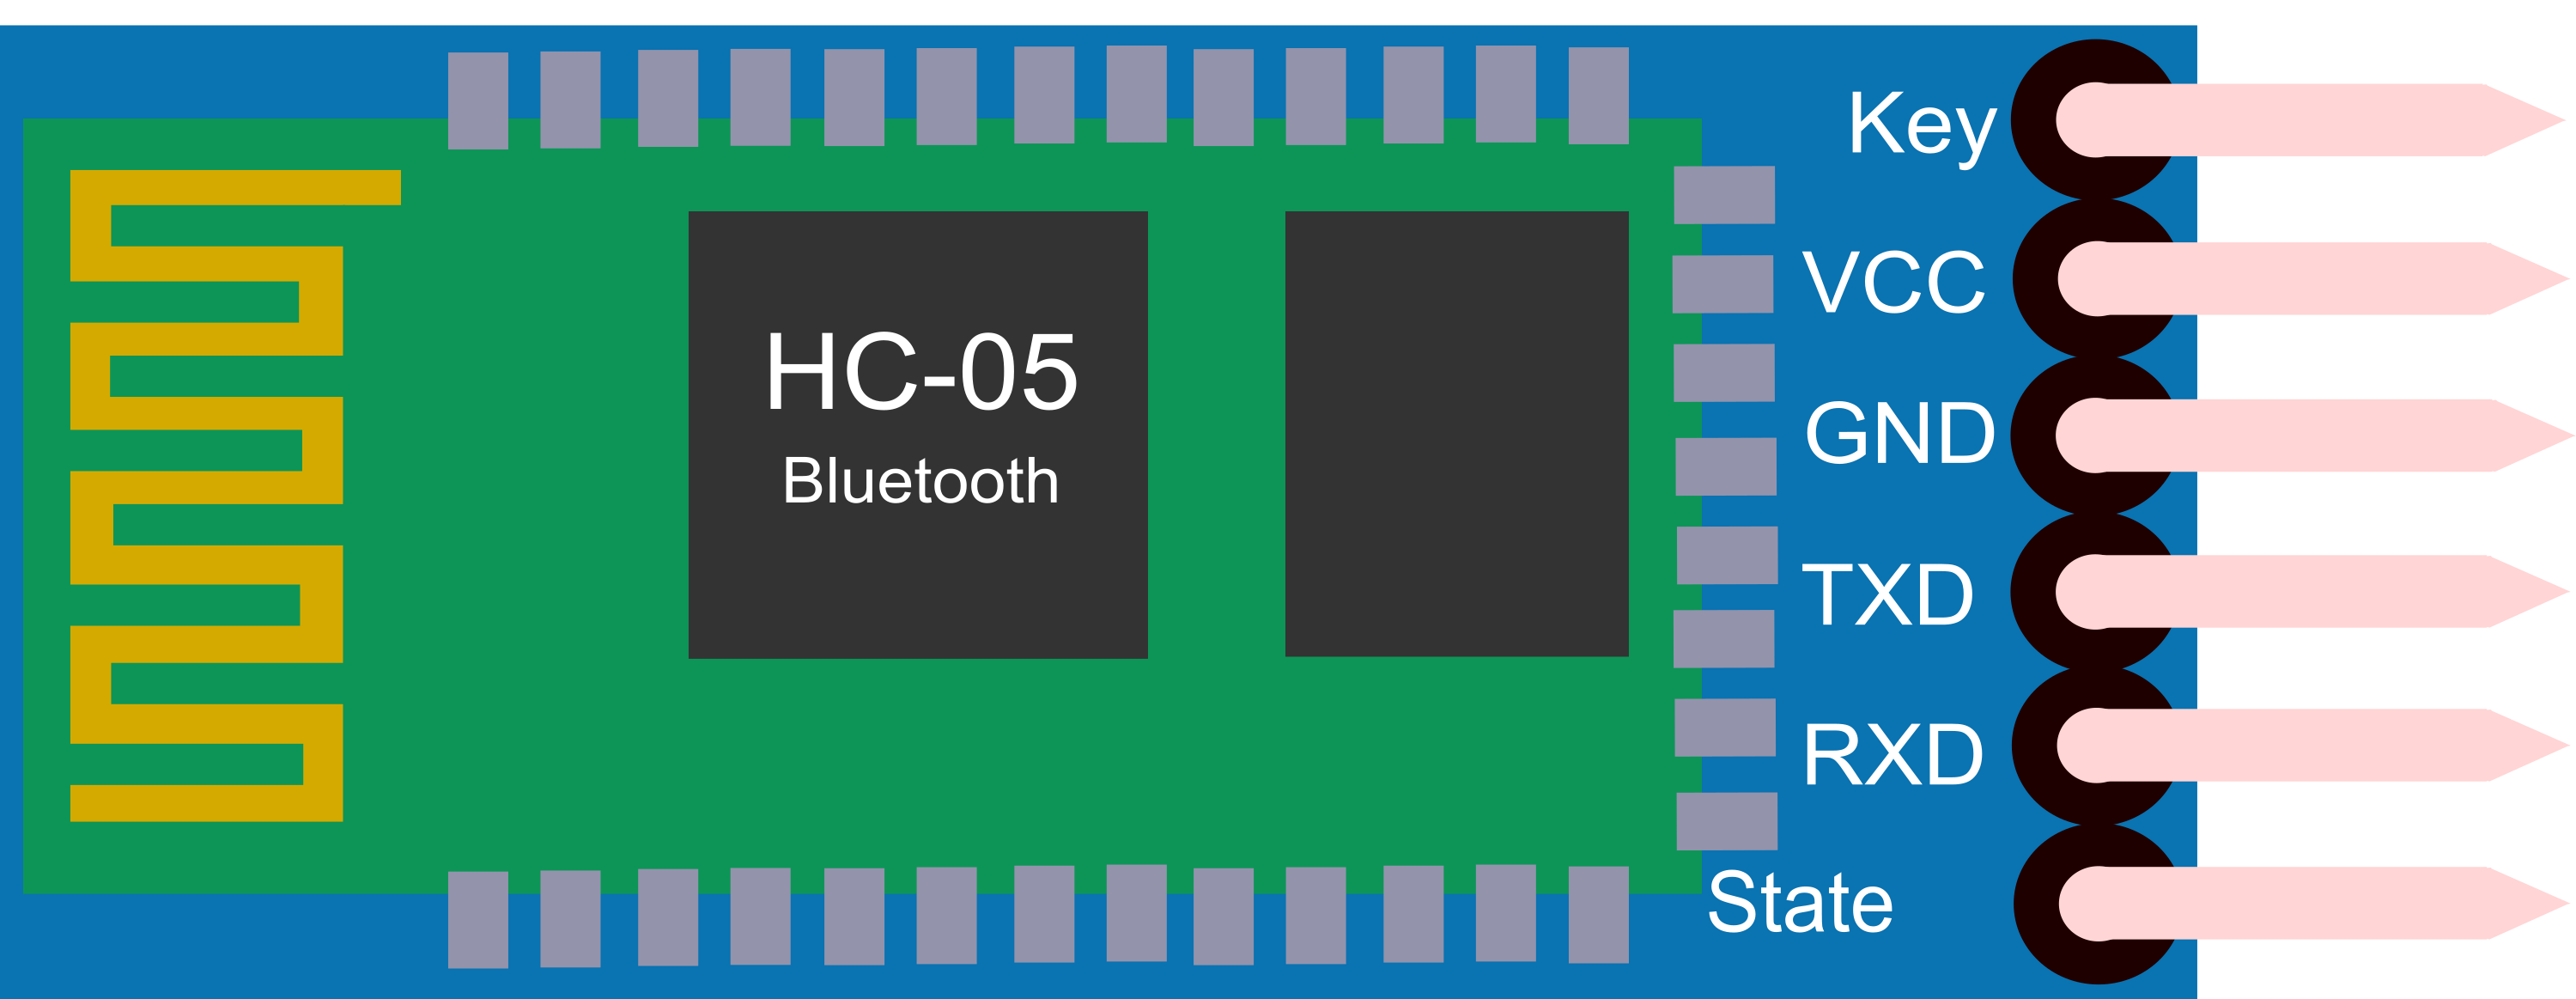
Pin Configuration and Descriptions
While cars do not have "pins" in the traditional sense, they do have electrical connectors and ports. Below is an example of a common 16-pin OBD-II (On-Board Diagnostics) connector used in modern cars for diagnostics and troubleshooting.
| Pin Number | Description |
|---|---|
| 1 | Manufacturer-specific |
| 2 | J1850 Bus+ |
| 3 | Manufacturer-specific |
| 4 | Chassis Ground |
| 5 | Signal Ground |
| 6 | CAN High (ISO 15765-4 and SAE J2284) |
| 7 | ISO 9141-2 K-Line |
| 8 | Manufacturer-specific |
| 9 | Manufacturer-specific |
| 10 | J1850 Bus- |
| 11 | Manufacturer-specific |
| 12 | Manufacturer-specific |
| 13 | Manufacturer-specific |
| 14 | CAN Low (ISO 15765-4 and SAE J2284) |
| 15 | ISO 9141-2 L-Line |
| 16 | Battery Power |
Usage Instructions
How to Use a Car:
- Ensure the car is in good working condition by checking fuel levels, battery charge (for electric vehicles), tire pressure, and fluid levels (e.g., oil, coolant).
- Insert the key into the ignition or press the start button (for keyless systems).
- Use the gear selector to choose the desired mode (e.g., Drive, Reverse, or Park).
- Gradually press the accelerator pedal to move the car and use the brake pedal to slow down or stop.
- Use the steering wheel to navigate and turn the car.
Important Considerations and Best Practices:
- Regularly maintain the car by following the manufacturer's recommended service schedule.
- Always wear a seatbelt and ensure all passengers do the same.
- Follow traffic laws and drive responsibly.
- For electric vehicles, ensure the battery is charged before long trips and plan charging stops if necessary.
- Use the OBD-II port for diagnostics if the "Check Engine" light or other warning indicators appear.
Example Code for Arduino UNO (Interfacing with OBD-II): Below is an example of how to read data from a car's OBD-II port using an Arduino UNO and an OBD-II adapter.
#include <OBD2.h> // Include the OBD-II library

OBD2 obd; // Create an instance of the OBD2 class

void setup() {
  Serial.begin(9600); // Initialize serial communication at 9600 baud
  if (obd.begin()) {
    Serial.println("OBD-II adapter connected successfully!");
  } else {
    Serial.println("Failed to connect to OBD-II adapter.");
  }
}

void loop() {
  int rpm = obd.readPID(PID_ENGINE_RPM); // Read the engine RPM
  if (rpm >= 0) {
    Serial.print("Engine RPM: ");
    Serial.println(rpm);
  } else {
    Serial.println("Failed to read engine RPM.");
  }
  delay(1000); // Wait for 1 second before reading again
}
Note: Ensure you have the appropriate OBD-II adapter and library installed to use this code. The adapter should be connected to the car's OBD-II port and the Arduino UNO.
Troubleshooting and FAQs
Common Issues:
- Car Won't Start:
- Check the battery charge and connections.
- Ensure there is enough fuel in the tank (for combustion engines).
- Verify that the key or key fob is functioning properly.
- Warning Lights on Dashboard:
- Use an OBD-II scanner to read diagnostic trouble codes (DTCs).
- Address the issue based on the code (e.g., low oil pressure, faulty sensor).
- Poor Fuel Efficiency:
- Check tire pressure and inflate to the recommended level.
- Replace dirty air filters and ensure proper engine tuning.
- Unusual Noises:
- Inspect the car for loose components or worn-out parts.
- Consult a mechanic if the issue persists.
- Car Won't Start:
FAQs:
- How often should I service my car?
- Follow the manufacturer's recommended service intervals, typically every 5,000-10,000 miles.
- Can I use an Arduino to control car functions?
- Yes, but it is recommended only for non-critical systems (e.g., lighting, infotainment). Avoid modifying safety-critical systems like brakes or airbags.
- What is the purpose of the OBD-II port?
- The OBD-II port allows for diagnostics and monitoring of the car's systems. It is commonly used by mechanics and DIY enthusiasts to troubleshoot issues.
- How often should I service my car?
By following this documentation, users can better understand and utilize their car for safe and efficient transportation.