How to Use Spring Lever Terminal Block: Examples, Pinouts, and Specs
Introduction
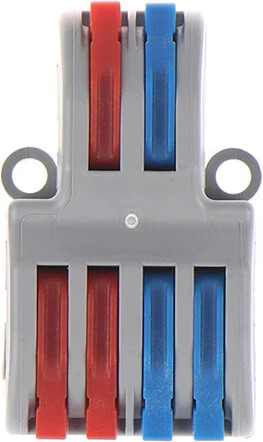
The Spring Lever Terminal Block is a type of electrical connector designed for quick, secure, and tool-free wire connections. It uses a spring-loaded mechanism to hold wires firmly in place, eliminating the need for screws or soldering. This component is widely used in electrical and electronic applications where reliable and reusable connections are required.
Explore Projects Built with Spring Lever Terminal Block


Explore Projects Built with Spring Lever Terminal Block
Common Applications and Use Cases
- Industrial Automation: Connecting sensors, actuators, and control systems.
- Home Wiring: Quick connections for lighting, switches, and outlets.
- Prototyping: Temporary connections in test circuits and breadboards.
- Renewable Energy Systems: Wiring solar panels and battery systems.
- DIY Electronics: Simplifying connections in hobbyist projects.
Technical Specifications
The Spring Lever Terminal Block is available in various configurations. Below are the general specifications for a typical model:
Key Technical Details
| Parameter | Value |
|---|---|
| Voltage Rating | Up to 450V AC |
| Current Rating | 32A (varies by model) |
| Wire Size Compatibility | 28 AWG to 12 AWG |
| Operating Temperature | -40°C to +105°C |
| Housing Material | Flame-retardant polycarbonate (PC) |
| Contact Material | Copper alloy with tin plating |
| Number of Terminals | 2 to 8 (depending on model) |
Pin Configuration and Descriptions
The Spring Lever Terminal Block does not have traditional pins but instead features wire slots and levers. Below is a description of its components:
| Component | Description |
|---|---|
| Wire Slot | Insert the stripped wire into this opening. |
| Spring Lever | Lift this lever to open the spring mechanism for wire insertion or removal. |
| Contact Terminal | Internal conductive element that ensures a secure electrical connection. |
| Mounting Hole (optional) | Used to secure the terminal block to a surface or enclosure. |
Usage Instructions
How to Use the Spring Lever Terminal Block in a Circuit
Prepare the Wires:
- Strip approximately 8-10mm of insulation from the end of each wire.
- Ensure the stripped wire is clean and free of frayed strands.
Open the Lever:
- Lift the spring lever to open the wire slot. This disengages the spring mechanism.
Insert the Wire:
- Insert the stripped end of the wire into the wire slot. Ensure the wire is fully seated.
Close the Lever:
- Push the lever back down to lock the wire in place. The spring mechanism will secure the wire.
Verify the Connection:
- Gently tug on the wire to ensure it is firmly held in place.
Connect to the Circuit:
- Repeat the process for all wires and connect the terminal block to the desired circuit.
Important Considerations and Best Practices
- Wire Compatibility: Ensure the wire gauge is within the supported range (28 AWG to 12 AWG).
- Avoid Overloading: Do not exceed the voltage or current ratings of the terminal block.
- Secure Mounting: If the terminal block has mounting holes, secure it to prevent movement.
- Environmental Conditions: Use terminal blocks rated for outdoor or high-temperature environments if needed.
- Reusability: The spring mechanism allows for repeated connections and disconnections without degradation.
Example: Connecting to an Arduino UNO
The Spring Lever Terminal Block can be used to connect external components, such as sensors or LEDs, to an Arduino UNO. Below is an example of wiring an LED to an Arduino using the terminal block:
Circuit Diagram
- Connect the positive leg of the LED to a terminal block slot.
- Connect the other side of the terminal block to Arduino pin 13.
- Connect the negative leg of the LED to another terminal block slot, and then to the Arduino GND.
Arduino Code
// Simple LED Blink Example
// This code blinks an LED connected to pin 13 of the Arduino UNO.

void setup() {
  pinMode(13, OUTPUT); // Set pin 13 as an output
}

void loop() {
  digitalWrite(13, HIGH); // Turn the LED on
  delay(1000);            // Wait for 1 second
  digitalWrite(13, LOW);  // Turn the LED off
  delay(1000);            // Wait for 1 second
}
Troubleshooting and FAQs
Common Issues and Solutions
| Issue | Solution |
|---|---|
| Wire slips out of the terminal block | Ensure the lever is fully closed and the wire is properly stripped and seated. |
| Poor electrical connection | Check for corrosion or dirt on the wire and ensure the wire gauge is correct. |
| Overheating of the terminal block | Verify that the current does not exceed the rated capacity of the terminal block. |
| Lever is difficult to operate | Ensure there is no debris in the mechanism and avoid excessive force. |
FAQs
Can I use stranded wires with the Spring Lever Terminal Block?
- Yes, stranded wires are compatible. Ensure the strands are twisted tightly before insertion.
How many times can I reuse the terminal block?
- The spring mechanism is designed for repeated use and can typically handle hundreds of cycles without degradation.
Is the terminal block suitable for outdoor use?
- Some models are rated for outdoor use. Check the IP rating and material specifications for your specific model.
Can I connect wires of different gauges in the same terminal block?
- Yes, as long as the wire gauges are within the supported range and fit securely in the slots.
By following this documentation, you can effectively use the Spring Lever Terminal Block in a variety of applications, ensuring reliable and efficient connections.