Cirkit Designer Logo
Cirkit Designer
Your all-in-one circuit design IDE
Home / 
Component Documentation

How to Use Esp32 C6: Examples, Pinouts, and Specs

Image of Esp32 C6
Cirkit Designer LogoDesign with Esp32 C6 in Cirkit Designer

Introduction

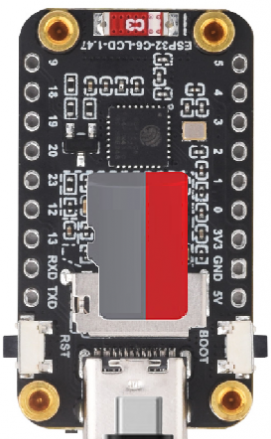
The ESP32-C6 by Waveshare (Manufacturer Part ID: ESP32) is a low-power, high-performance system-on-chip (SoC) designed for Internet of Things (IoT) applications. It integrates Wi-Fi 6, Bluetooth 5.0, and IEEE 802.15.4 (Thread/Zigbee) capabilities, making it a versatile choice for wireless communication. With its dual-core processor, multiple GPIO pins, and support for various communication protocols, the ESP32-C6 is ideal for smart home devices, industrial automation, wearable electronics, and other embedded systems.

Explore Projects Built with Esp32 C6

Use Cirkit Designer to design, explore, and prototype these projects online. Some projects support real-time simulation. Click "Open Project" to start designing instantly!
ESP32-C6 and ST7735S Display: Wi-Fi Controlled TFT Display Module
Image of ESP32-C6sm-ST7735: A project utilizing Esp32 C6 in a practical application
This circuit features an ESP32-C6 microcontroller interfaced with a China ST7735S 160x128 TFT display. The ESP32-C6 controls the display via SPI communication, providing power, ground, and control signals to render graphics and text on the screen.
Cirkit Designer LogoOpen Project in Cirkit Designer
ESP32C3 and LoRa-Enabled Environmental Sensing Node
Image of temperature_KA: A project utilizing Esp32 C6 in a practical application
This circuit features an ESP32C3 Supermini microcontroller connected to a LORA_RA02 module and a DHT11 temperature and humidity sensor. The ESP32C3 handles communication with the LORA module via SPI (using GPIO05, GPIO06, GPIO10, and GPIO04 for MISO, MOSI, NSS, and SCK respectively) and GPIO01 and GPIO02 for additional control signals. The DHT11 sensor is interfaced through GPIO03 for data reading, and all components share a common power supply through the 3.3V and GND pins.
Cirkit Designer LogoOpen Project in Cirkit Designer
ESP32-C6 Zero Controlled Servo with AMS1117 Power Regulation
Image of esp32: A project utilizing Esp32 C6 in a practical application
This circuit features an ESP32-C6 Zero microcontroller that controls a servo motor via one of its GPIO pins (pin 22). The microcontroller is powered by a 3.3V regulator (ams1117 3.3), which in turn is supplied by a 2x 18650 battery pack. Electrolytic capacitors are used for voltage smoothing on both the input and output of the voltage regulator, ensuring stable operation of the microcontroller and servo.
Cirkit Designer LogoOpen Project in Cirkit Designer
ESP32-Based Air Quality Monitor with OLED Display and DHT11 Sensor
Image of RTS: A project utilizing Esp32 C6 in a practical application
This circuit features an ESP32 microcontroller connected to a DHT11 temperature and humidity sensor, an MQ6 gas sensor, and a 1.3" OLED display. The ESP32 reads analog data from the MQ6 sensor via its VP pin, digital data from the DHT11 sensor via its D4 pin, and communicates with the OLED display using I2C protocol through pins D21 (SCL) and D22 (SDA). All components share a common ground (GND) and are powered by the ESP32's VIN pin, indicating a shared power supply.
Cirkit Designer LogoOpen Project in Cirkit Designer

Explore Projects Built with Esp32 C6

Use Cirkit Designer to design, explore, and prototype these projects online. Some projects support real-time simulation. Click "Open Project" to start designing instantly!
Image of ESP32-C6sm-ST7735: A project utilizing Esp32 C6 in a practical application
ESP32-C6 and ST7735S Display: Wi-Fi Controlled TFT Display Module
This circuit features an ESP32-C6 microcontroller interfaced with a China ST7735S 160x128 TFT display. The ESP32-C6 controls the display via SPI communication, providing power, ground, and control signals to render graphics and text on the screen.
Cirkit Designer LogoOpen Project in Cirkit Designer
Image of temperature_KA: A project utilizing Esp32 C6 in a practical application
ESP32C3 and LoRa-Enabled Environmental Sensing Node
This circuit features an ESP32C3 Supermini microcontroller connected to a LORA_RA02 module and a DHT11 temperature and humidity sensor. The ESP32C3 handles communication with the LORA module via SPI (using GPIO05, GPIO06, GPIO10, and GPIO04 for MISO, MOSI, NSS, and SCK respectively) and GPIO01 and GPIO02 for additional control signals. The DHT11 sensor is interfaced through GPIO03 for data reading, and all components share a common power supply through the 3.3V and GND pins.
Cirkit Designer LogoOpen Project in Cirkit Designer
Image of esp32: A project utilizing Esp32 C6 in a practical application
ESP32-C6 Zero Controlled Servo with AMS1117 Power Regulation
This circuit features an ESP32-C6 Zero microcontroller that controls a servo motor via one of its GPIO pins (pin 22). The microcontroller is powered by a 3.3V regulator (ams1117 3.3), which in turn is supplied by a 2x 18650 battery pack. Electrolytic capacitors are used for voltage smoothing on both the input and output of the voltage regulator, ensuring stable operation of the microcontroller and servo.
Cirkit Designer LogoOpen Project in Cirkit Designer
Image of RTS: A project utilizing Esp32 C6 in a practical application
ESP32-Based Air Quality Monitor with OLED Display and DHT11 Sensor
This circuit features an ESP32 microcontroller connected to a DHT11 temperature and humidity sensor, an MQ6 gas sensor, and a 1.3" OLED display. The ESP32 reads analog data from the MQ6 sensor via its VP pin, digital data from the DHT11 sensor via its D4 pin, and communicates with the OLED display using I2C protocol through pins D21 (SCL) and D22 (SDA). All components share a common ground (GND) and are powered by the ESP32's VIN pin, indicating a shared power supply.
Cirkit Designer LogoOpen Project in Cirkit Designer

Common Applications:

  • Smart home devices (e.g., smart lights, thermostats)
  • Industrial IoT (e.g., sensors, actuators)
  • Wearable electronics
  • Wireless communication hubs
  • Robotics and automation systems

Technical Specifications

Key Technical Details:

Parameter Specification
Processor Dual-core RISC-V at up to 160 MHz
Wireless Connectivity Wi-Fi 6, Bluetooth 5.0, IEEE 802.15.4
Flash Memory Up to 4 MB
SRAM 512 KB
GPIO Pins 22
Operating Voltage 3.0V to 3.6V
Power Consumption Ultra-low power in deep sleep mode
Communication Interfaces UART, SPI, I2C, I2S, PWM, ADC, DAC
Operating Temperature Range -40°C to +85°C

Pin Configuration and Descriptions:

The ESP32-C6 has 22 GPIO pins, each capable of multiple functions. Below is a summary of the pin configuration:

Pin Number Pin Name Functionality
1 GND Ground
2 3V3 3.3V Power Supply
3 EN Enable Pin (Active High)
4 GPIO0 General Purpose I/O, Boot Mode Select
5 GPIO1 UART TX, General Purpose I/O
6 GPIO2 UART RX, General Purpose I/O
7 GPIO3 I2C SDA, General Purpose I/O
8 GPIO4 I2C SCL, General Purpose I/O
9 GPIO5 SPI CLK, General Purpose I/O
10 GPIO6 SPI MISO, General Purpose I/O
11 GPIO7 SPI MOSI, General Purpose I/O
12 GPIO8 PWM Output, General Purpose I/O
13 GPIO9 ADC Input, General Purpose I/O
14 GPIO10 DAC Output, General Purpose I/O
15-22 GPIO11-18 General Purpose I/O

Usage Instructions

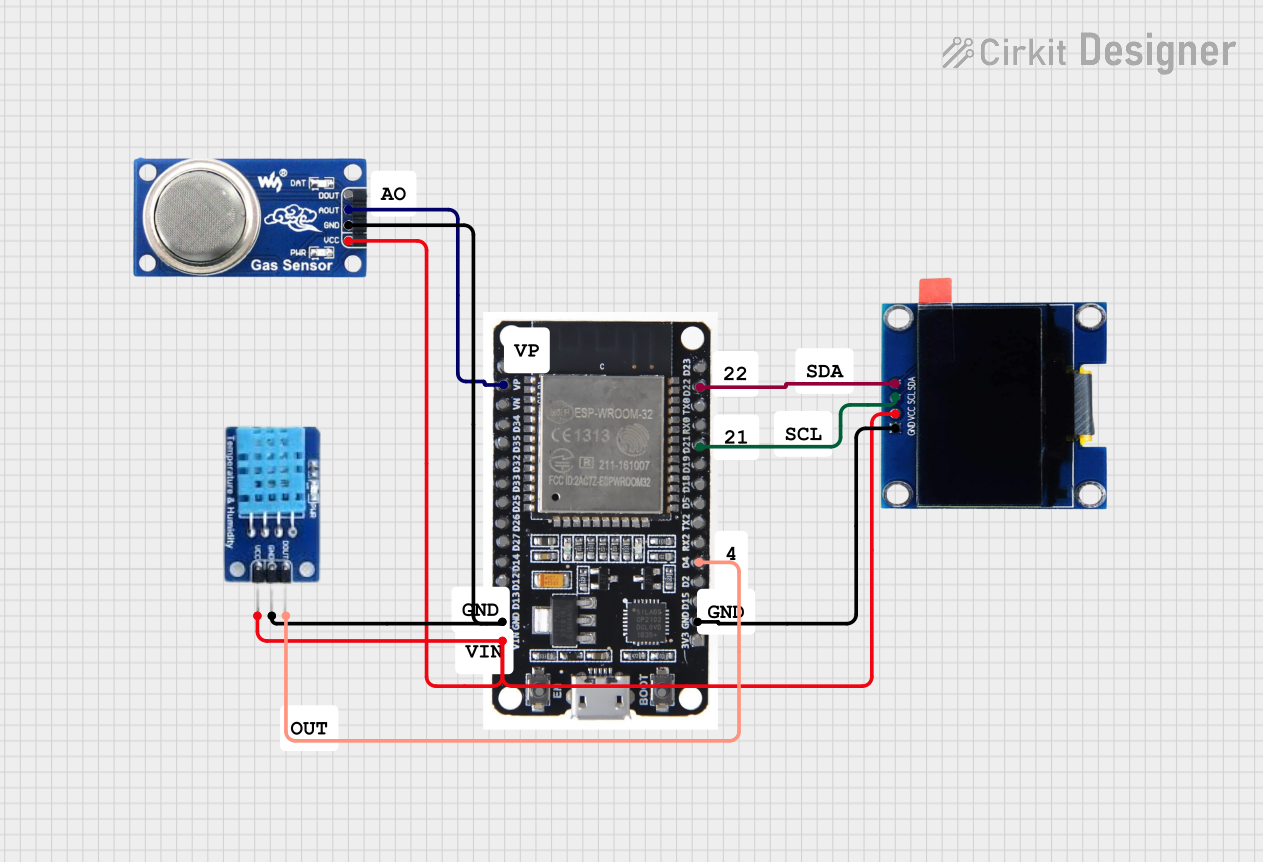
How to Use the ESP32-C6 in a Circuit:

  1. Power Supply: Connect the 3V3 pin to a 3.3V power source and GND to ground.
  2. Boot Mode: To upload code, connect GPIO0 to GND during reset. Disconnect after programming.
  3. Communication: Use UART, SPI, or I2C for interfacing with other devices.
  4. GPIO Configuration: Configure GPIO pins in your code for input, output, or alternate functions.

Important Considerations:

  • Voltage Levels: Ensure all connected devices operate at 3.3V logic levels to avoid damage.
  • Power Consumption: Use deep sleep mode for battery-powered applications to minimize power usage.
  • Antenna Placement: For optimal wireless performance, ensure the onboard antenna is not obstructed by metal or other RF-blocking materials.

Example Code for Arduino UNO:

The ESP32-C6 can be programmed using the Arduino IDE. Below is an example of how to blink an LED connected to GPIO2:

// Include the necessary library for ESP32
#include <Arduino.h>

// Define the GPIO pin for the LED
#define LED_PIN 2

void setup() {
  // Set the LED pin as an output
  pinMode(LED_PIN, OUTPUT);
}

void loop() {
  // Turn the LED on
  digitalWrite(LED_PIN, HIGH);
  delay(1000); // Wait for 1 second

  // Turn the LED off
  digitalWrite(LED_PIN, LOW);
  delay(1000); // Wait for 1 second
}

Troubleshooting and FAQs

Common Issues:

  1. ESP32-C6 Not Responding:

    • Cause: Incorrect power supply or wiring.
    • Solution: Verify the 3.3V power supply and ensure all connections are secure.
  2. Code Upload Fails:

    • Cause: GPIO0 not grounded during boot mode.
    • Solution: Ensure GPIO0 is connected to GND during reset for programming.
  3. Wi-Fi or Bluetooth Not Working:

    • Cause: Poor antenna placement or interference.
    • Solution: Ensure the antenna is unobstructed and away from RF-blocking materials.
  4. High Power Consumption:

    • Cause: Device not in deep sleep mode.
    • Solution: Implement deep sleep mode in your code for low-power applications.

FAQs:

  • Q: Can the ESP32-C6 operate at 5V?
    A: No, the ESP32-C6 operates at 3.3V. Using 5V can damage the chip.

  • Q: How do I reset the ESP32-C6?
    A: Press the EN (Enable) pin or use a software reset command in your code.

  • Q: Can I use the ESP32-C6 for Zigbee communication?
    A: Yes, the ESP32-C6 supports IEEE 802.15.4, which is compatible with Zigbee.

  • Q: What is the maximum range of Wi-Fi?
    A: The range depends on the environment but typically extends up to 100 meters in open space.


This documentation provides a comprehensive guide to the ESP32-C6, ensuring users can effectively integrate it into their projects.